
Quickstart
This guide will give you a simple overview of what you can do in workflow.
To go into deeper detail, please look into the further linked pages along the quickstart.
Creating a first workflow
This application is called workflow for a reason 😉. The first page you will see is the overview of your current running workflows, and it is empty. Let's change that. Create a new project from scratch:
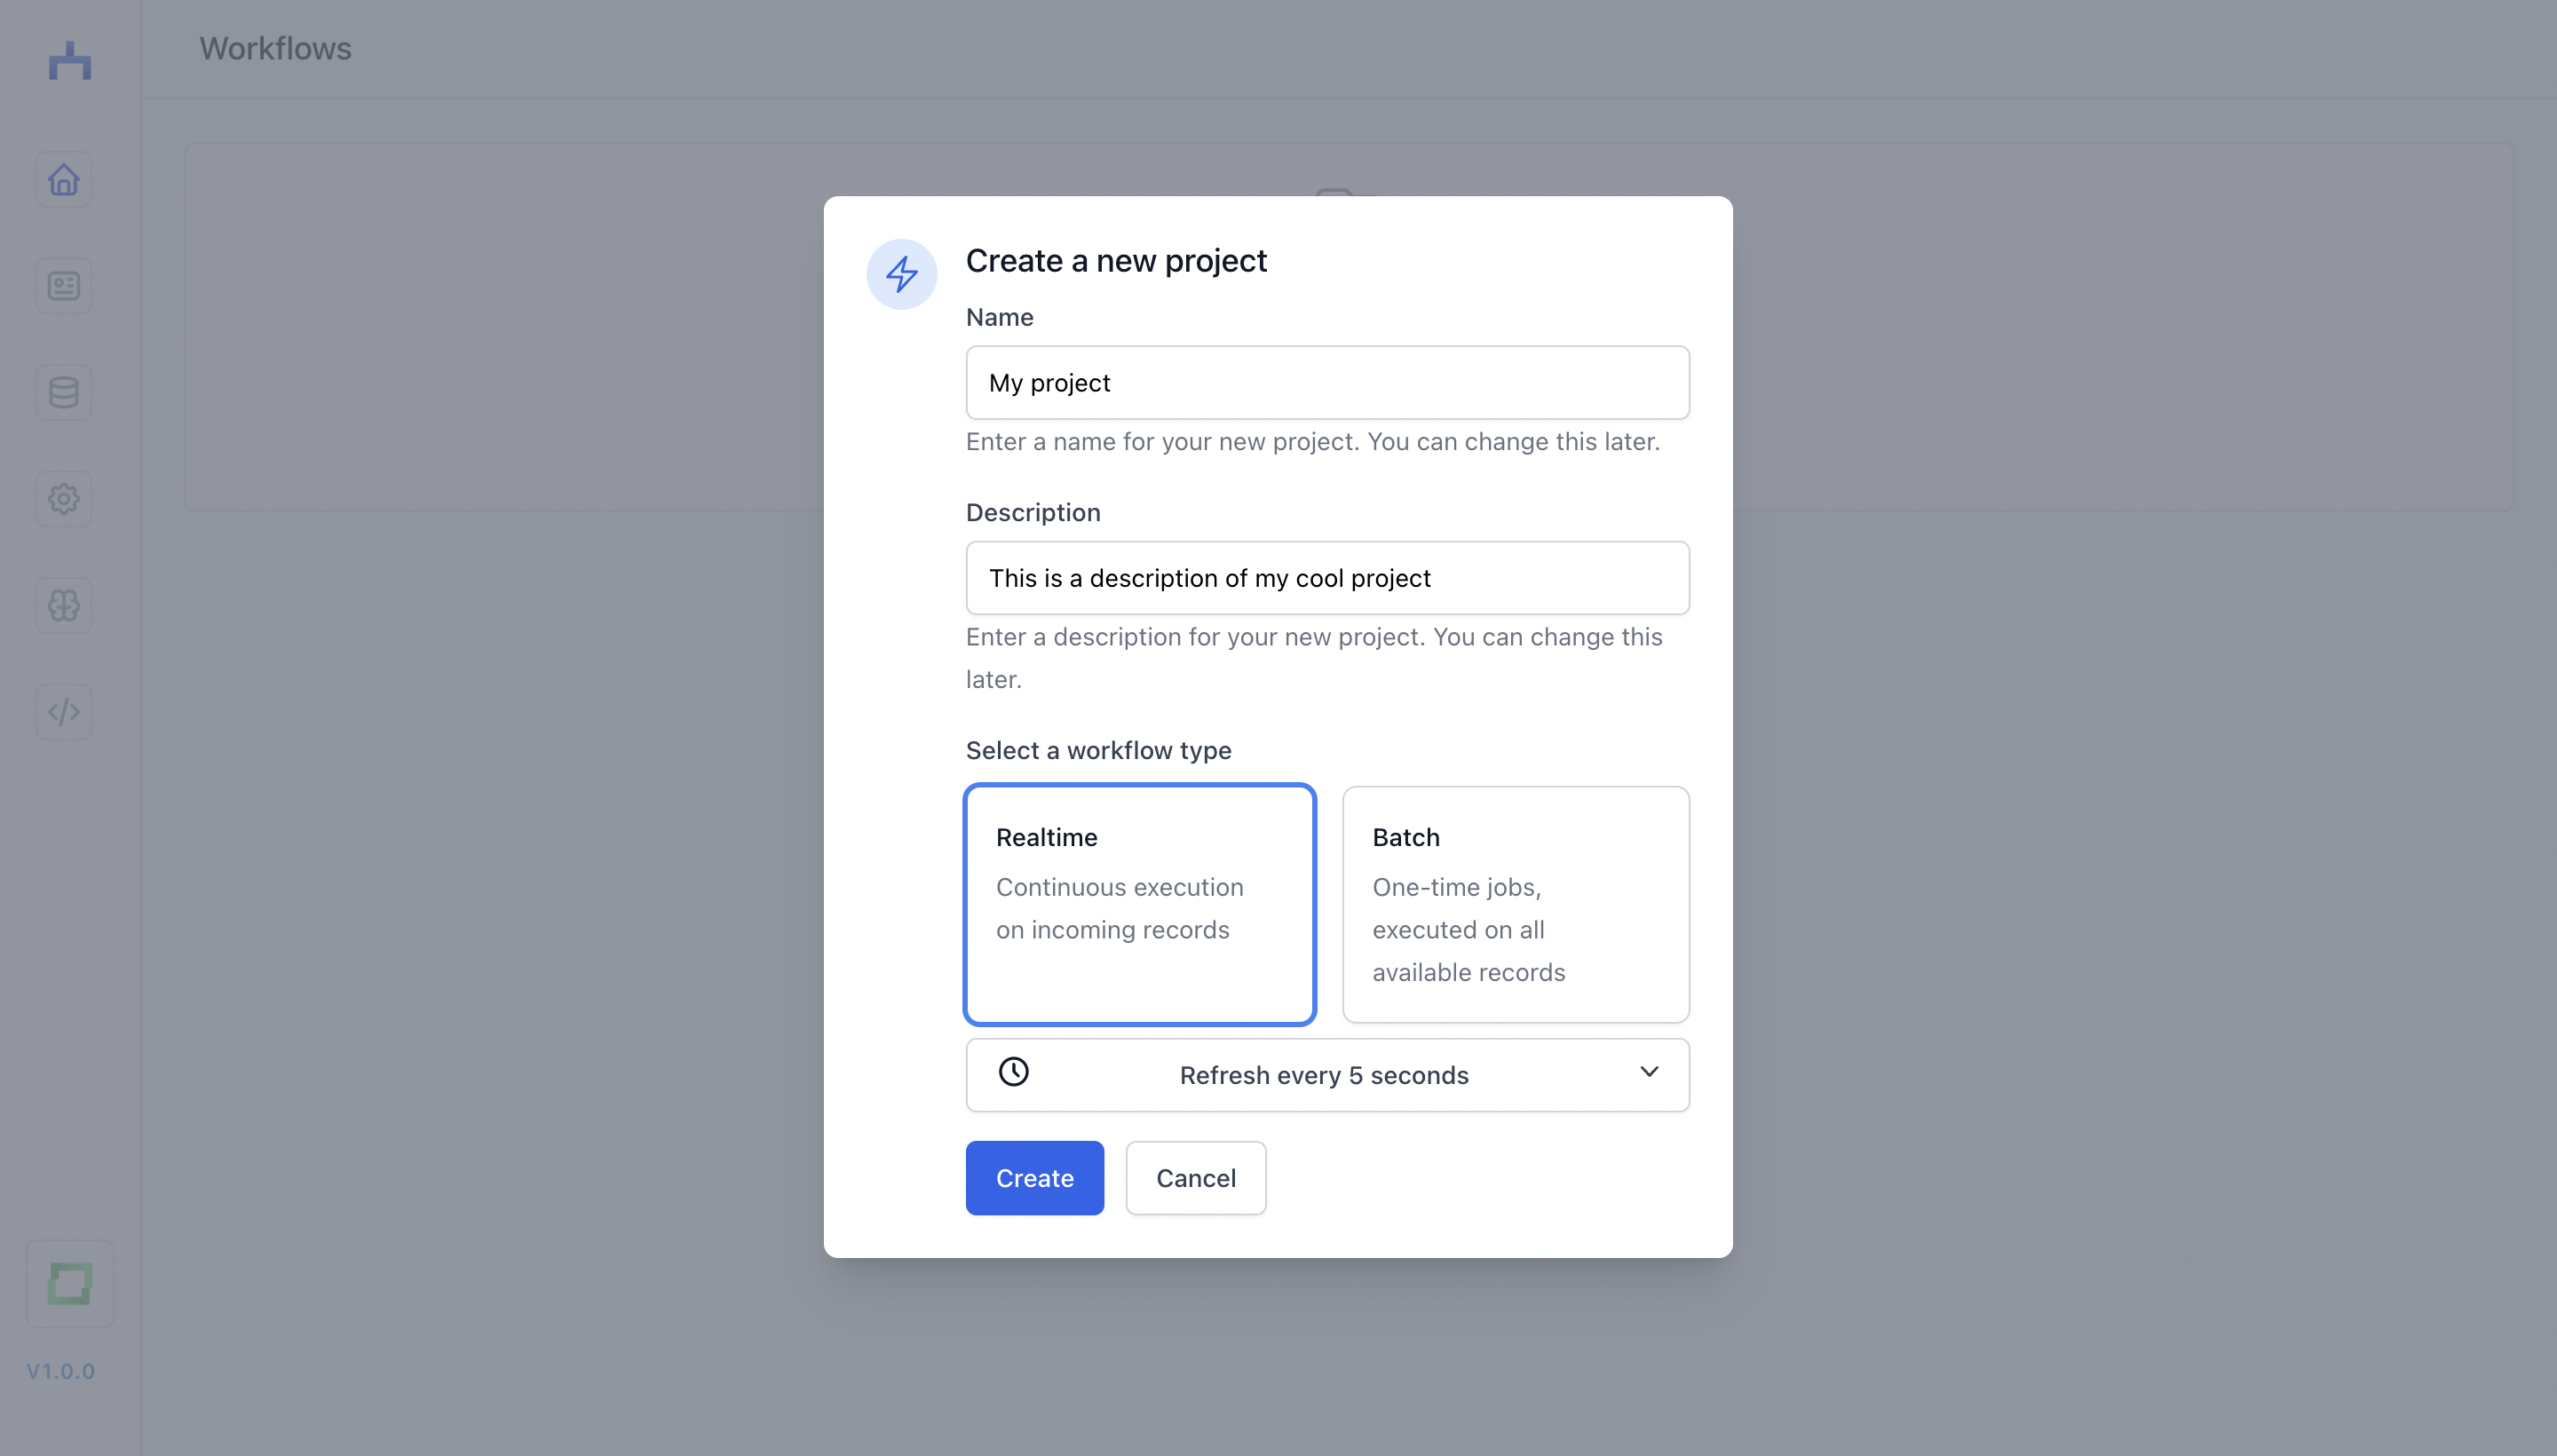
As you can already see, workflow offers both batch and realtime workflows. We'll dive into the difference on another page. For now, we create a realtime job that is executed every 5 seconds.
You will be forwarded to the workflow details page, where a large empty canvas welcomes you.
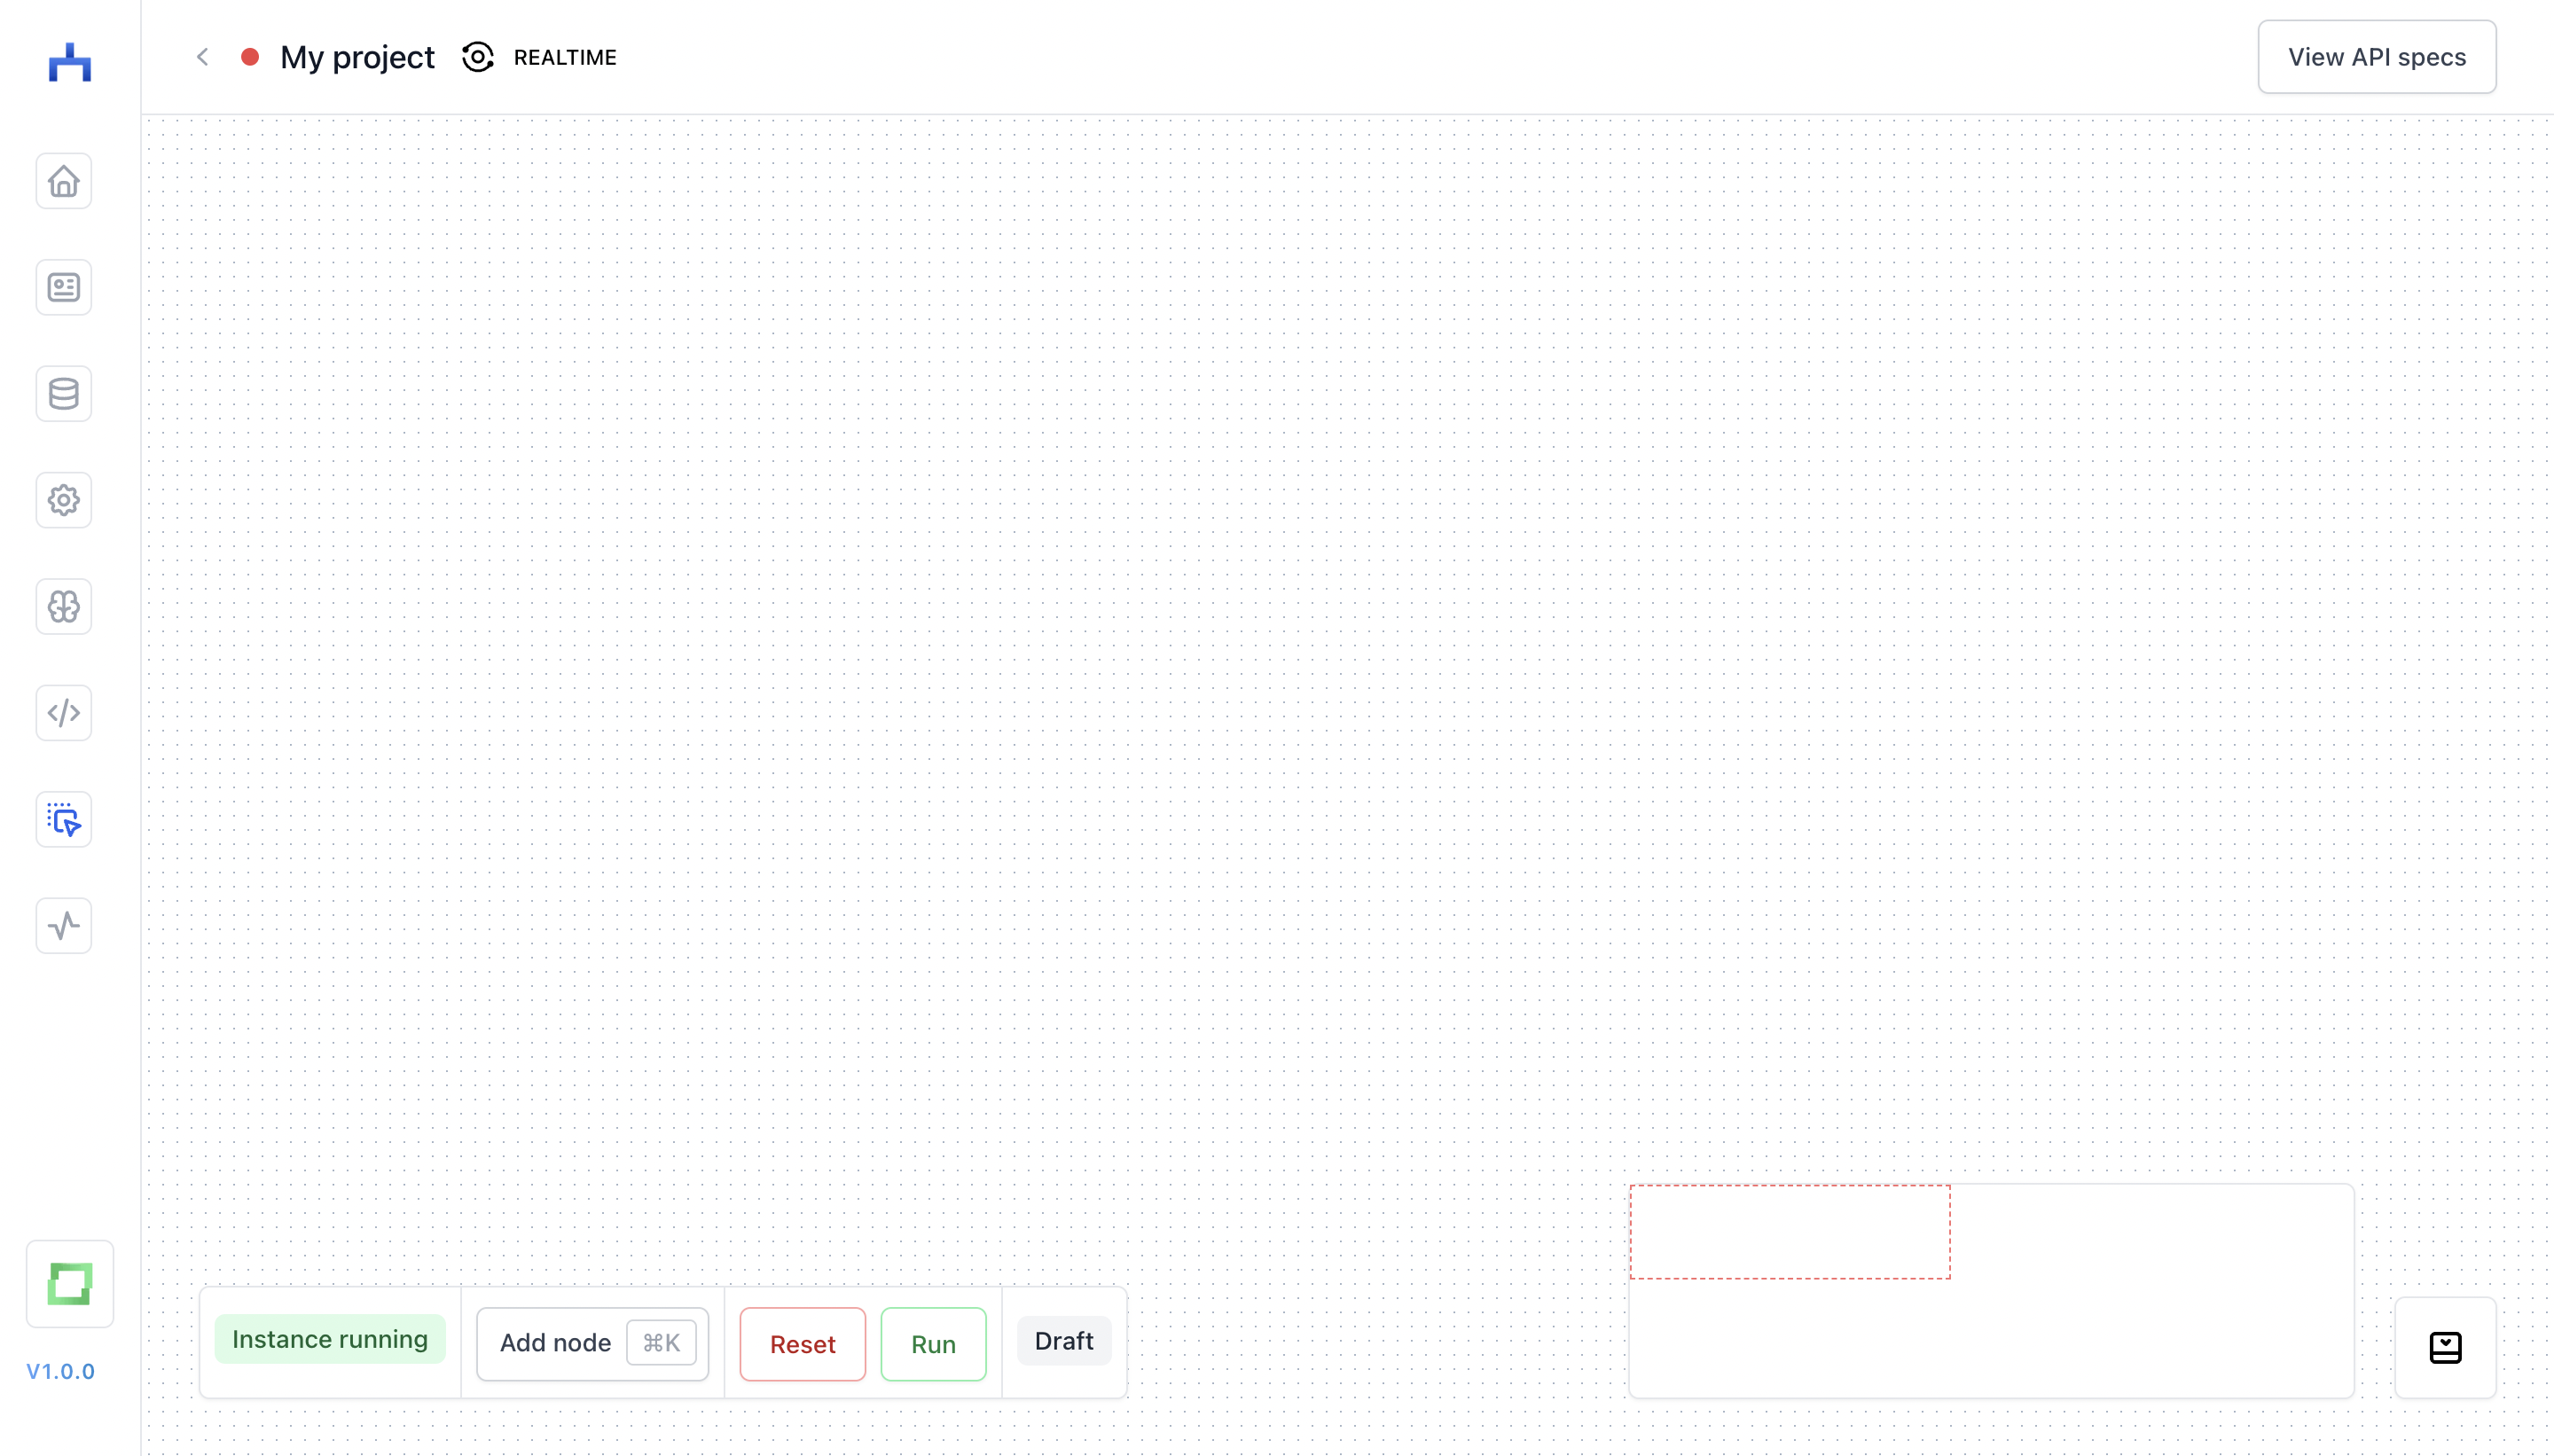
In here, we'll be able to implement the steps of a workflow and then connect them. For this, we will need some kind of data source - which is why we're now jumping into the stores catalogue.
Setting up a store
In the stores catalogue, you will see a variety of options to choose from. These options are divided into being either a source, target, or modifier (with one exception, the "Shared Store", which is both a source and target).
source: you're pulling raw data from these stores. That could be e.g. a Google spreadsheet you want to process.target: you're pushing transformed data into these stores. A target store contains the logic to process incoming records with the integration-specific logic, i.e. pushing data to the "GMail Send" store will categorize your inbox, or it will create drafts for you.modifier: use them as a step in your workflow to enrich records via lookup tables.
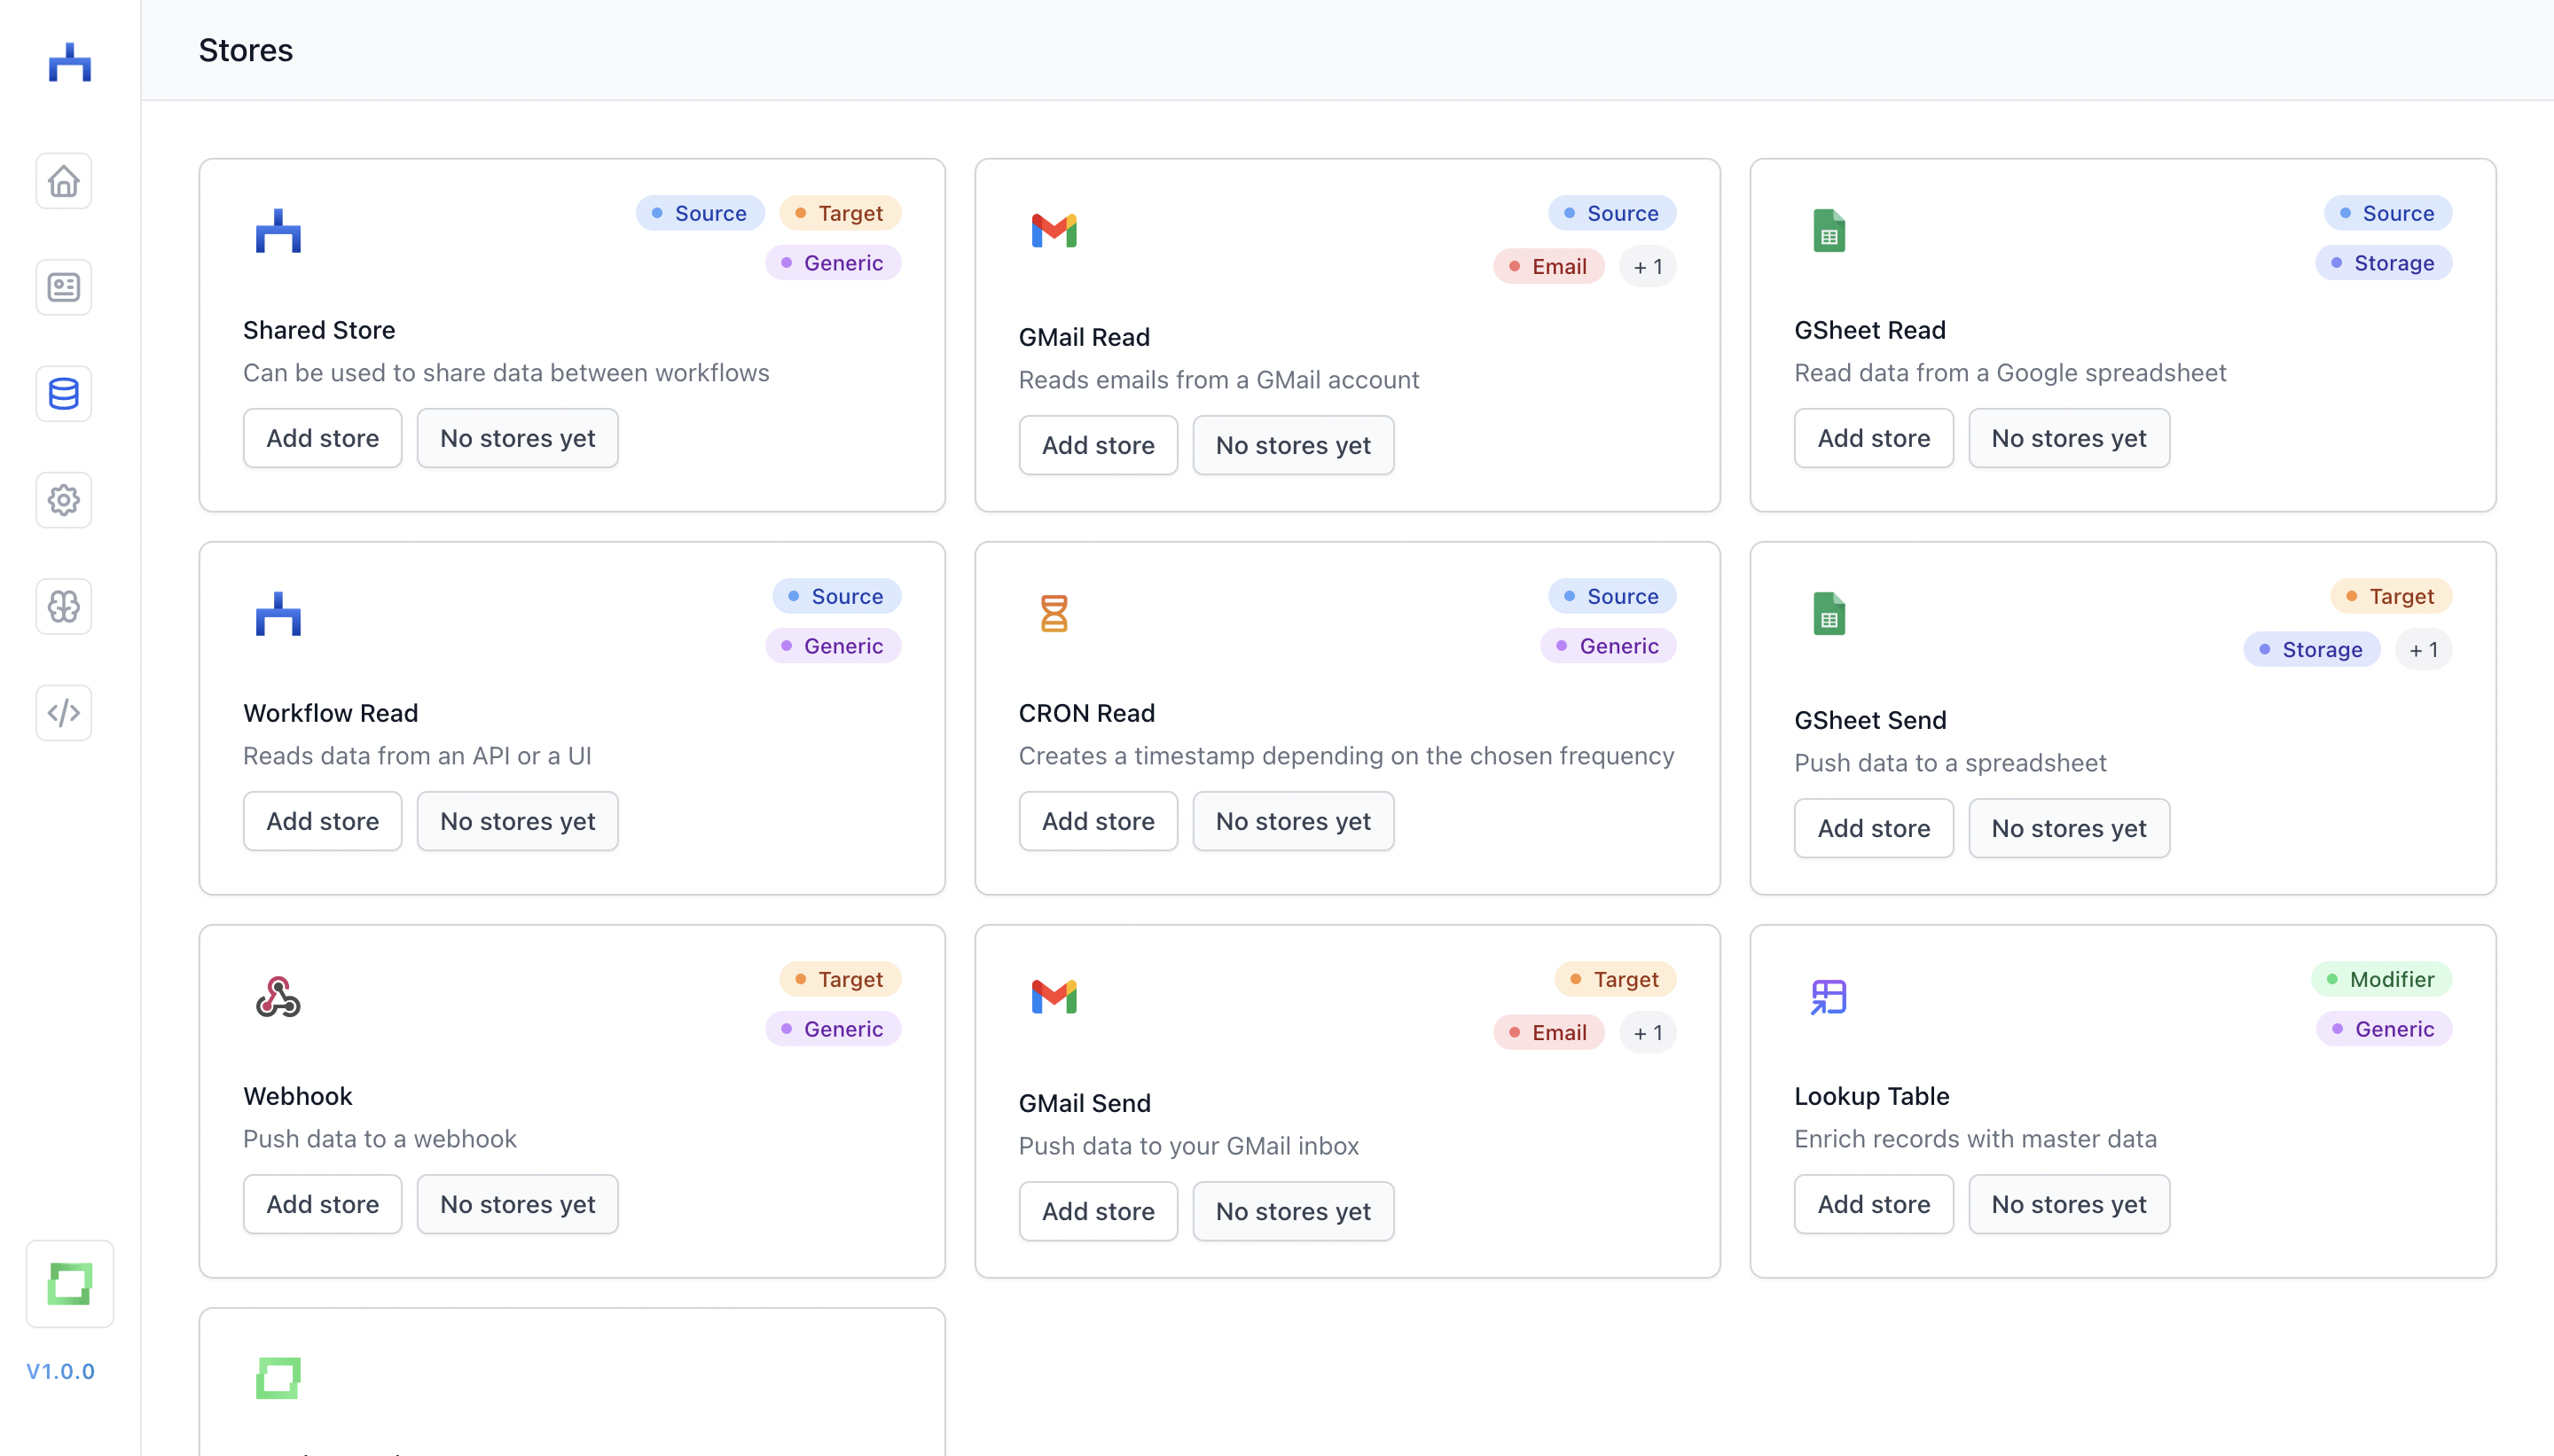
You will find further information about the stores in the stores page. For now, let's select a simple "Workflow Read" store, which enables us to enter data manually from the UI. To do so, simply click on Add store, which will forward you to the store-specific creation page. In this case, we can create a simple schema for our store. Let's keep it simple:
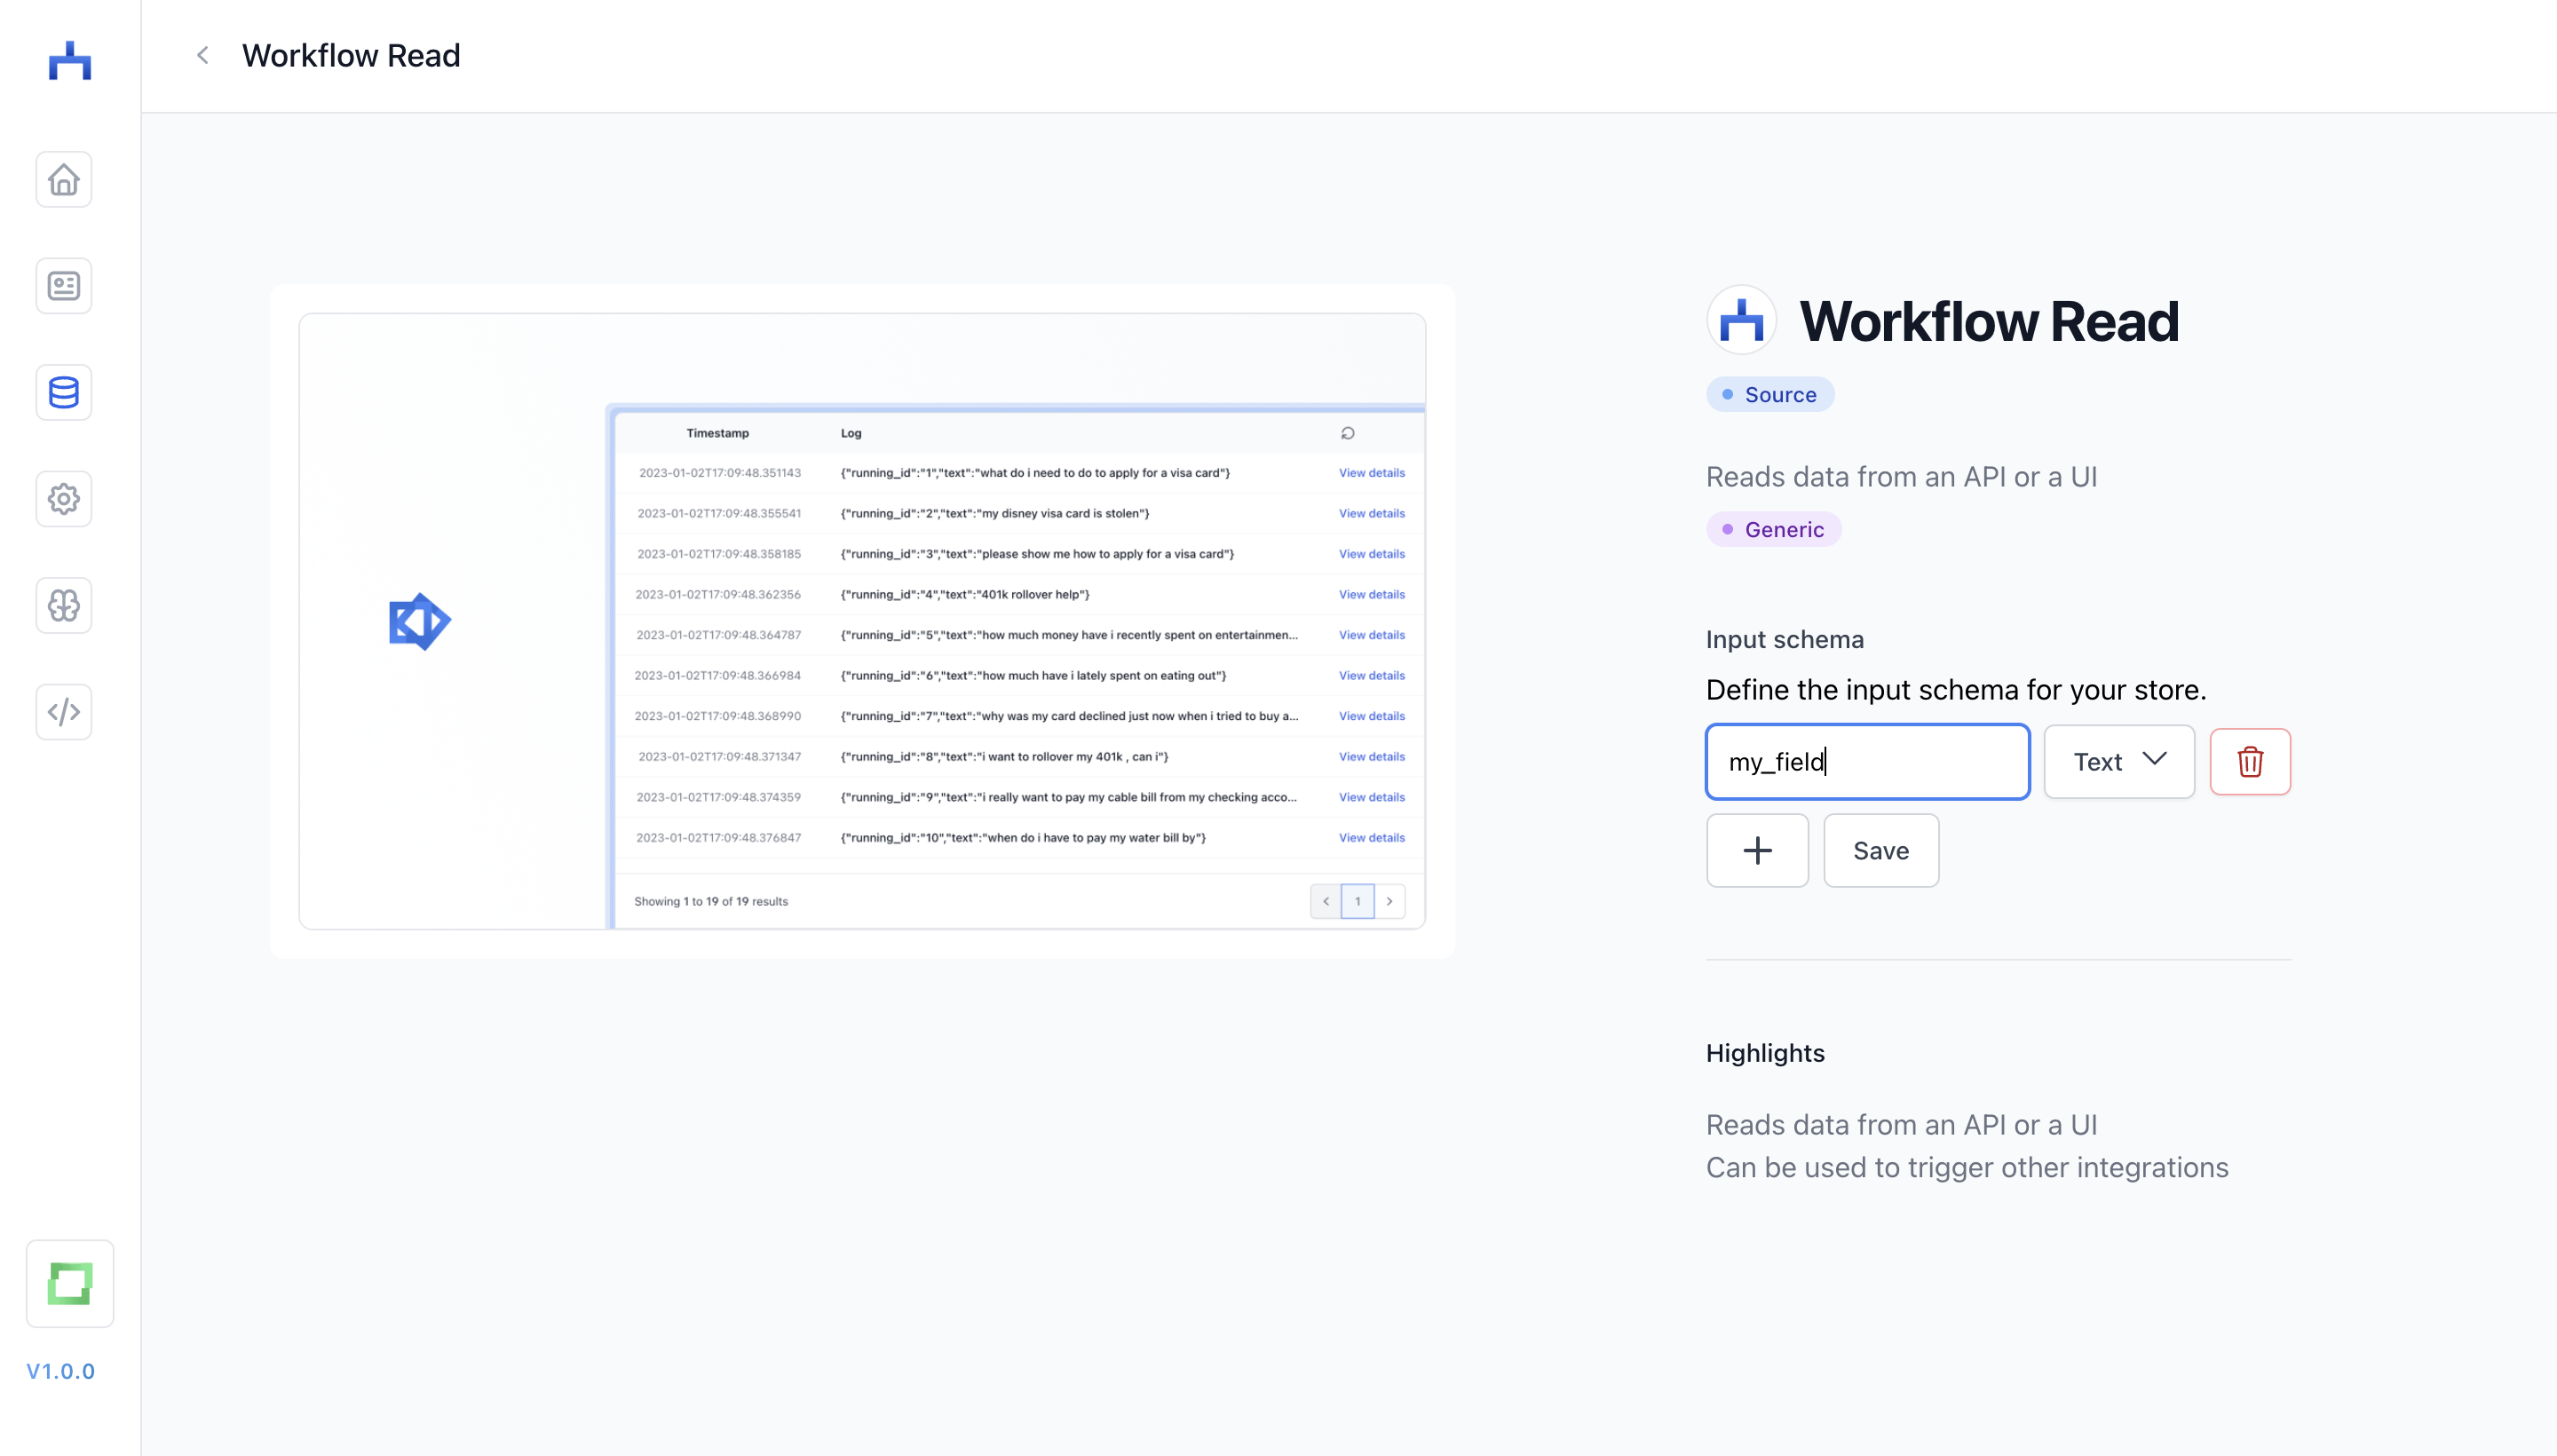
Now, we can go to this store and click on Enter data, which will forward us to the "Workflow Read"-specific data entry page. Let's create some sample data:
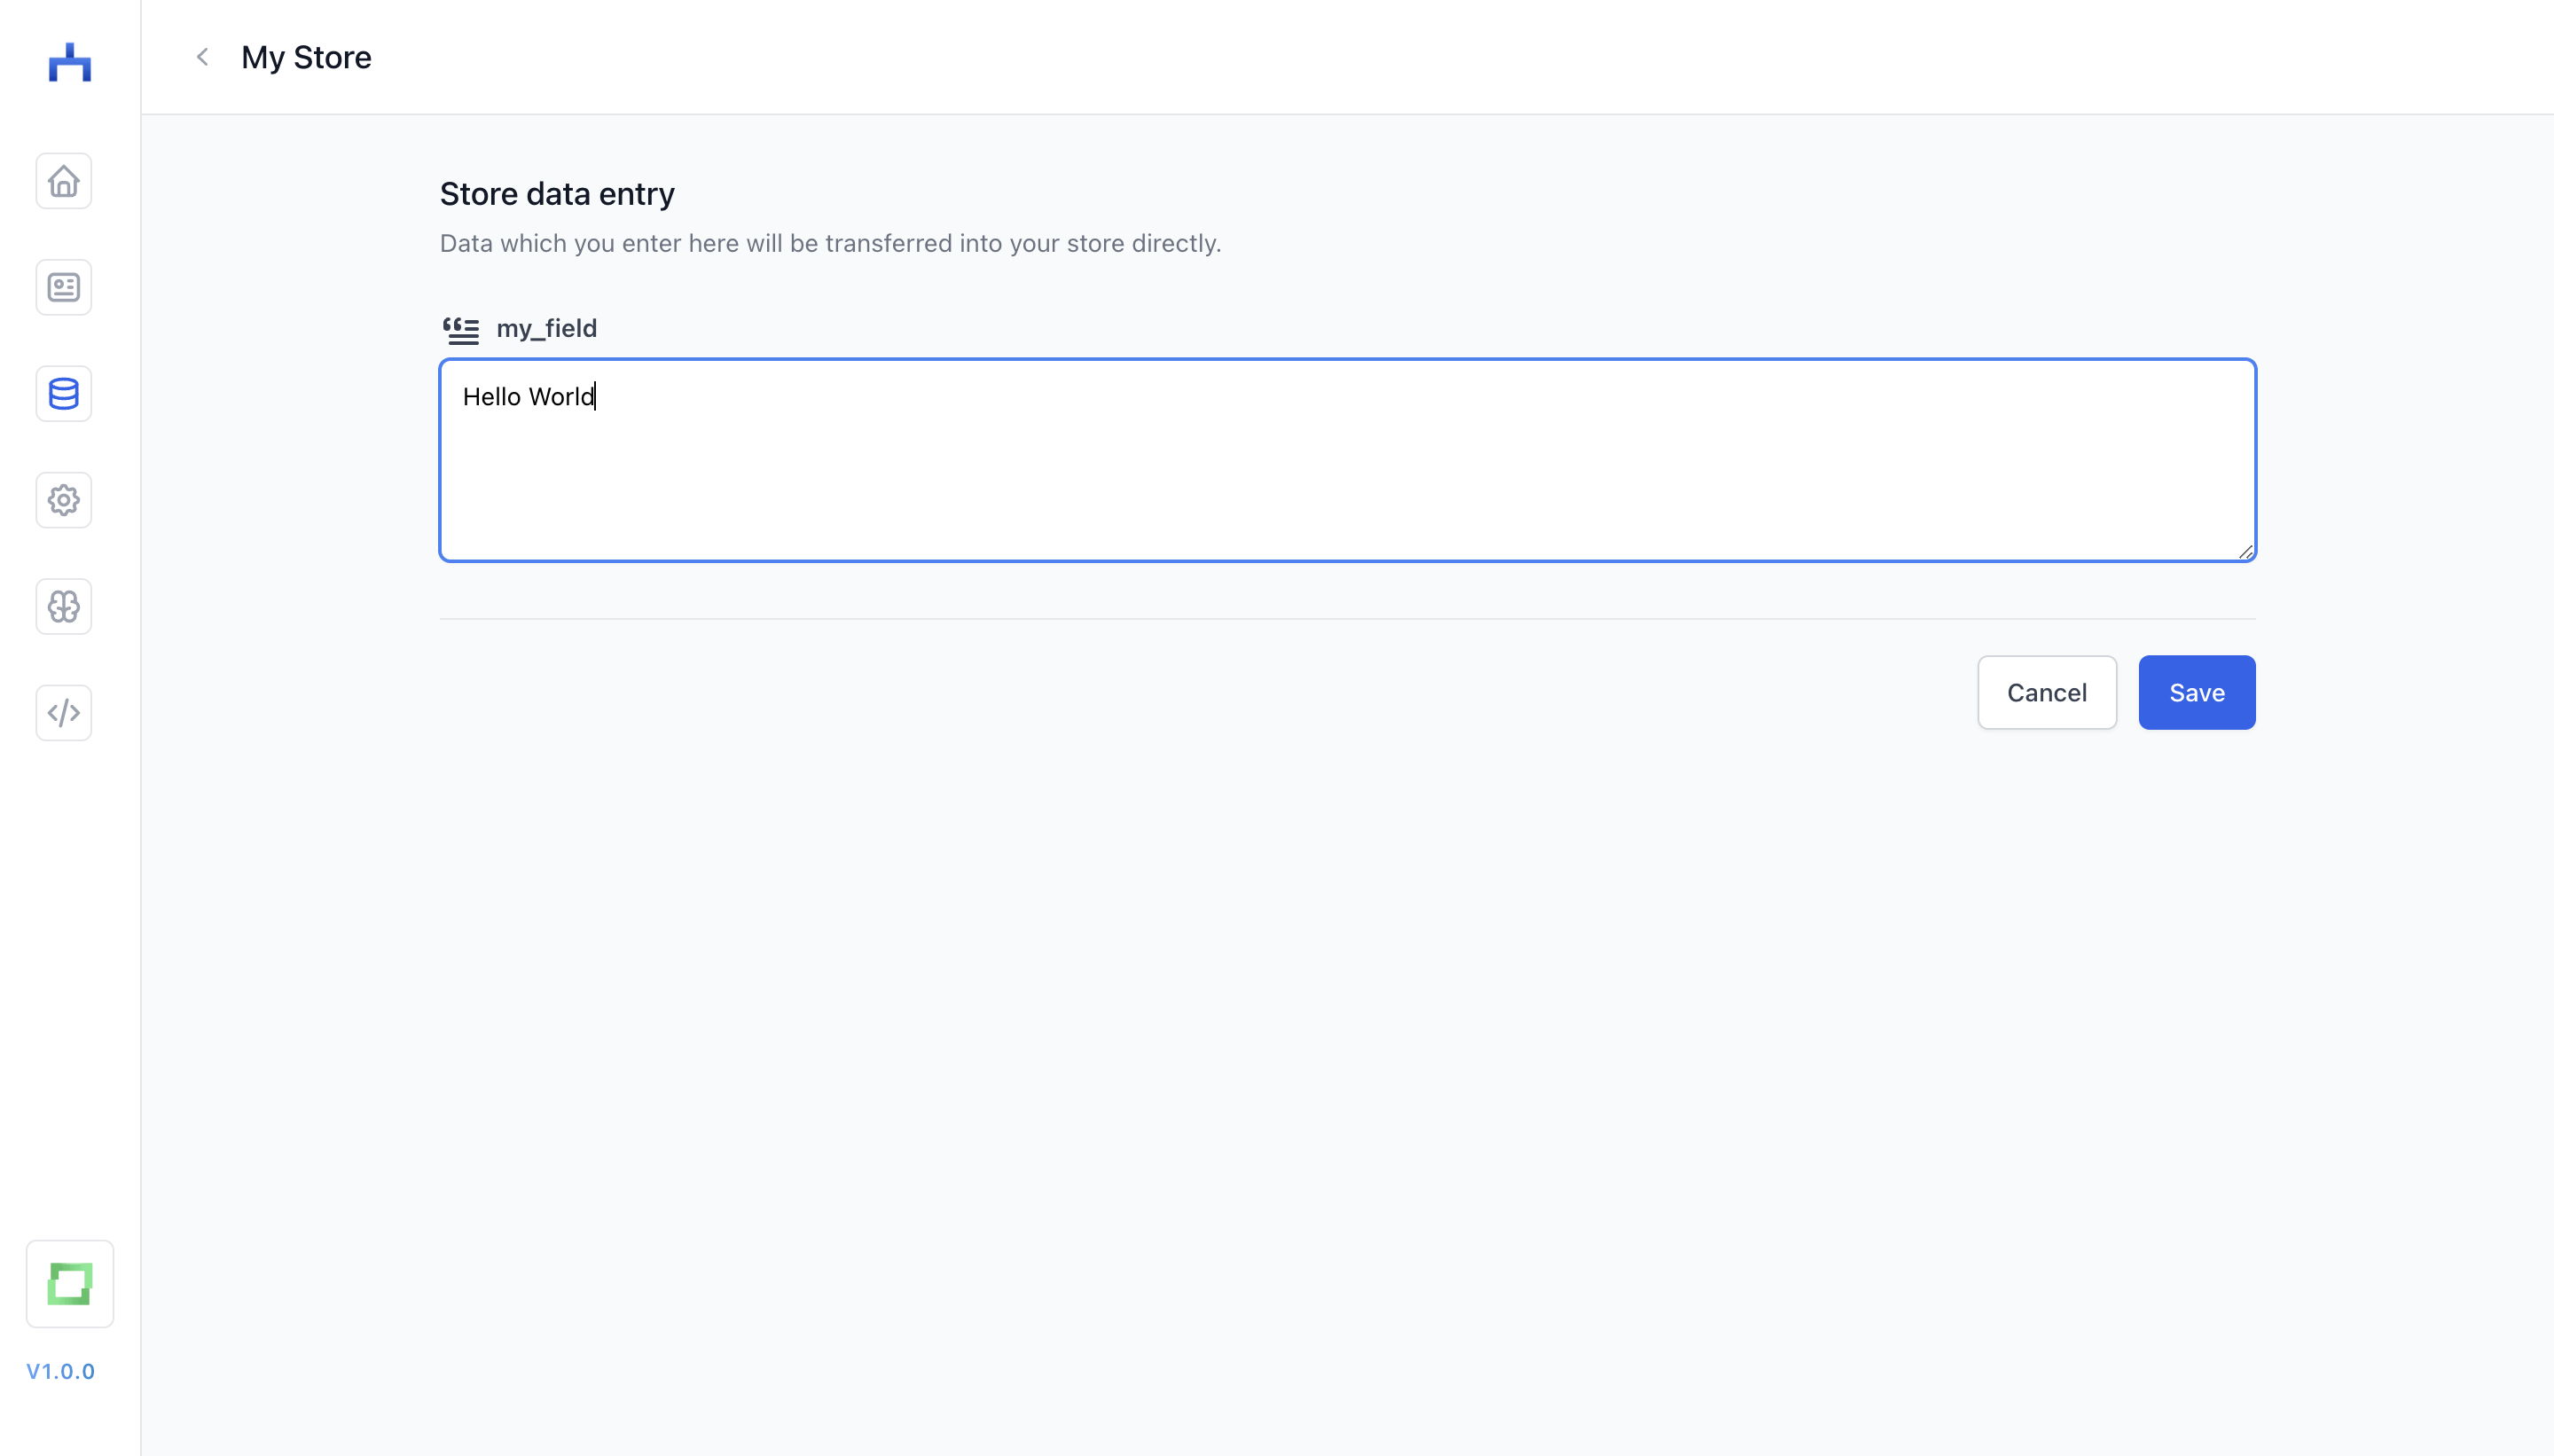
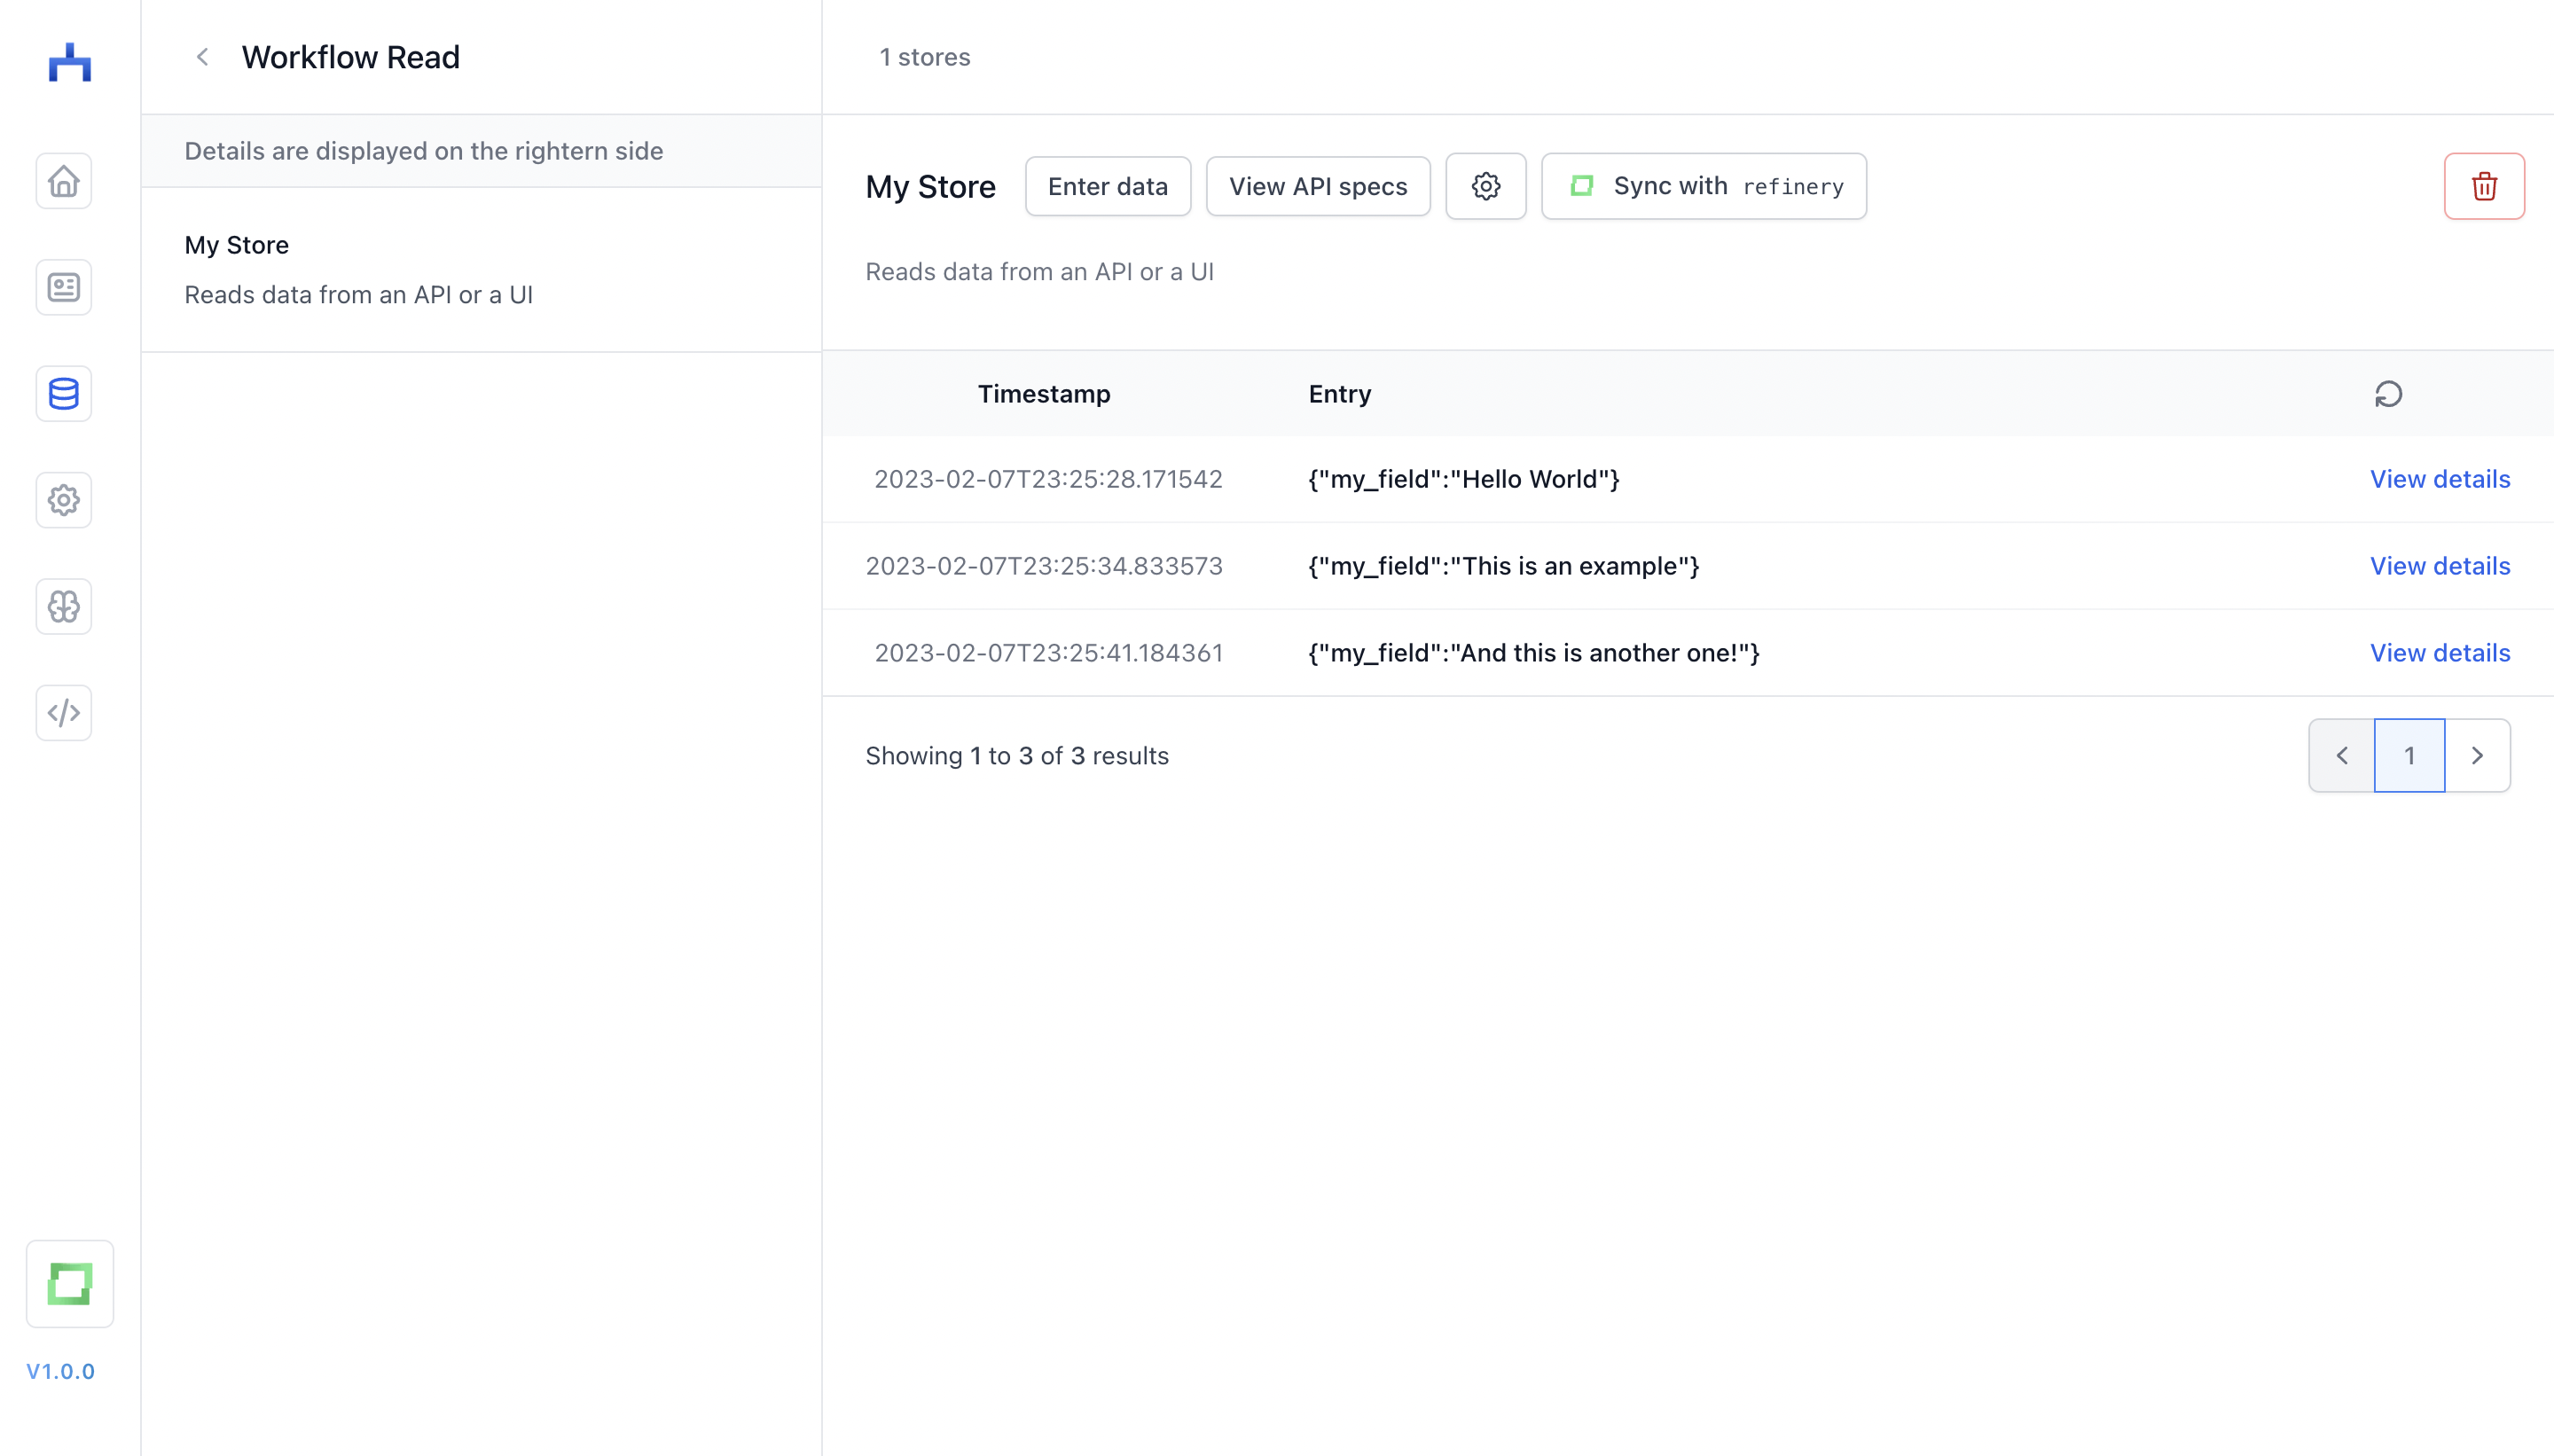
This data is now in our store:
Great! We have a very simple data source for now, and can jump back into our workflow from before.
To get an overview of the existing store options, take a look into the stores page.
Creating and connecting nodes
Finally, our step to build our first workflow, we are back in our canvas. We can now use the data store we just created by hitting ⌘ + K on the keyboard (or selecting Add node in the bottom left control panel), which will open up the node palette:
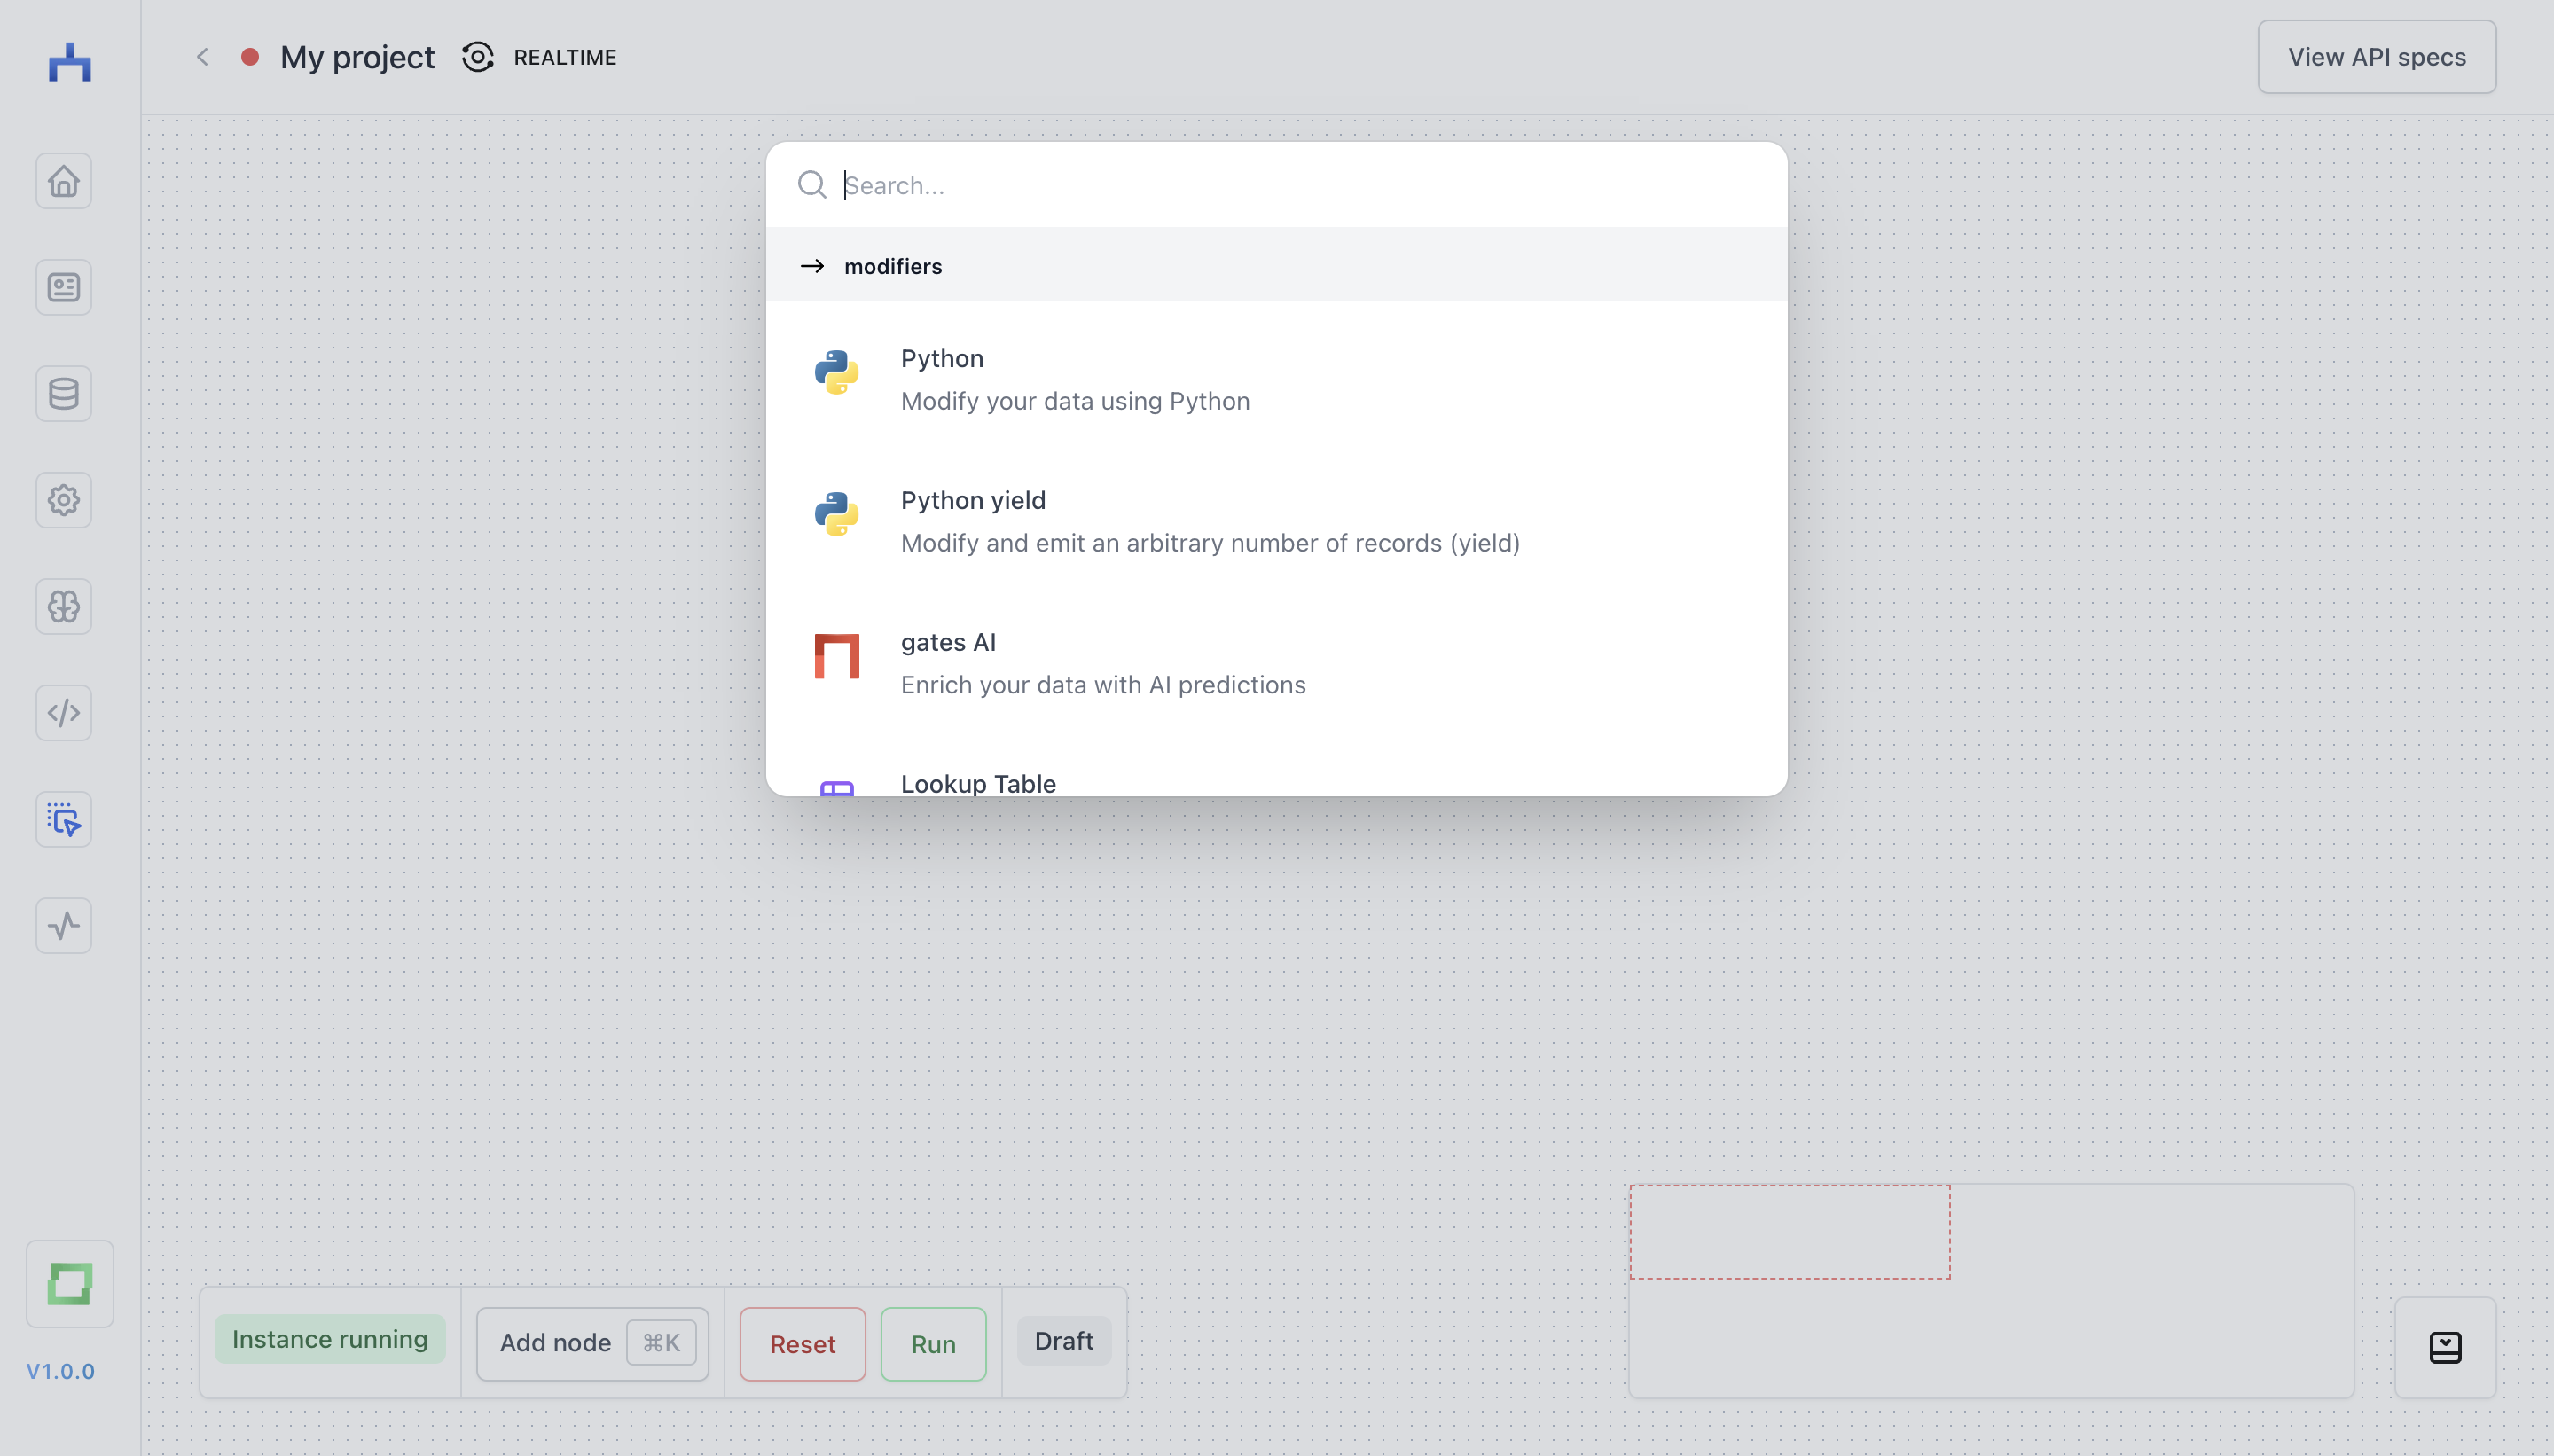
This palette contains the nodes we can use for our workflow. Simply scroll down in this palette to sources and choose "Workflow Read". You will now see the "Workflow Read" node in the canvas, and by clicking on it, you can open the configuration in order to pick the "Workflow Read" store we created before.
Stores that you create are by default called like the name of the store option in the catalogue, i.e. inboxes you connect via "GMail Read" are called "GMail Read". You can change the name of the store anytime in the details page of your store. More about this on the stores page.
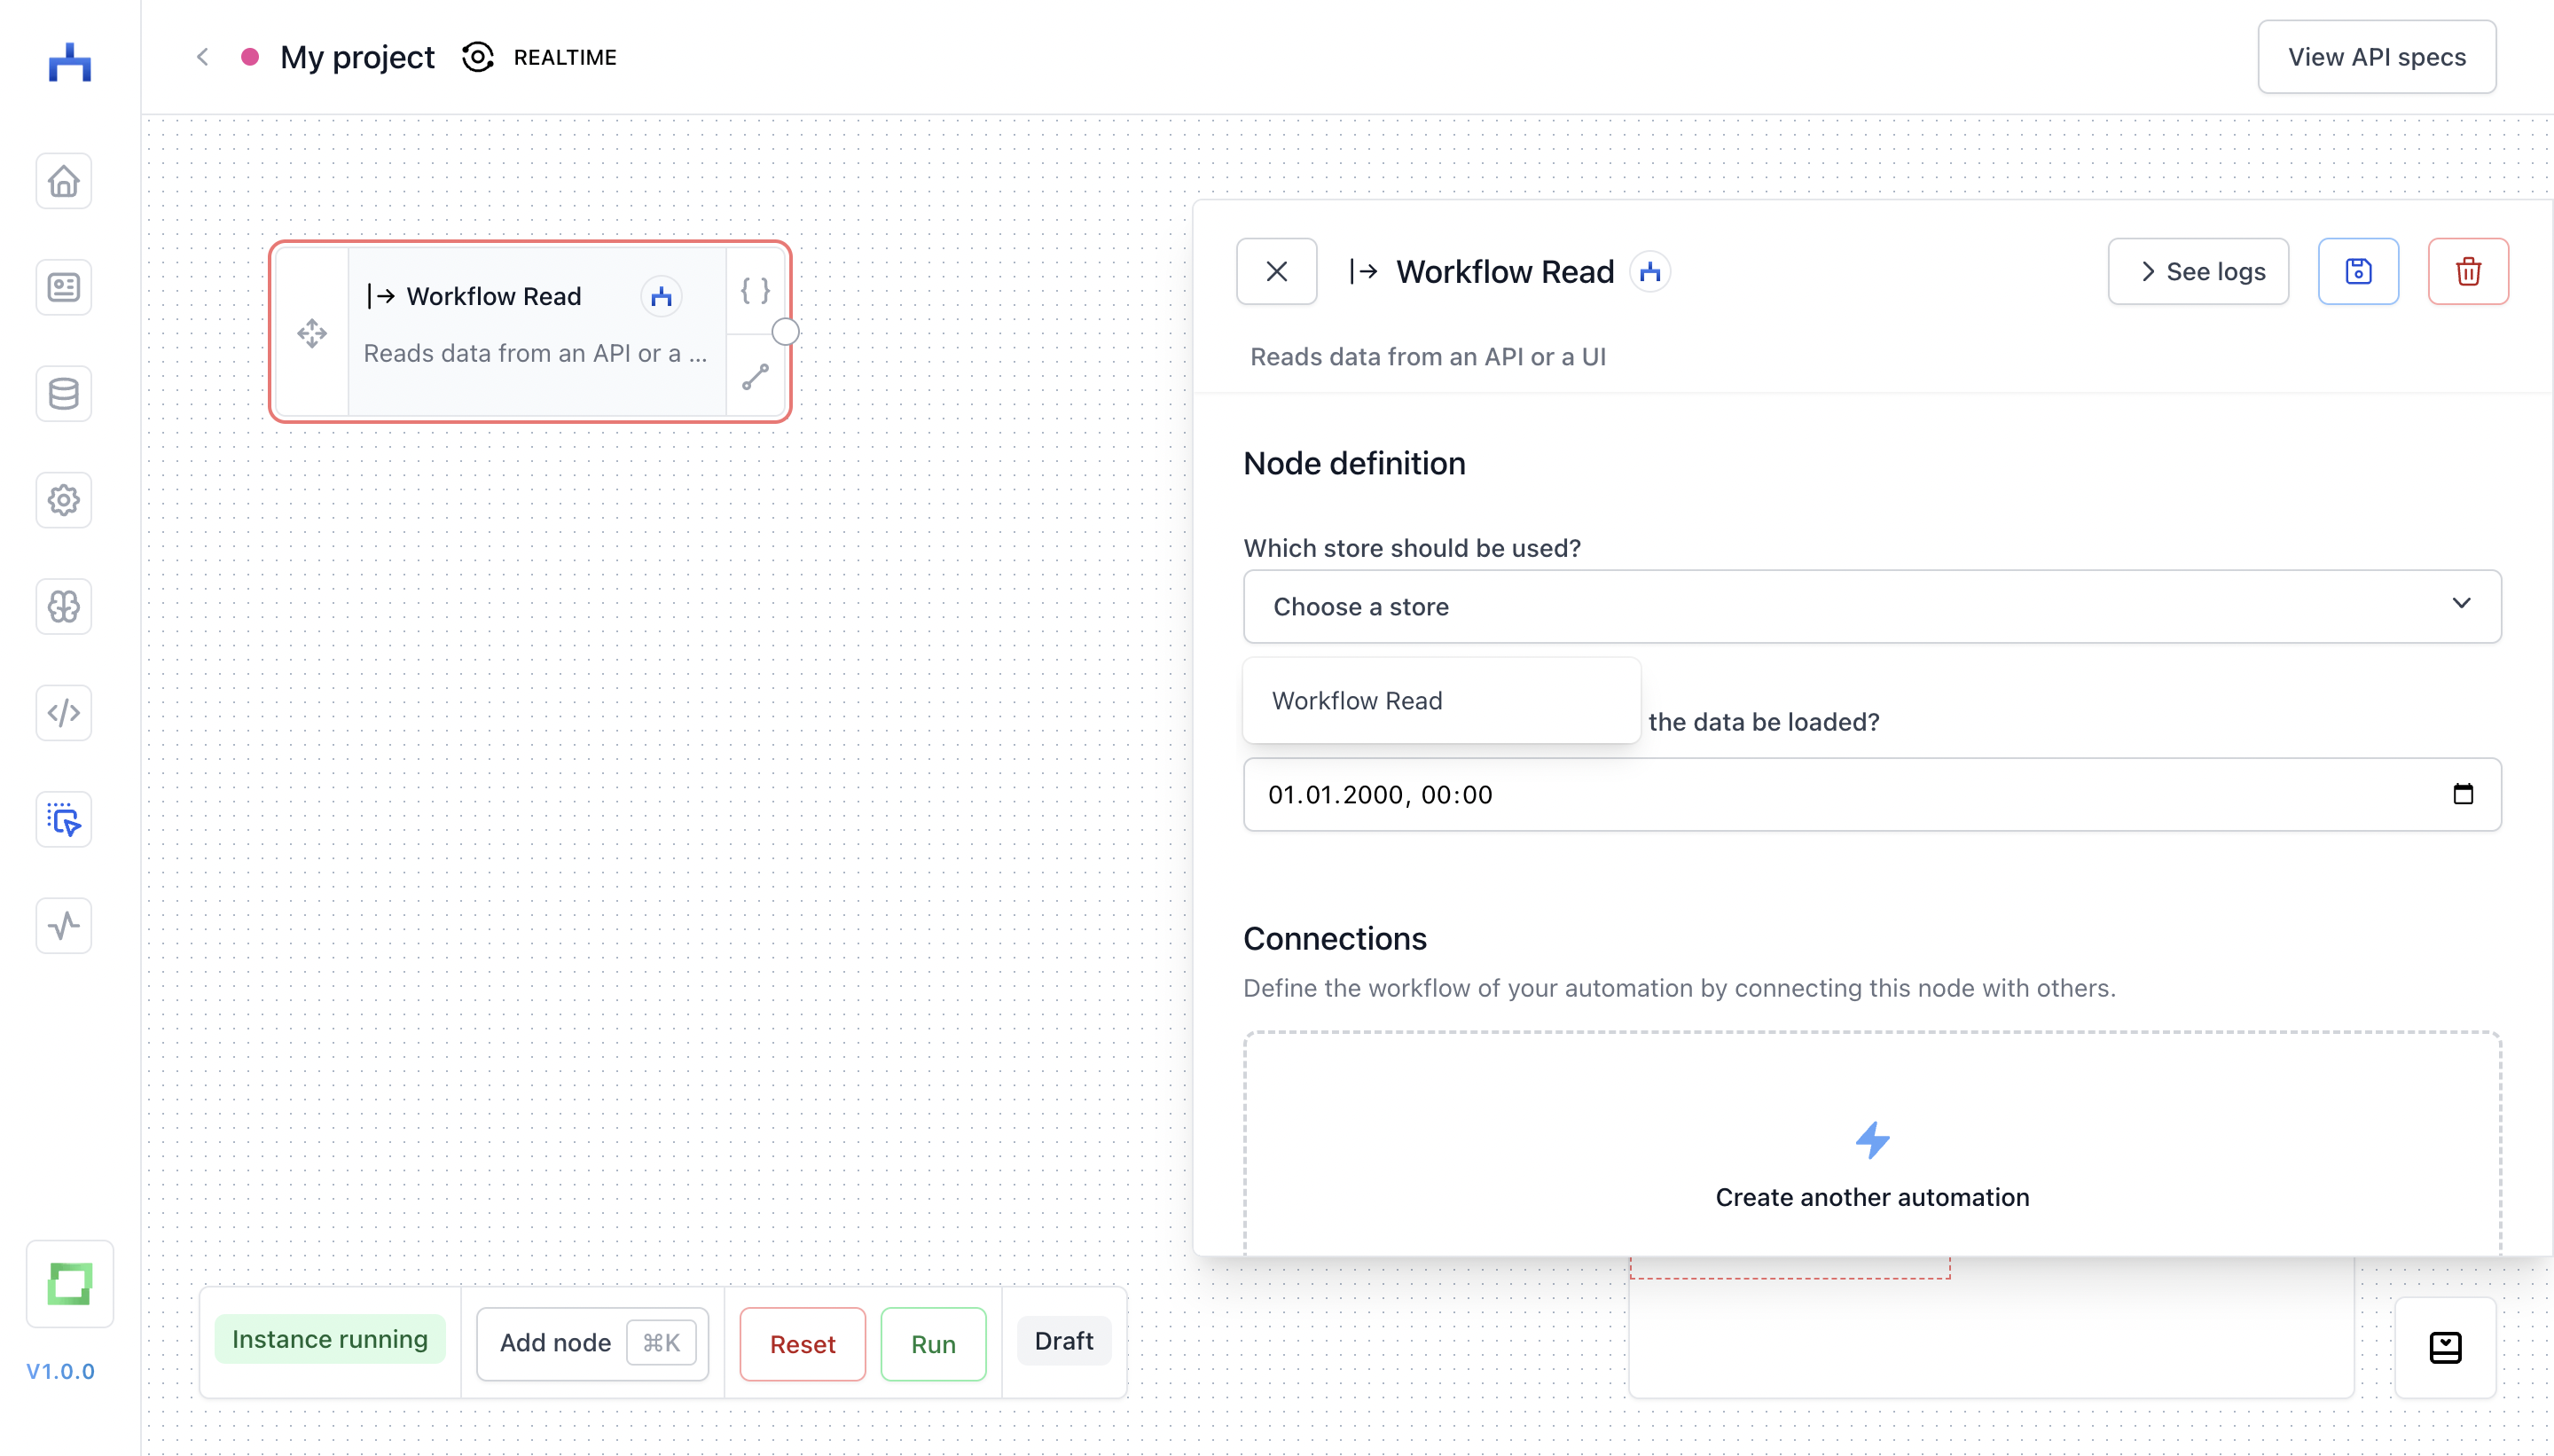
workflow automatically pulls data from this store for this specific workflow in the frequency you selected during the workflow creation. This means that our "My project"-workflow will automatically fetch data from the store every 5 seconds. If you're wondering how that fetching mechanism works in detail, please look into the workflows page.
We can now attach this store to another node which consumes the provided data, e.g. a simple Python node to calculate some attribute. Simply open the node catalogue, pick a "Python" node and start implementing the code:
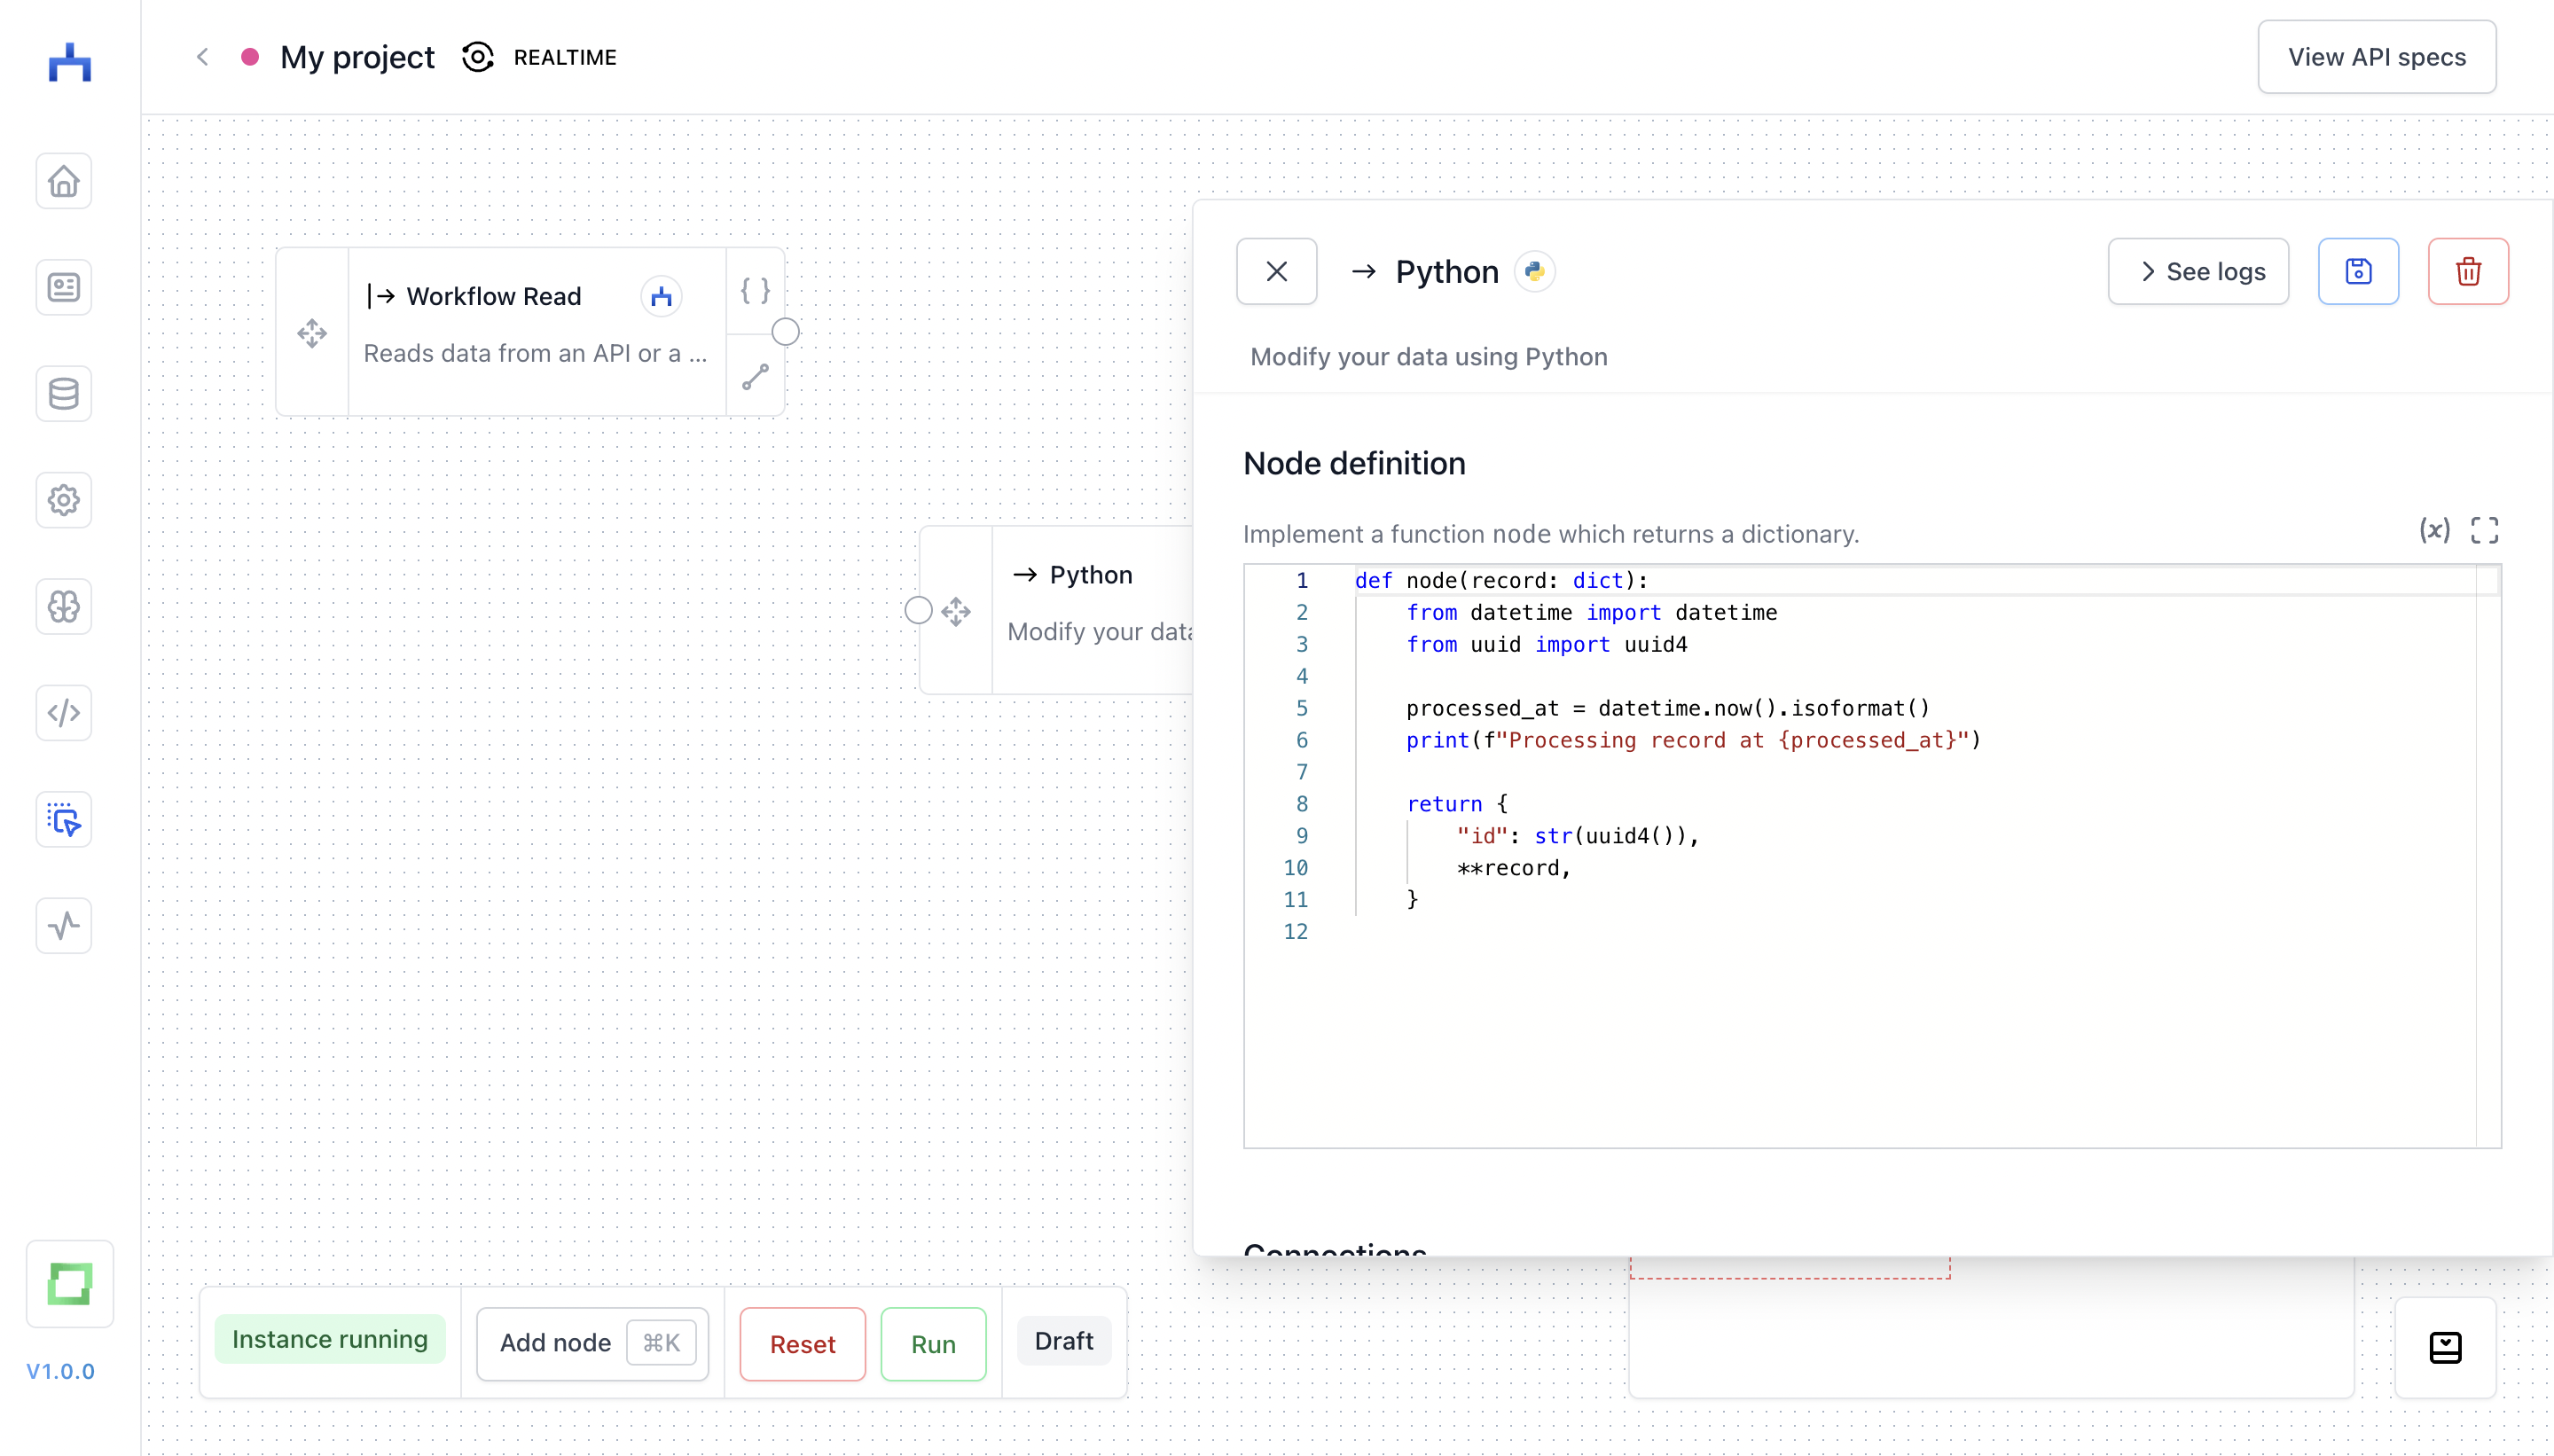
Please make sure that you implement against the interface of the Python node in that each programmable node takes as input a record: dict and outputs either a single dict ("Python") or a Generator of dict ("Python yield").
def node(record:dict) -> dict:
  # please keep the name of the function as it is

  # you can compute any custom logic in here
  my_field = "some_value"
  return {
    **record,
    "my_field": my_field
  }
To forward the data from the "Workflow Read" node into the "Python" node, you can create a Python condition in the configuration of the "Workflow Read" node.
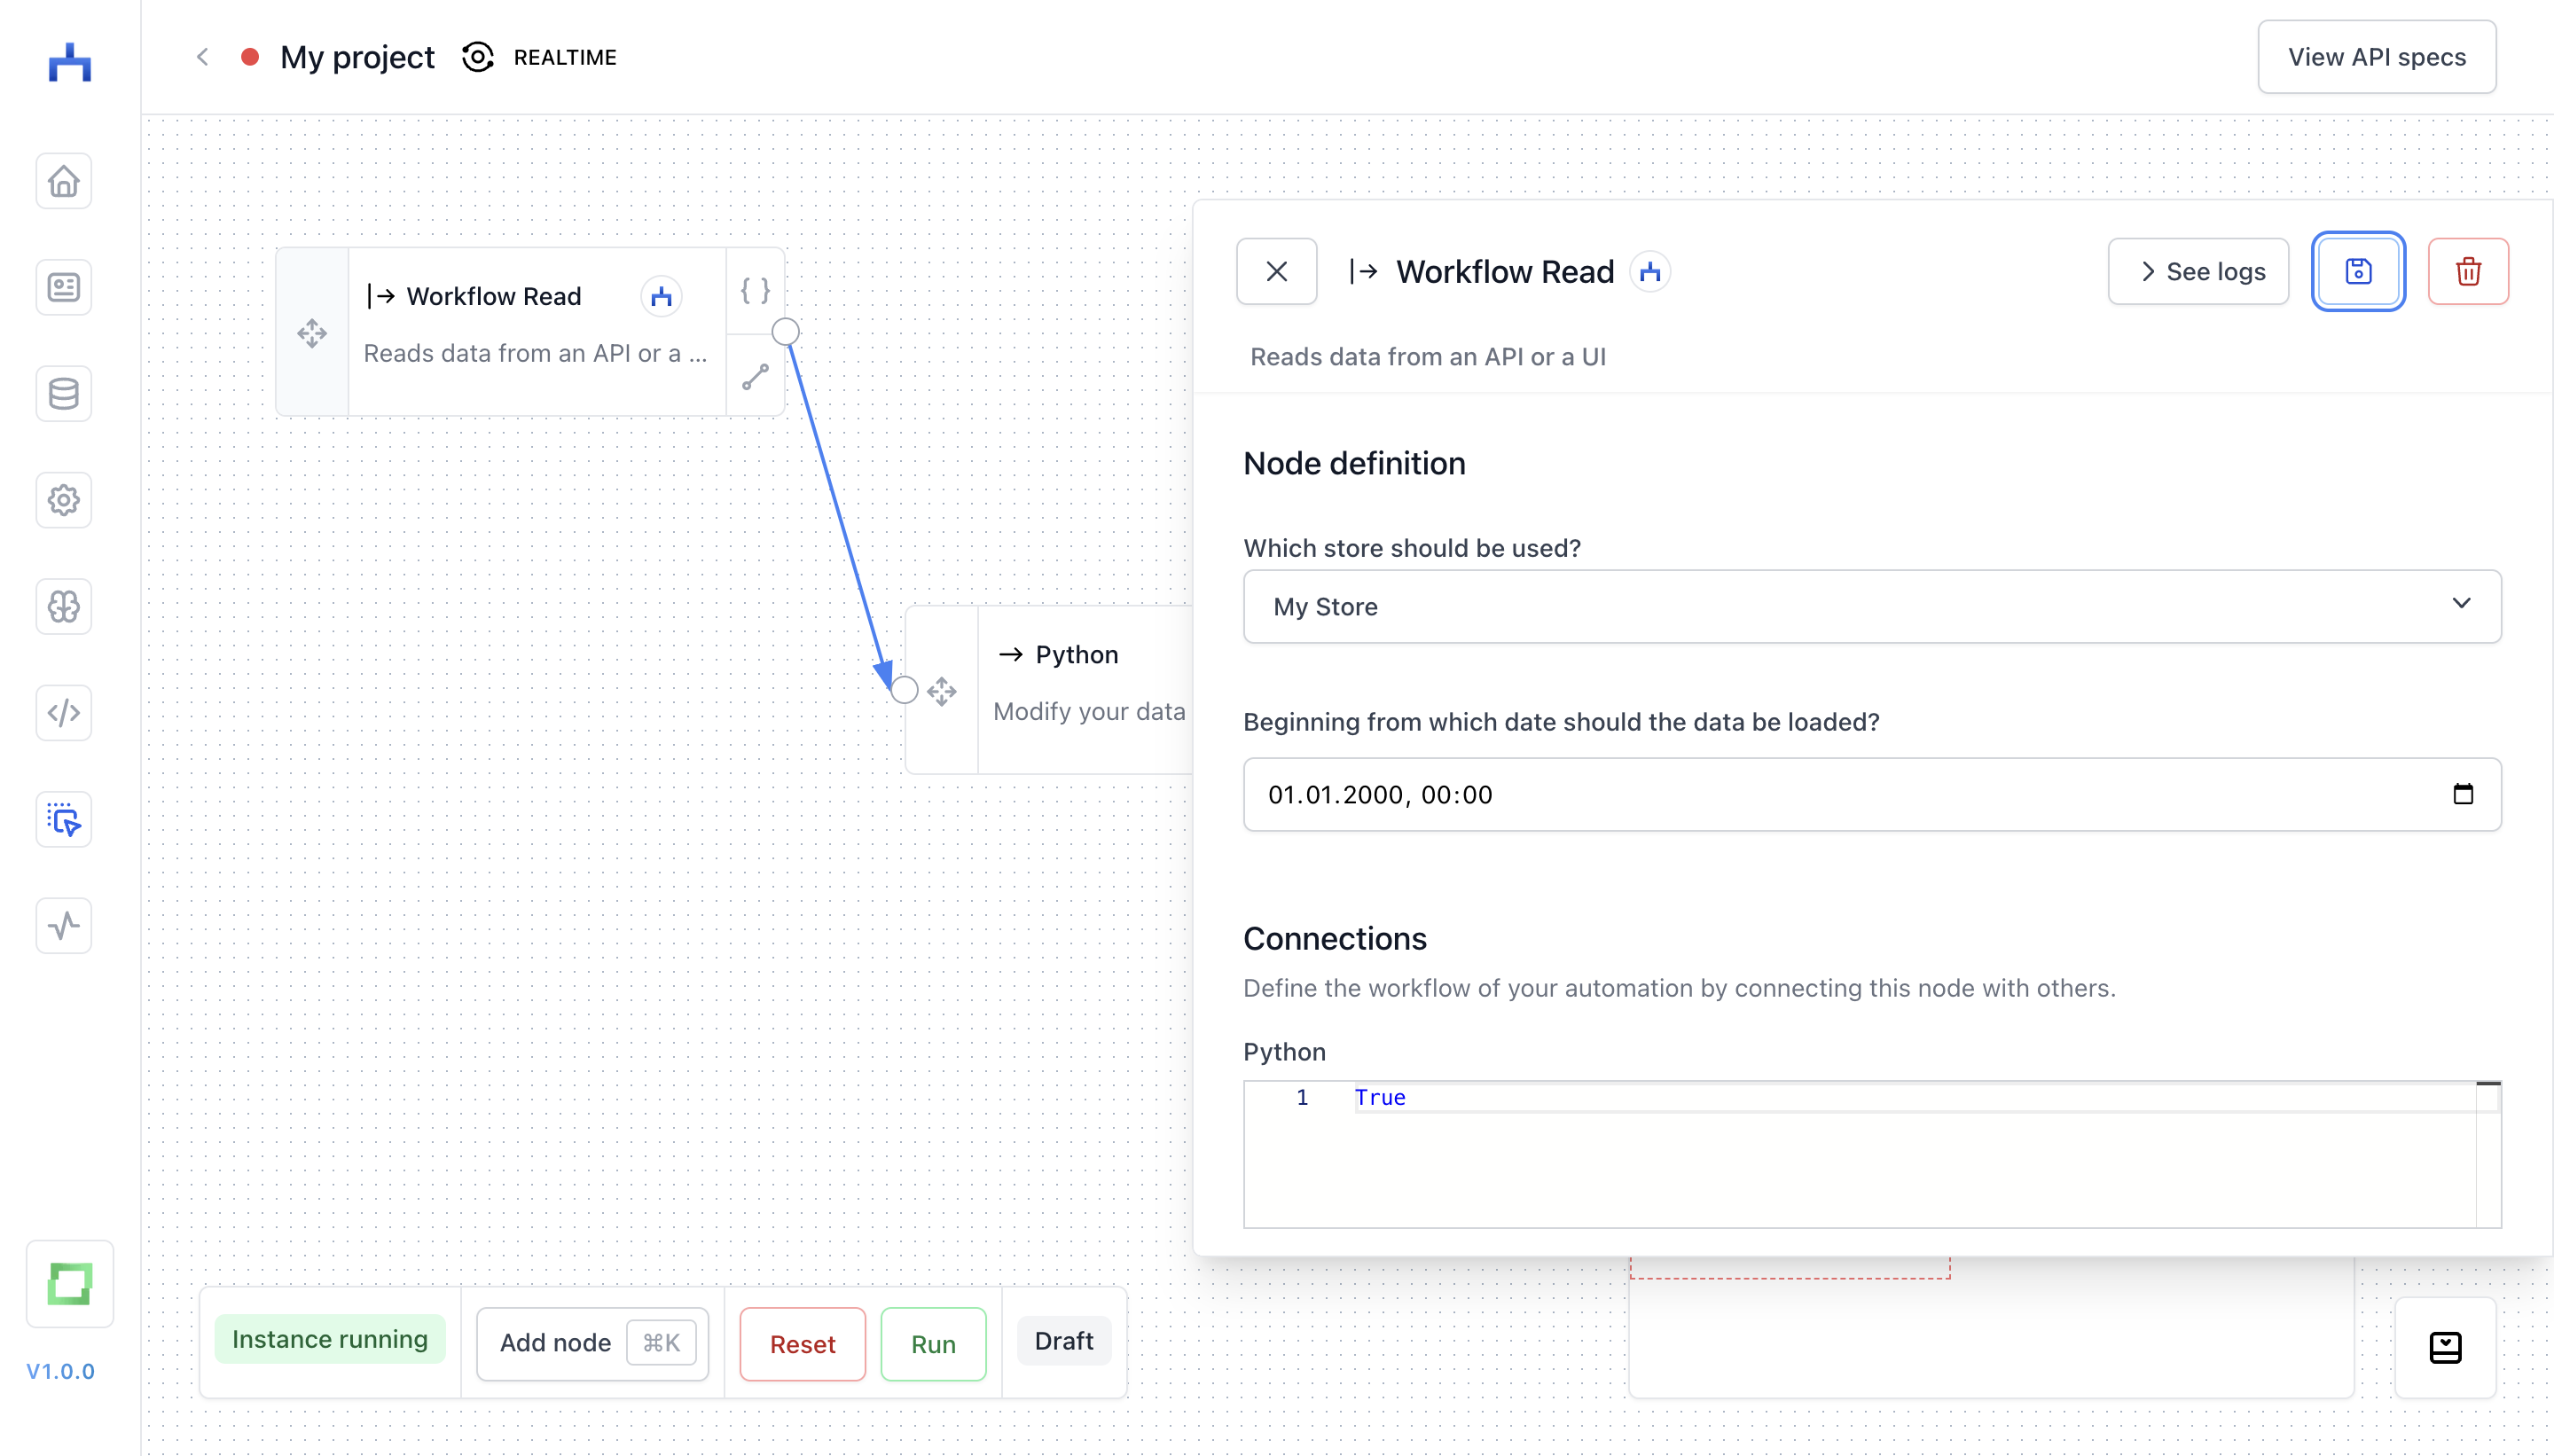
This condition can be anything you'd write as an if-condition in Python, even complex conditions such as
record["confidence"] > 0.5 and (record["source"] = "source_1" or record["count"] % 3 == 0)
Those are the basic concept of building workflows:
- Creating nodes, either from a store or with some Python logic. A special node in the platform is the
gates AInode, which we cover in another section. - You can use any Python logic to connect the nodes.
- In this sense, you can build workflows such as [data source -> transformer -> data sink].
What's next?
Great, you now have a first understanding of what workflow can do. Here are a few links that might be handy as you venture further into workflow