Adding attributes
Refinery allows you to calculate new attributes to your already existing data. That means that you can write Python code that takes your existing record as input, does some transformations or uses outside APIs, and finally returns a value that is the value for this new attribute. The attribute calculation is applied to every record individually.
Motivation
We strongly believe that a good labeling environment has to be as flexible as possible in order to keep up with changing requirements. One of those tools enabling more flexibility is calculating new attributes while the project is already up and running.
This is useful for many scenarios, here are two examples:
- You engineer the same features in many of your labeling functions so you decide to take the code and add it as a new attribute, which saves you a lot of computation in the weak supervision cycle.
- While labeling you find that a useful predictor could be the sentiment of a given text. You decide to add a new attribute to your data that enriches your records with a sentiment score from a remote API that you know and trust.
For more inspiration, check out our content library called bricks, where we collected commonly used NLP enrichments like profanity detection, E-Mail extraction, language translation, and many many more. They are all written in Python and designed to be copied into refinery directly.
Adding new attributes in refinery
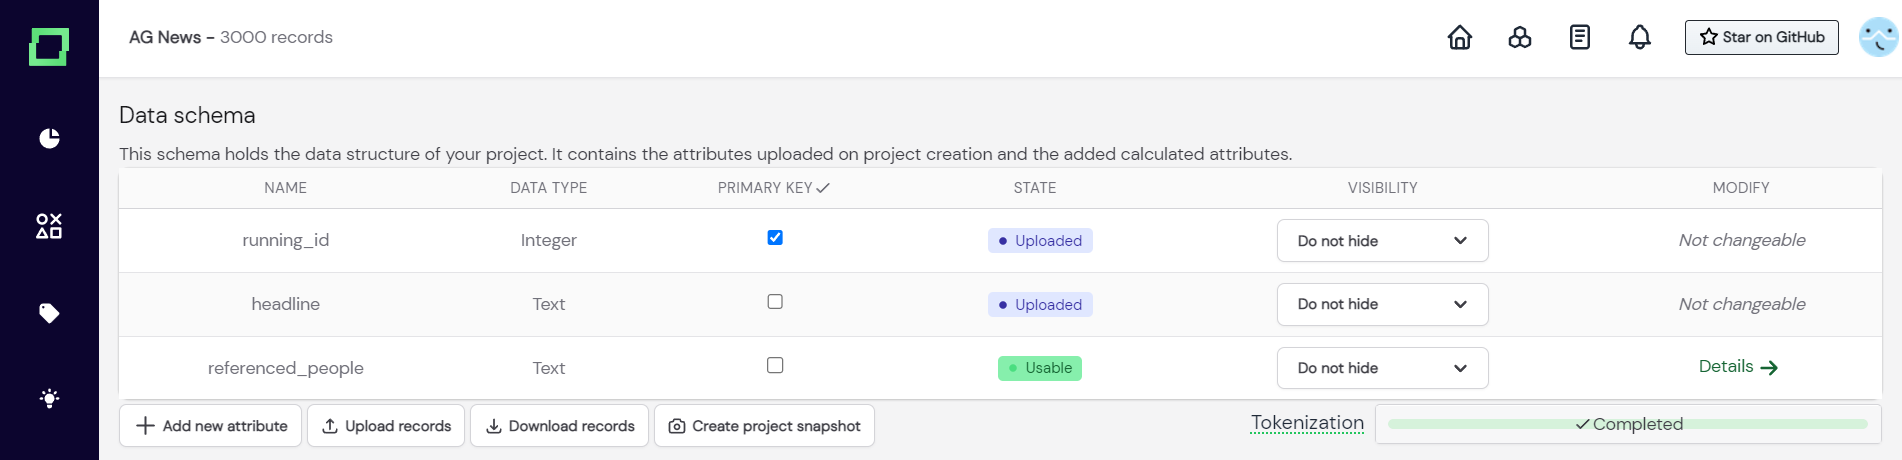
To add a new attribute to your data, you have to visit the settings page and click the button "add new attribute" (see Fig.1).
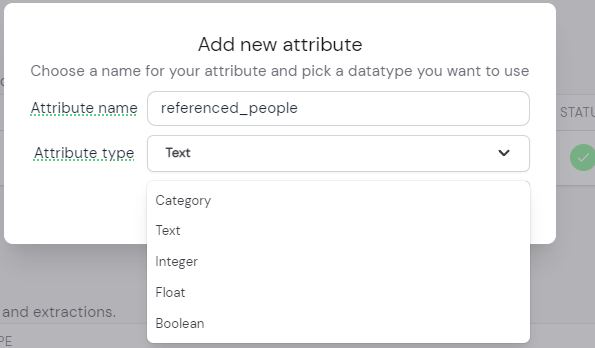
After that, a modal will appear (see Fig. 2), which prompts you to input a new unique attribute name and the data type of that new attribute.
Only text attributes are available for tokenization and embedding creation.
The attribute data type acts as a safeguard for your calculated attribute because the calculation will throw an error when the returned value does not match the specified data type. Also, the data type will be considered in the data browser, so every data type has different filtering options. For example, an attribute of the boolean data type can only be toggled on or off during filtering, there are no additional options for it. If you want to know more about the effects of selecting the data types, please read the section about attribute filters.
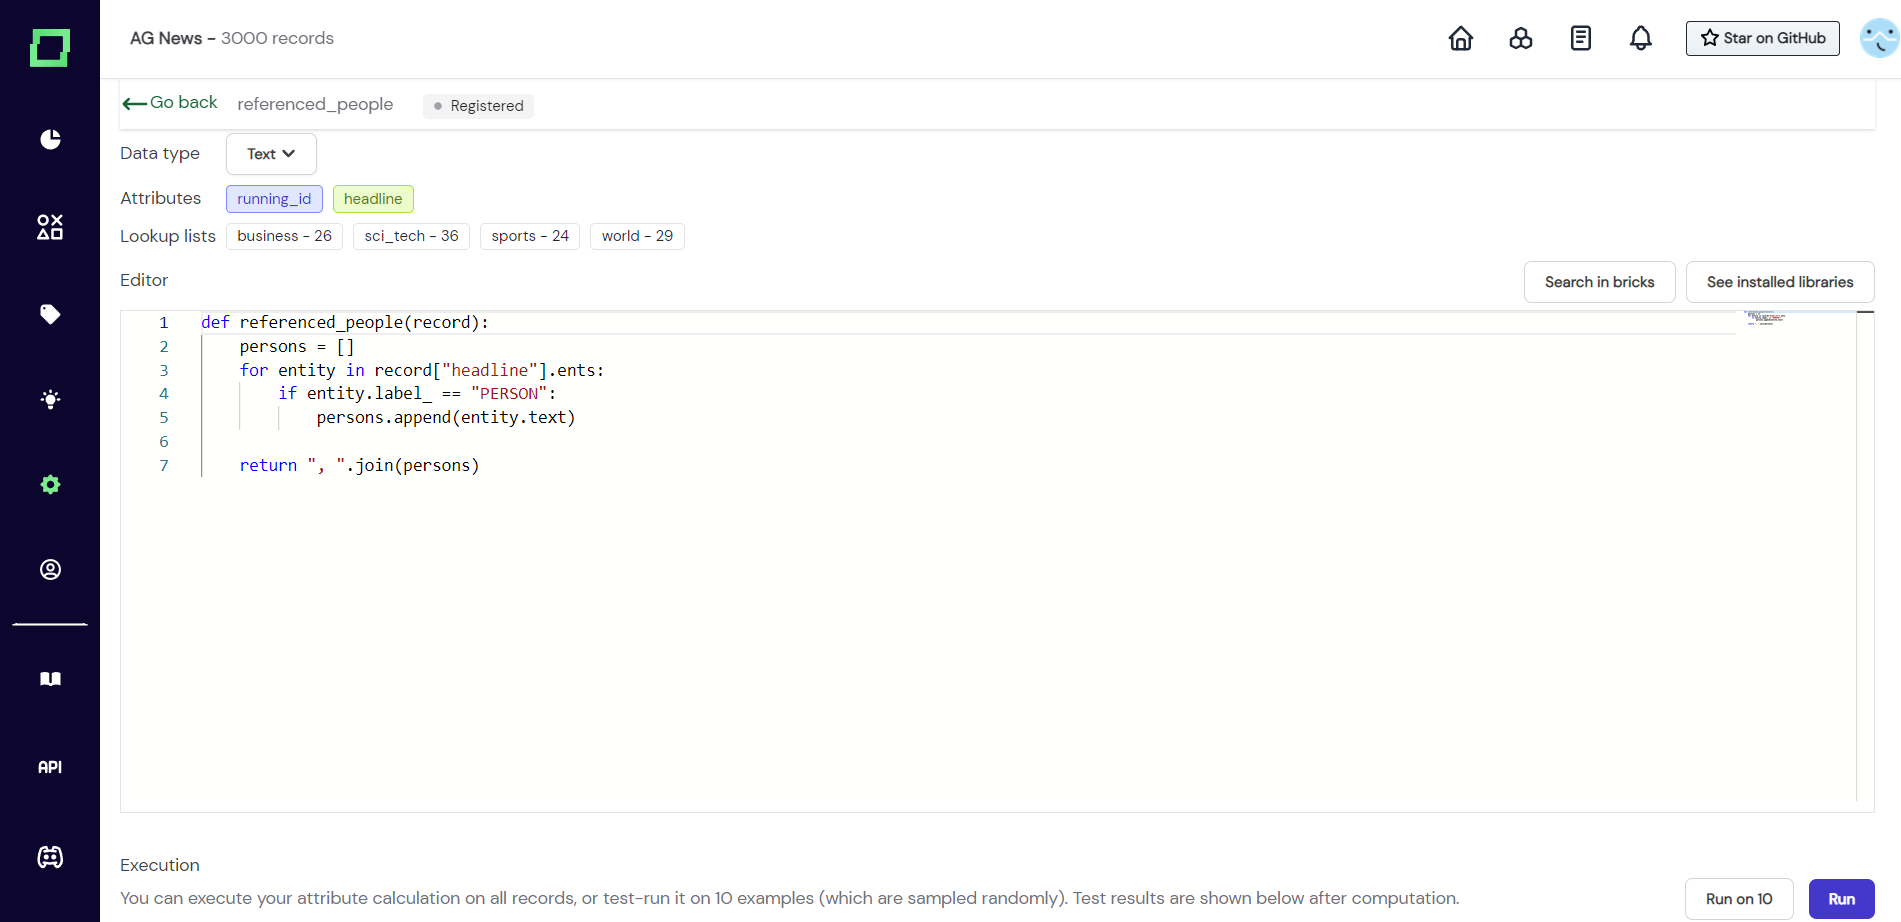
After creating the function, we are greeted by the usual interface that you should be familiar with from the labeling functions. The input that you get is still a single record, that can be treated as a dictionary, where every text attribute is of type spaCy Doc (see their documentation). That is why we can iterate through the entities of the attribute "headline" that were extracted during the tokenization process.
You can use requests in your attribute calculation. When you want to enrich your records with an outside or local running API, then you can use the requests Python package in your attribute calculation function.
After assembling your attribute in the function you just have to return it. Make sure that the data type matches the one you specified because otherwise you will get an error. Good practice is to use the "run on 10" feature before committing to the attribute calculation, as this will usually clear up any bugs.
When everything is finalized and you tested your function, you can press on "run" in the bottom right corner. This will execute the attribute calculation function on your whole data. Please note that this calculated attribute is immutable after execution, so if you need to adjust something, you will need to create a new attribute and copy the old code.