
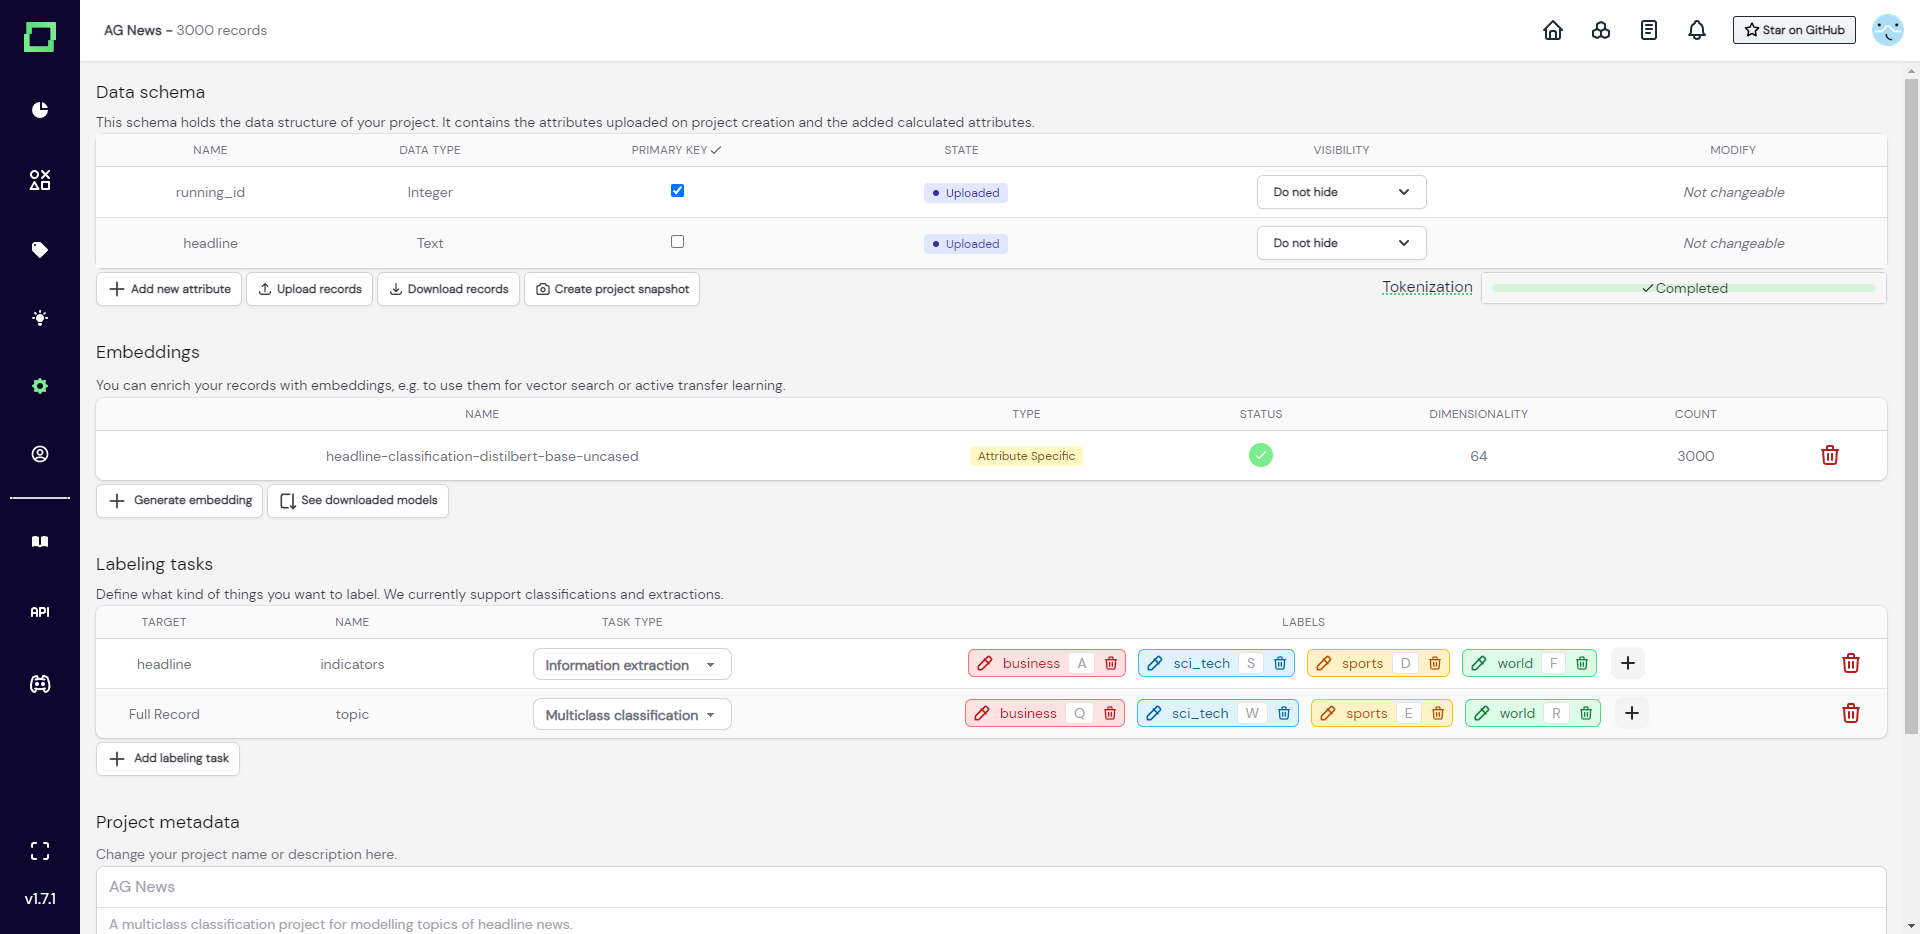
Labeling tasks
Before you can label anything in refinery, you must first create a labeling task. Labeling tasks include information about the labeling target (full record or certain attribute), the type of the task, and the available labels. Each labeling task has a unique name that is used to identify it on other pages, e.g. in the labeling view and data browser.
Types of labeling tasks
The labeling task type defines the granularity of your labeling. Currently, we support these two options:
Multiclass classification: Gives you the option to assign the target record or attribute exactly one of the available labels. Good for downstream tasks like classification.Information extraction: Gives you the option to assign any token of the selected attribute to exactly one label. Required the labeling task to be defined on an attribute, and not on the full record. Good for downstream tasks like named entity recognition, sentence segmentation, or part-of-speech tagging.
We're working on adding further types in the future, such as relationship labels or native multilabel classifications (which, at the moment, you'd need to build via a workaround of multiple multiclass classifications). Let us know if you need something that refinery does not offer at the moment!
Creating labeling tasks
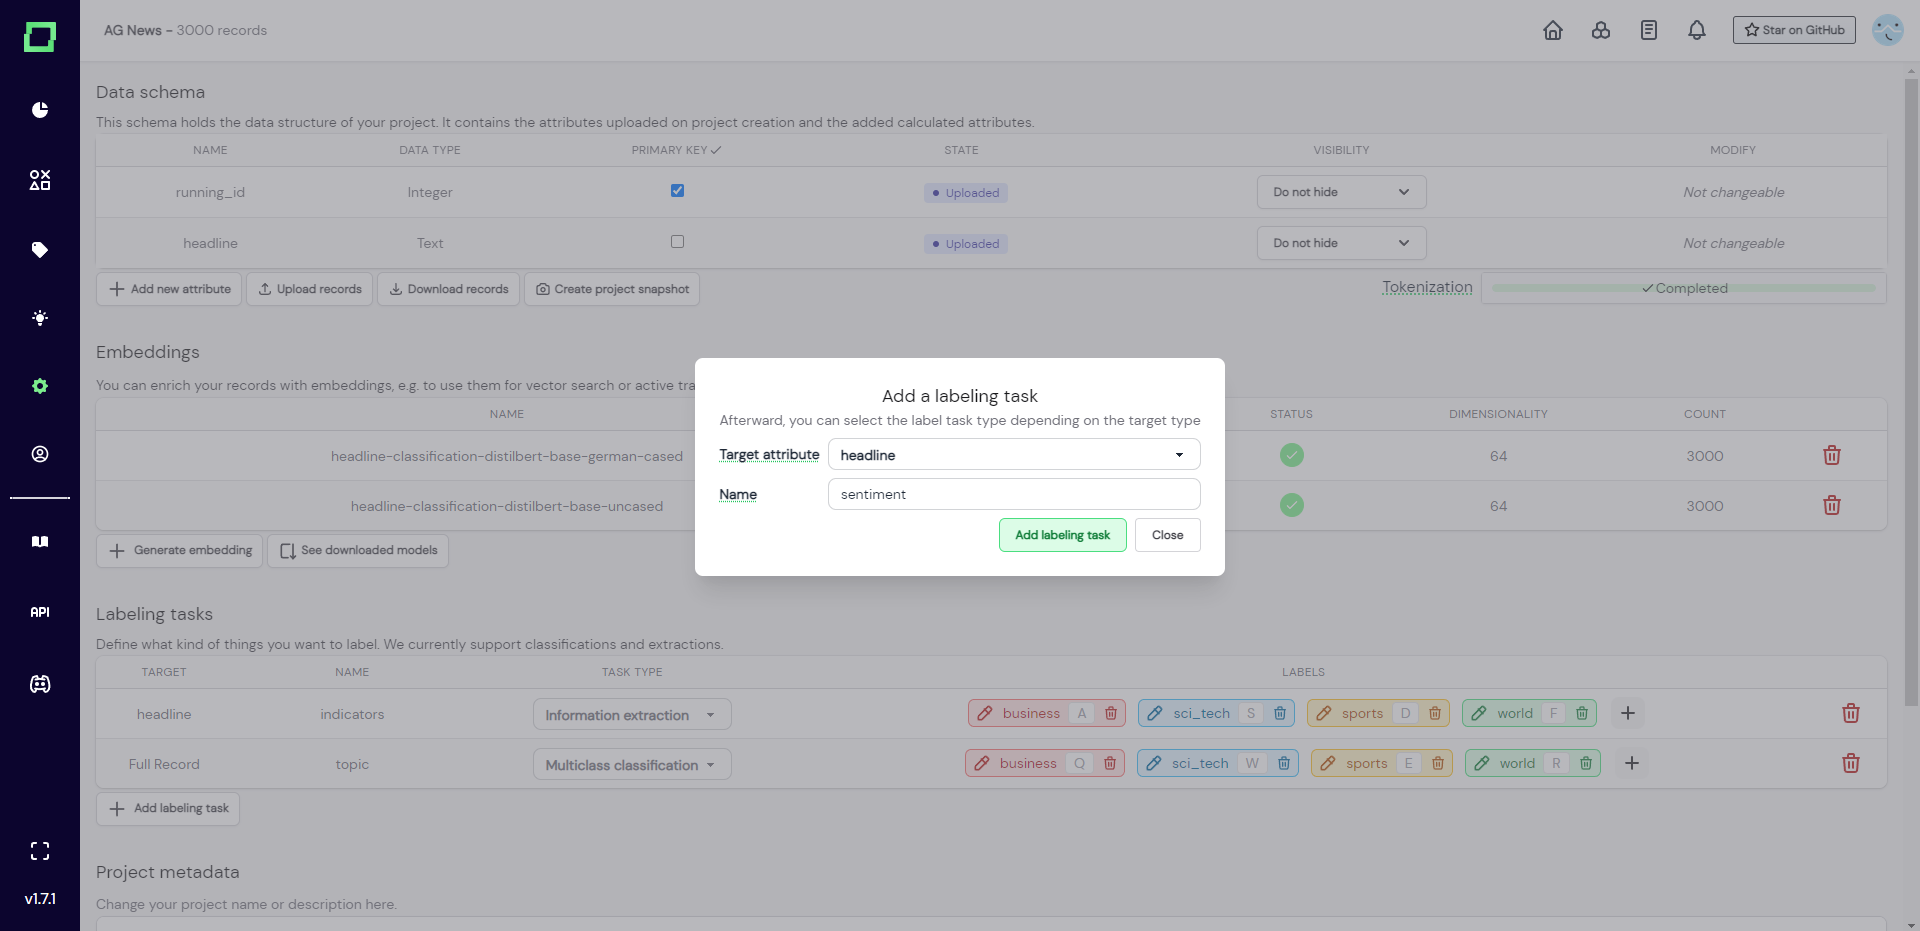
To add a labeling task, simply click on the "Add labeling task" button on the settings page.
A modal will open up, which asks you for the attribute you want to label. This selection will determine the available task types for later. If you want to label for classification and don't want to differentiate between single attributes, go with the full record option. After also providing a unique name for the task, you can now create the labeling task.
Deleting labeling tasks
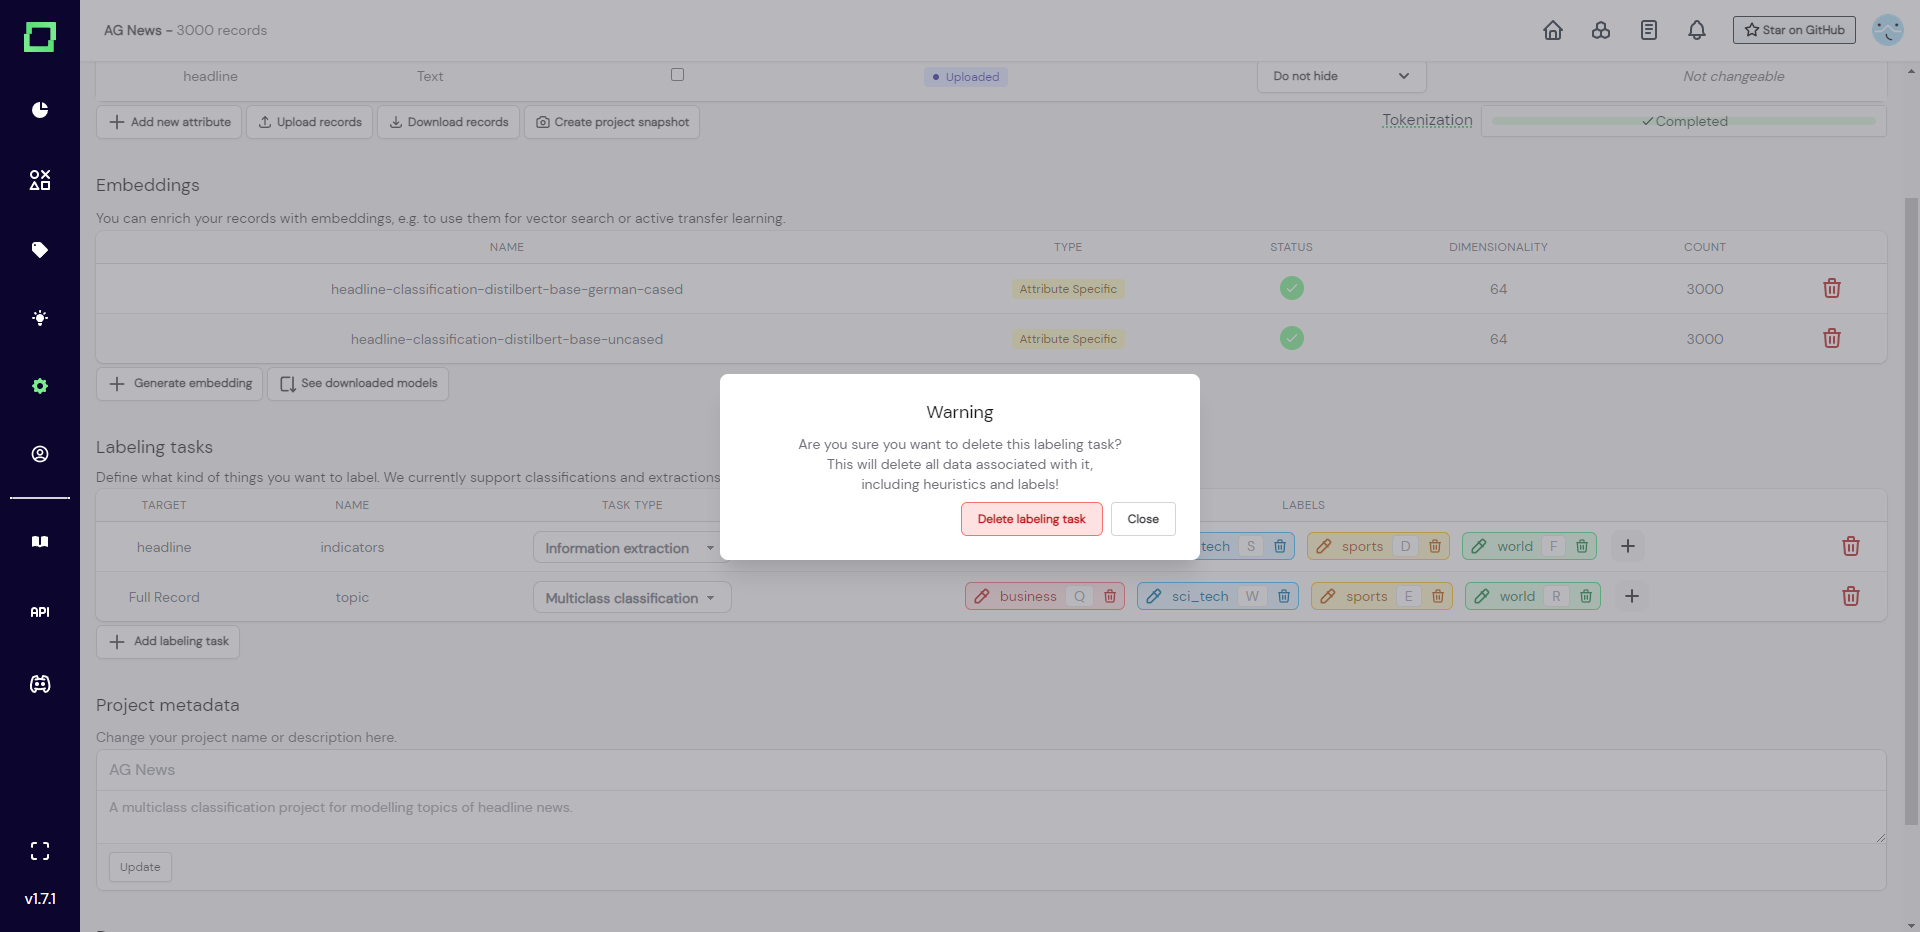
Deleting a labeling task has far-reaching consequences as it is associated with labels, heuristics, and some filters in the data browser. If you delete this structure, the associations will be removed, too, which means that the labels and labeling efforts of that specific task will also be removed from the project.
If you are sure that you want to delete the labeling task, just click on the red trashcan icon on the very right of the labeling task on the settings page. There will be an explanatory modal that requires your confirmation (see Fig. 3).
Labels
Creating labels
Labels can be created at any time during the project, both on the settings page and while labeling your records. This gives you a lot of flexibility if requirements change during the project.
Creating information extraction labels automatically create lookup lists. For every new label created on an extraction task, refinery will automatically create a lookup list with the exact name of that label. If you label tokens with said label, it automatically gets added to the lookup list. This is just a convenience feature. You don't have to use the lookup lists, but they are often a great starting point for keyword labeling functions. Deletion of the label will NOT delete the associated lookup list, though.
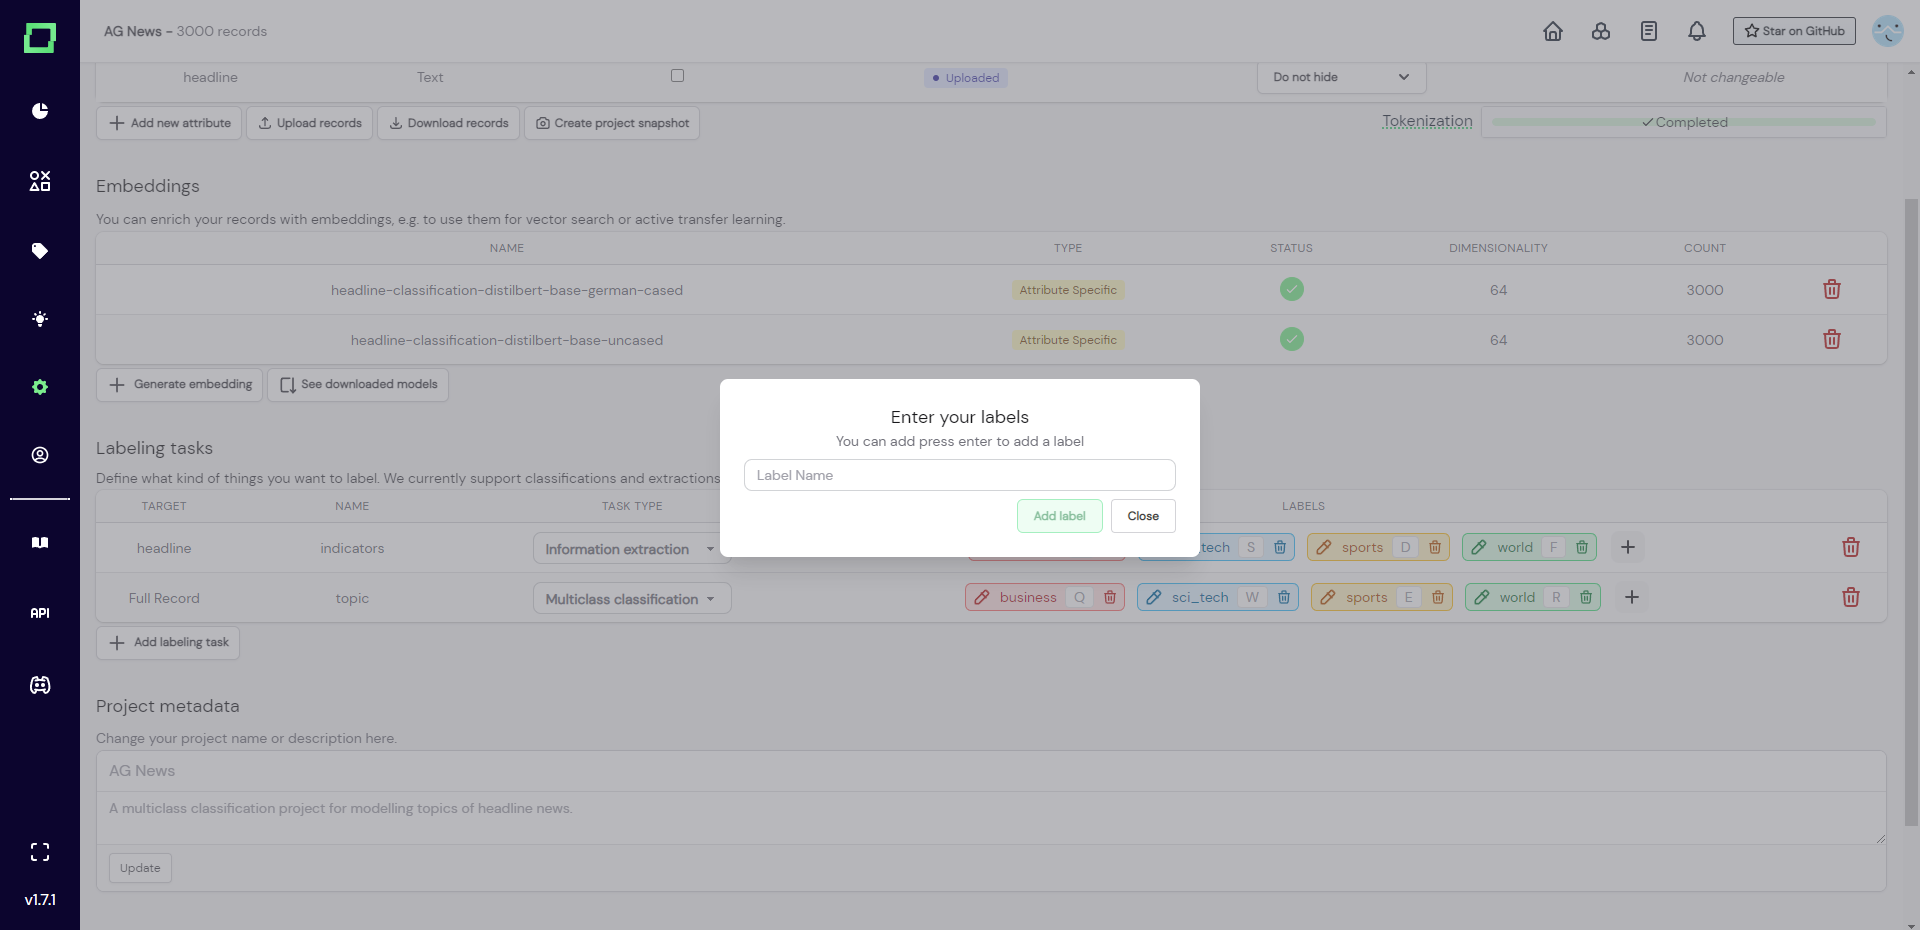
In order to add labels on the settings page, you just have to press on the "+" icon, which will open a modal where you must enter a unique label name for that task. So you could use the same label names for different tasks (as can be seen in Fig. 2). Users oftentimes want to add more than just a single label, which is why the modal stays open even after adding the label (shortcut confirm with enter key). That way you can add multiple labels really fast and when you're done, just close the modal with the "close" button (see Fig. 4).
You can also add labels while in the labeling suite (see Fig. 5) by typing the name of the new label into the search bar and pressing the "+" icon next to the search bar. This will add the new label to the available options, which you will have to manually select afterward in order to label your record.
Renaming labels
Sometimes, you might choose the wrong name for a label, or you just want to shorten it because it clutters your labeling view. To stay flexible throughout the project, you can rename labels from the settings page. In order to do that you have to click on the little color pipette icon on the left side of the label. A modal will appear that lets you customize your label with a color and a keyboard shortcut, but if you want to rename it, you have to click on the label itself at the very top of that modal (see Fig. 6).
When renaming the label, refinery is aware that this label might have been used in heuristics, lookup lists, or other parts of your project. This is why there is a mandatory check before you can actually rename the label. This will display all the parts in refinery where this label name appears. Please keep in mind that we provide a "best guess" for these changes. Since custom written Python code is very versatile some changes might not be what you intended.
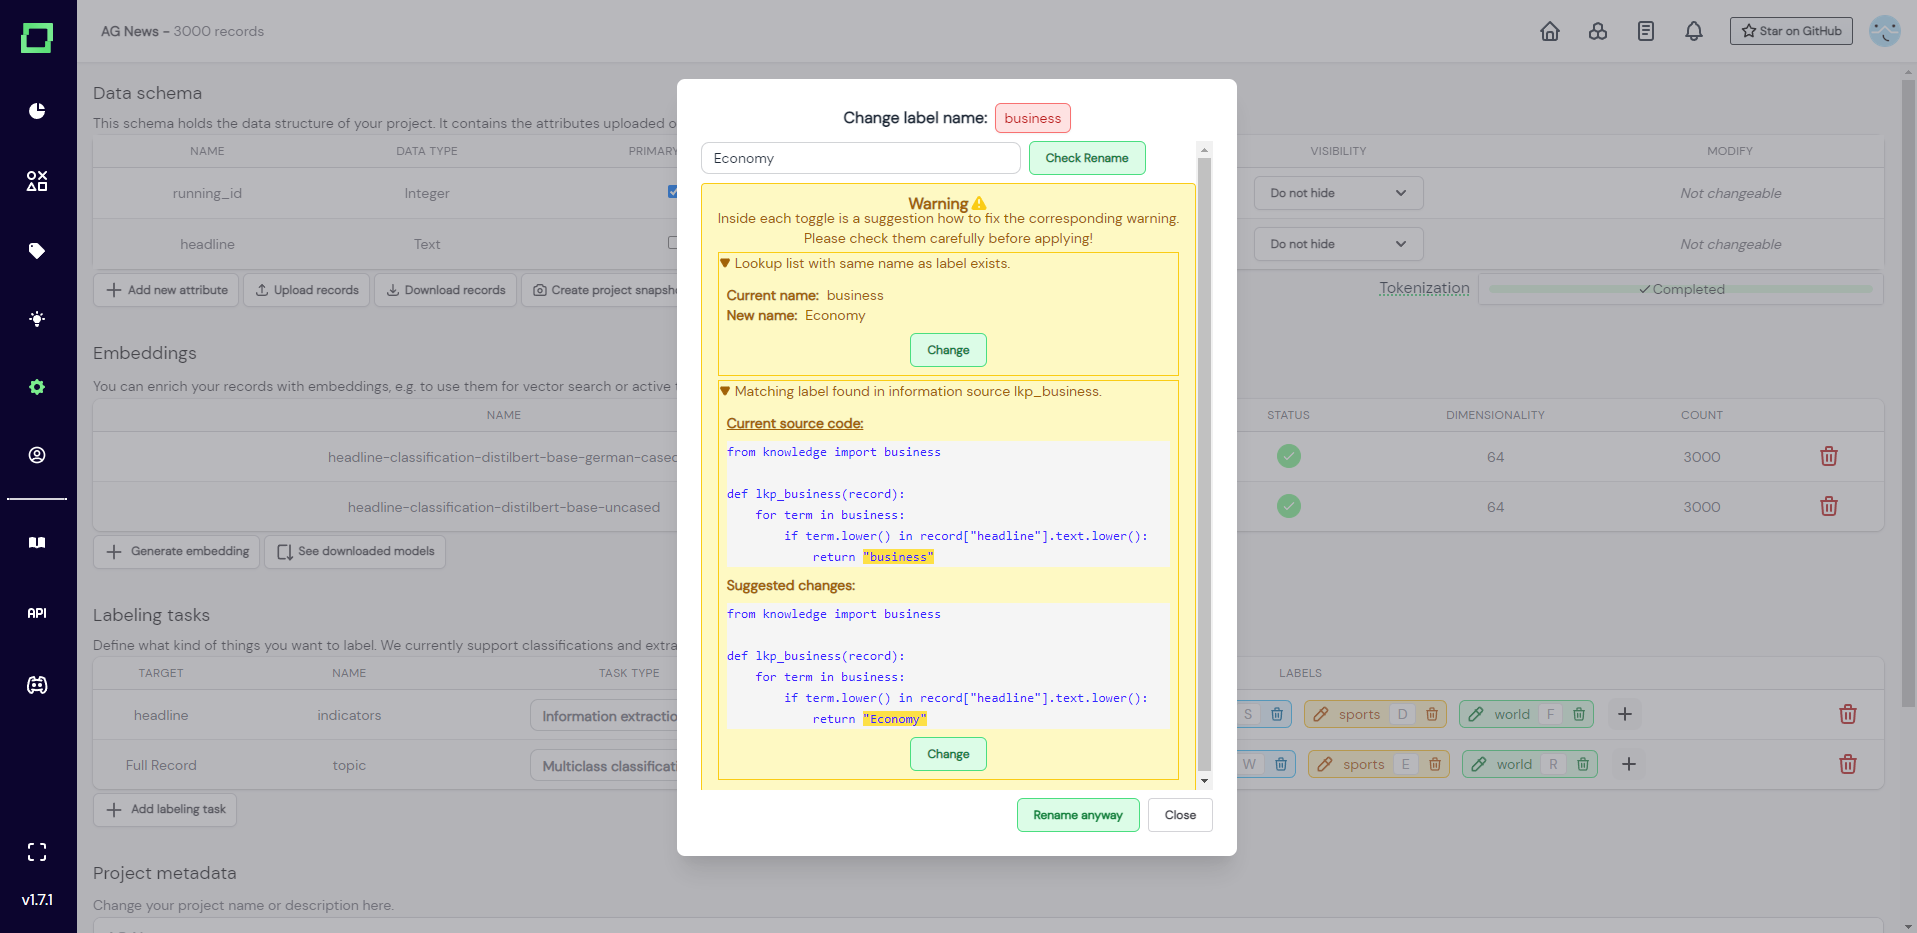
Be careful with renaming the lookup lists. Currently, if you have multiple labels with the same name in different tasks, it could occur that renaming a classification label will display a change warning for a lookup list with the same name that was created from an extraction task. So before renaming a lookup list, be sure that it is not linked to an existing information extraction label.
Deleting labels
Deleting a label will also delete all the manually labeled data associated with it, as the given label would have no reference to a label and labeling task anymore. The other labels and tasks will be unaffected.
In order to delete a label, just go to the settings page and click on the little trashcan icon right next to it (not the one for the labeling task!). As this will delete all the manual labels associated with this label, there will be a modal asking for confirmation.
Quality of life
Label colors and keyboard shortcuts
You can customize your labels for more efficient labeling. If you want to change the color of your label, just click on the little pipette icon next to it on the settings page. That page also allows you to set a unique keyboard shortcut for that label. Just press the desired key, which will then be saved automatically. The chosen shortcuts will also be displayed on the settings and labeling suite.