
Manual labeling
Manual labeling is a crucial part of creating high-quality training data as the domain experts provide meaning and context, which the algorithm can then use to recognize patterns and make informed decisions. Because it is such an important part, we spent much time making this experience in refinery as comfortable as possible.
This page will cover the labeling capabilities of refinery in a single-user setting. If you are looking for multi-user features please visit the dedicated page on that. Everything on this page still applies to the general labeling workflow.
Core concept: labeling sessions
Manual labeling happens exclusively in so-called labeling sessions. A labeling session consists of not more than 1000 records and can be started from two locations: the data browser and the navigation bar. Labeling sessions are persisted in the database, but more on that later.
Starting a session from the navigation bar
If you start a labeling session from the navigation bar (label icon, 3rd option from the top in Fig. 1), you will always get the first 1000 records of your data in the default order. That order is determined during data upload and is not influenced by refinery, but rather by the database itself. Additionally, you will always start at the first position of those 1000 records.
Starting a session from the data browser
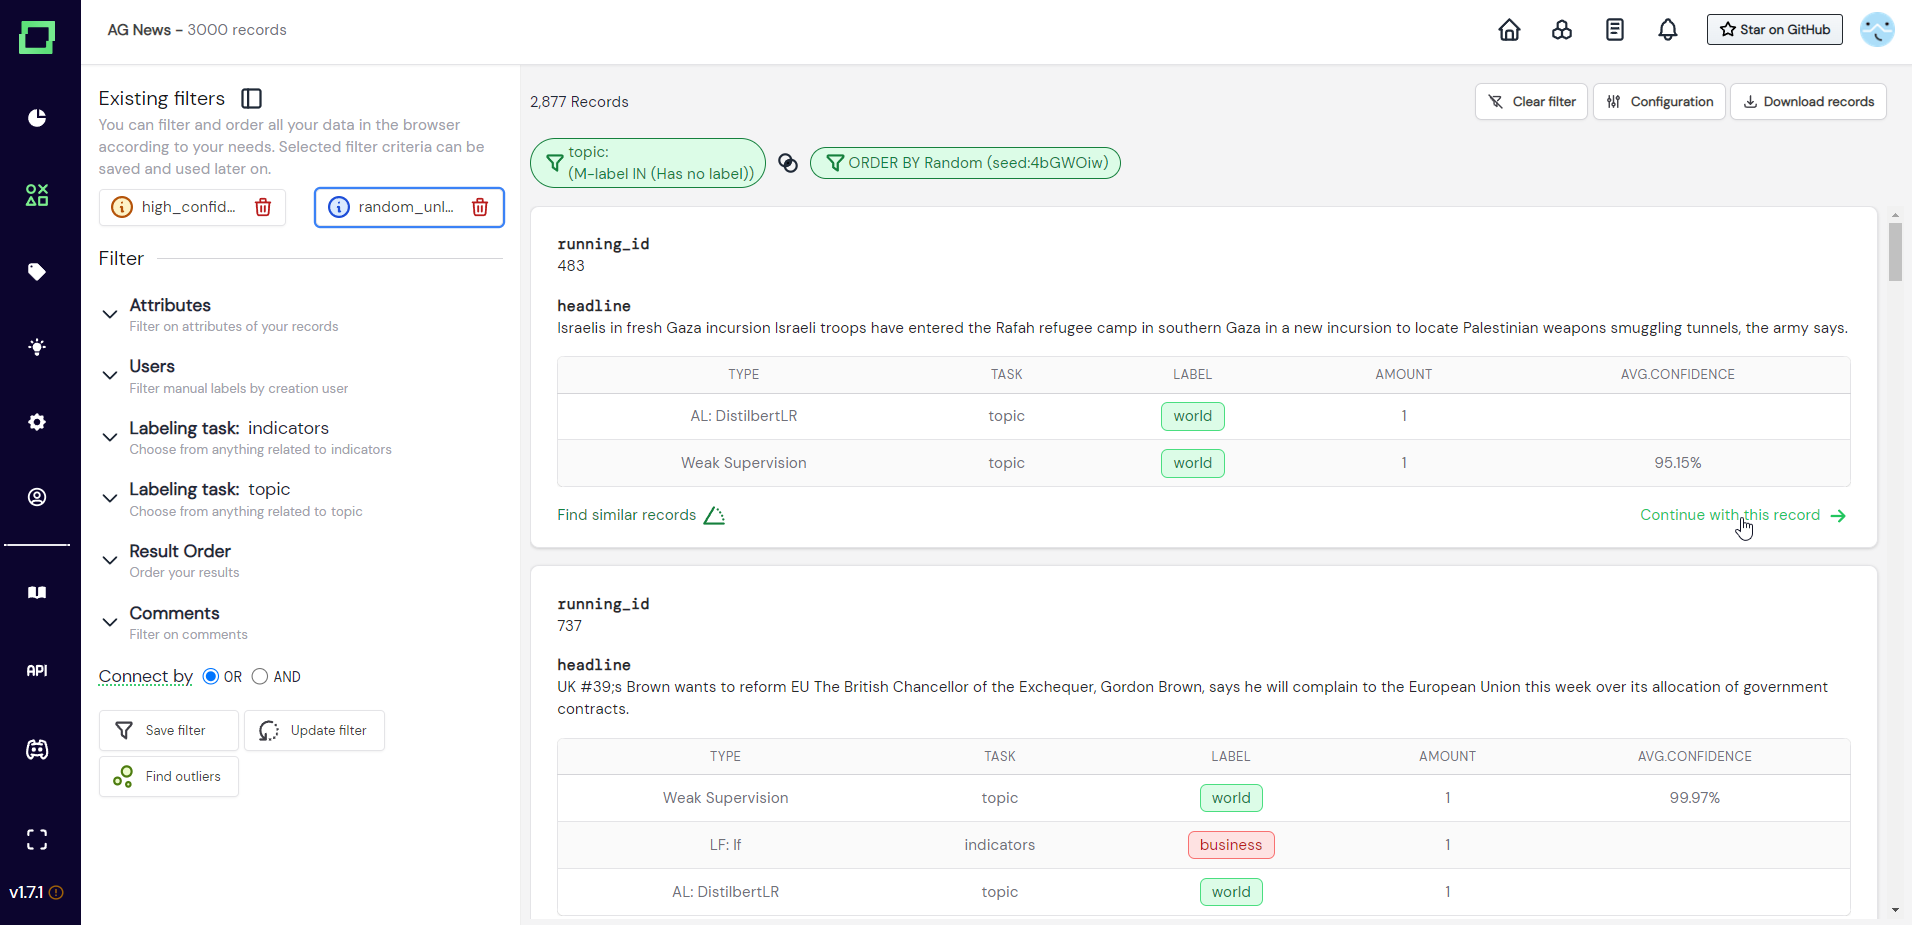
Starting a labeling session from the data browser is the most preferred scenario for manual labeling as it gives you full flexibility. To start a session, you first have to select the records that you want to label. This is because the labeling session will always consist of the records that are visible in the data browser at that time and will also have the same order as in the data browser. After you selected your filters or data slice, you can click on "Continue with this record" on the desired record (see Fig. 2).
After clicking "Continue with this record", you will be redirected to the labeling suite with the first 1000 records of the selection (see Fig. 3).
Need to label more than 1000 records of a single data slice? In that case you could split up that slice according to an attribute like "running_id". Select the data slice in the data browser, add the positional filter (e.g. "running_id" > 1000) and start the session from there!
Persistence of labeling sessions
For a frustration-free experience, it is important to understand when things are persisted and when they are lost. Every labeling session that was started is persisted in the database and can be accessed again at later times. Refinery persists the records of the labeling session, not the filter settings. Because of this design, you can even access labeling sessions where the corresponding data slice or filter settings have been deleted. Also because of this design, you cannot retrieve the filter settings that were used to create a labeling session. So if you did not save your filter settings of the data browser as a data slice, you will lose those settings once you start the labeling session. The best practice for this scenario is either saving it as a data slice or starting the labeling session in a new tab.

But even though labeling sessions are persisted in the database, there currently
is no UI element that lets you select past labeling sessions. This is why Fig. 3
also contains the URL, which we are going to inspect now. The URL after the domain
has the following template: /app/projects/$PROJECT_ID/labeling/$SESSION_ID?pos=$POS&type=$TYPE.
Relevant for us is the SESSION_ID because by altering this, you can access previously
persisted labeling sessions. There might be a UI element in the future for this,
but at the moment, this is how you can still access old labeling sessions. If you
don't want to leave refinery, we suggest saving important sessions as data slices
or at least their IDs as comments.
Entering a valid labeling session ID that has not been persisted in the database creates a new one with the default records and default ordering.
If you want to jump far ahead to a certain position in the labeling session, modify the "pos" attribute in the URL.
Labeling workflow
Creating labels
Ideally, you have everything set up already before starting your labeling session. But if you should come across a record in your labeling workflow that deserves a label that has not been registered yet, you can create that new label directly from the labeling suite (see Fig. 4). More on creating labels in this section.
Assigning labels
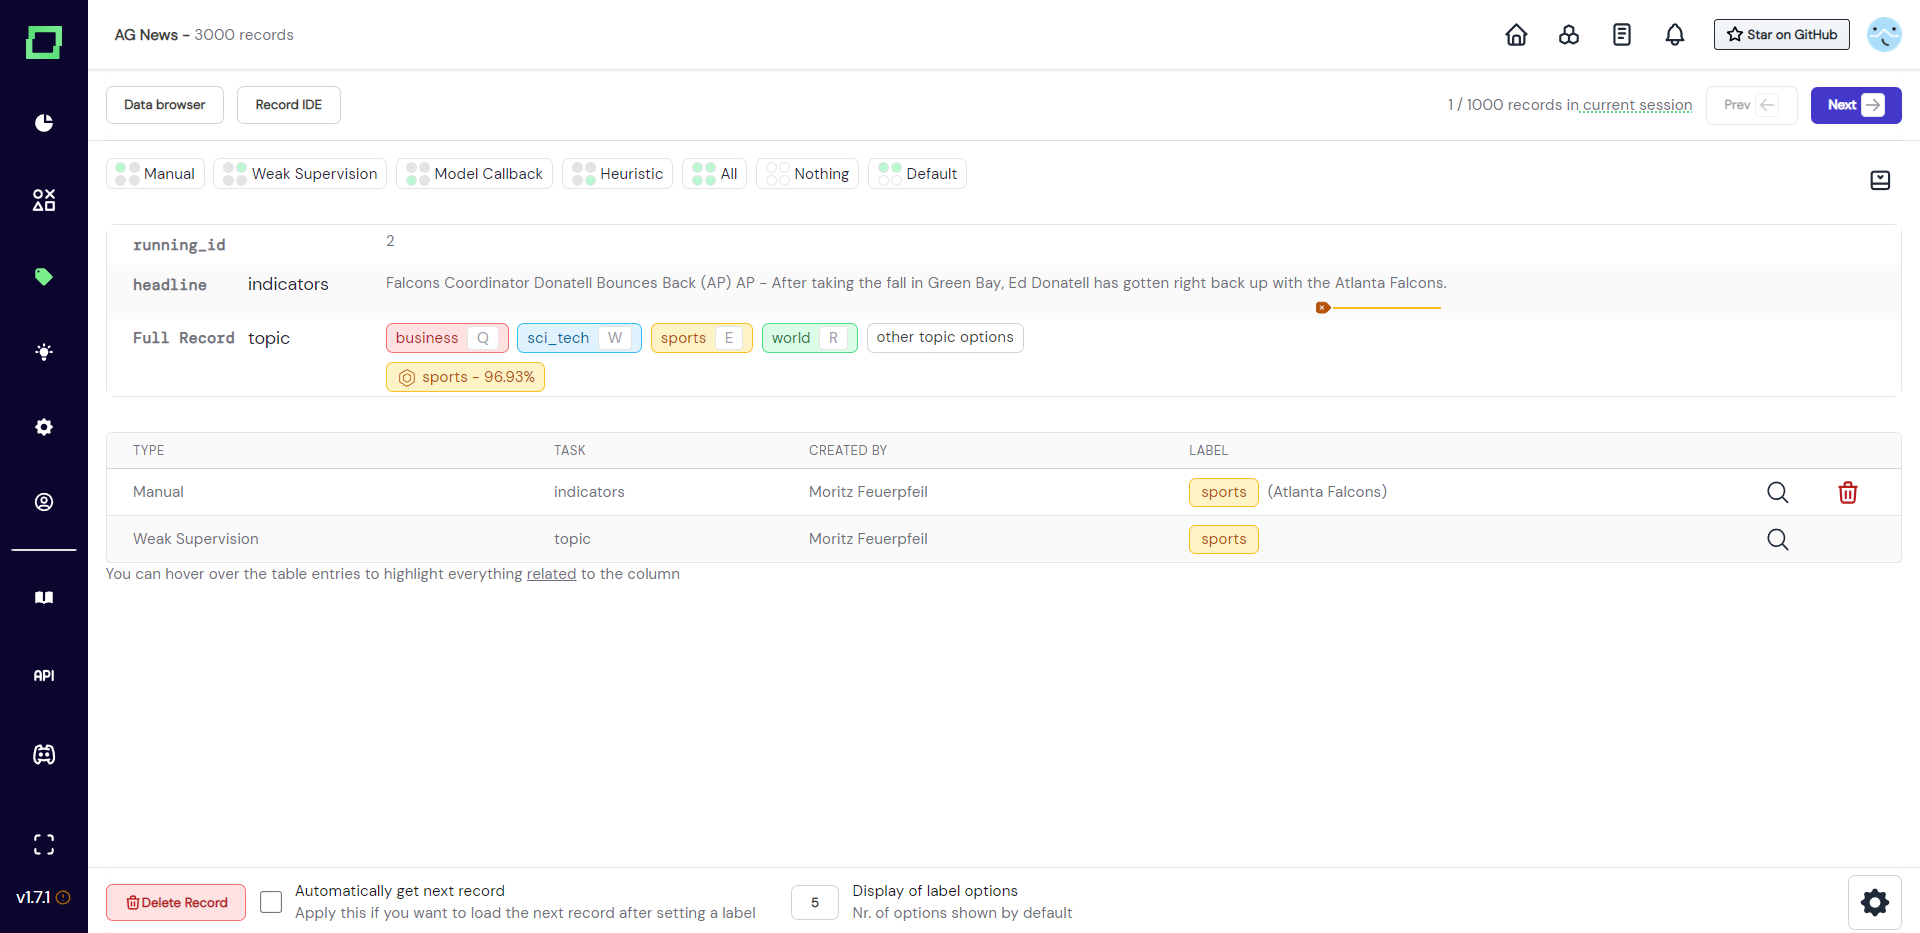
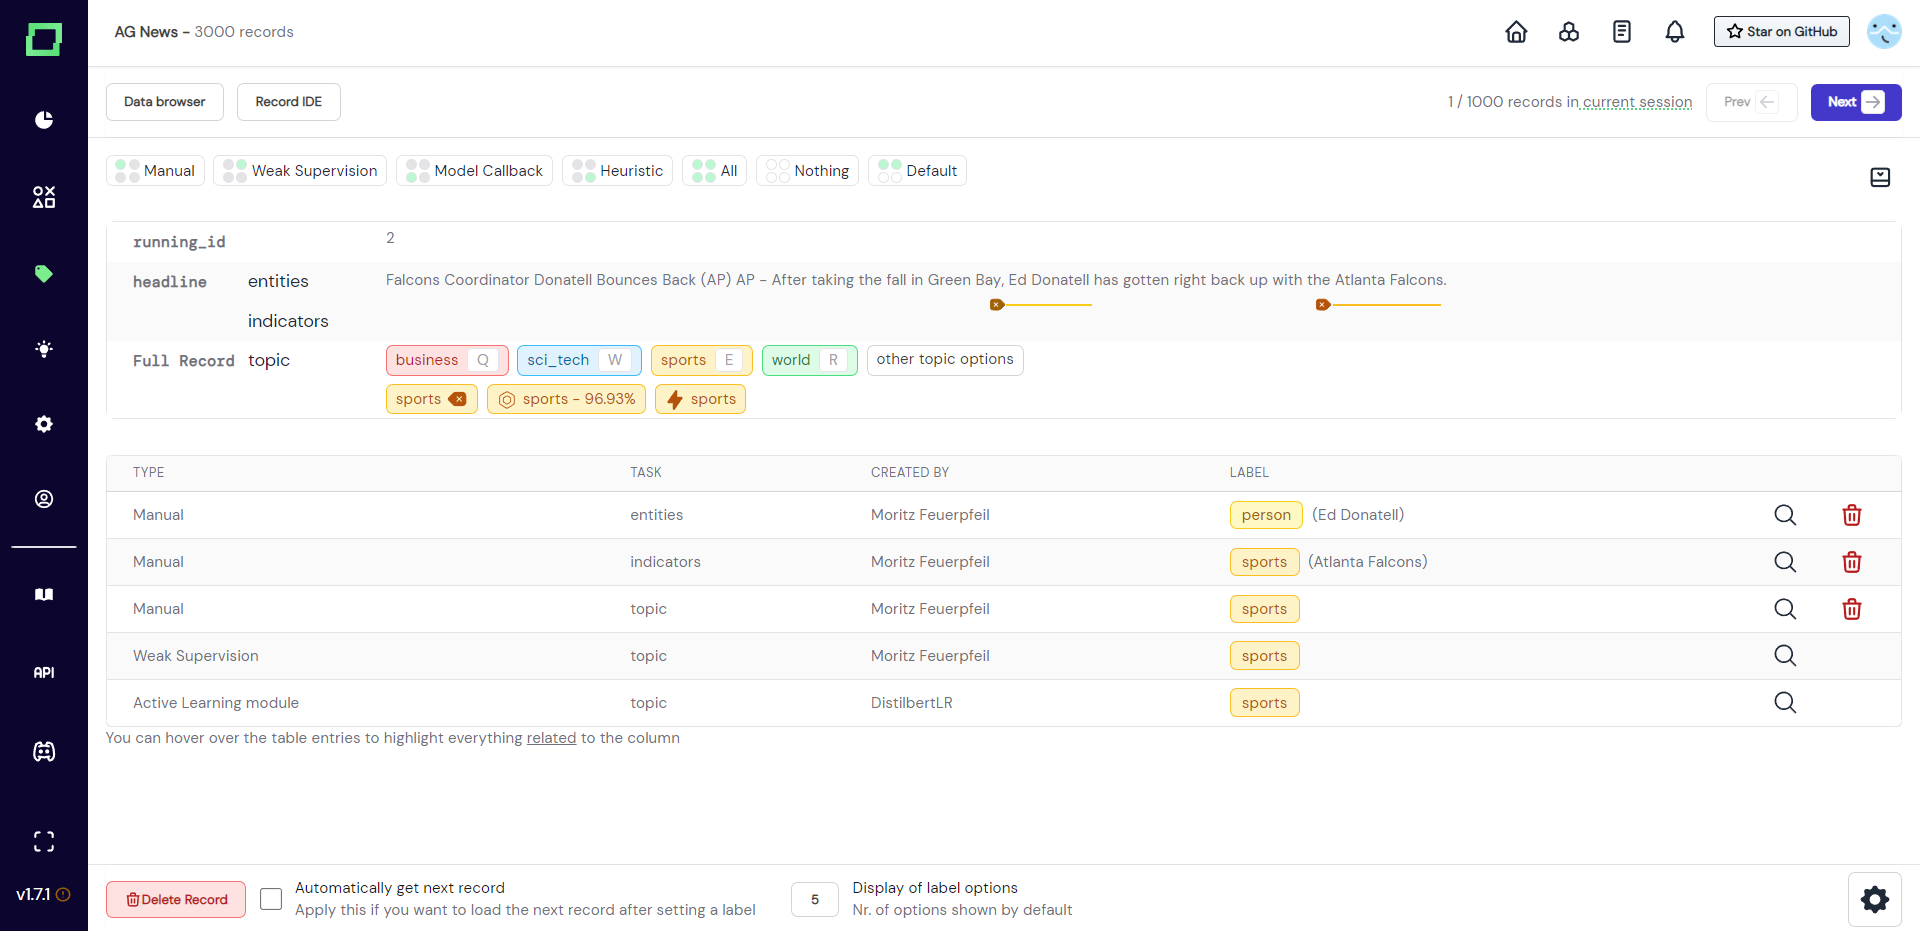
As there are two different types of labeling tasks, there are also two different types of labels you can assign. Every label must be assigned to a certain labeling task, which is why you need to have at least one classification or extraction labeling task. As soon as there is a task available, it will be displayed in the labeling suite. If it is a task defined on an attribute, it will be displayed next to that attribute (see "indicators" in Fig. 5). If it is a classification labeling task defined on the whole record, it will be displayed next to "Full Record" (see "topic" in Fig. 5).
Classification label
Classification labels are displayed without any user interaction. If you want to assign a label, just click on the colorful badge or press the keyboard shortcut that you assigned on the settings page. This adds a new entry to the label table below the record.
Every classification task can only carry a single label for one record as refinery currently supports multiclass classification labeling, but not multi-label classification.
Information extraction label
Extraction labels are a little different because they do not label whole records or attributes, but label only spans (or tokens if you will) within a textual attribute. In order to select the span that you want to label, you simply drag across it with your mouse. You don't have to select all the right characters of a single token, refinery expands that selection to the whole token automatically. You can see how the tokenizer split up your data by hovering over the text. This will also display the automatically detected entities as tooltips if it is supported by the spaCy model that you selected at project creation (see spaCy documentation).
After you made your selection, a modal will appear that displays the available label options for that task. Just select the label you want to add to the highlighted span. If there are multiple extraction tasks on the same attribute, they are displayed beneath each other (see Fig. 6).
Every span can have any amount of labels.
Weak supervision label
If you already ran weak supervision on your data, there will be additional badges for the weak supervision predictions (if not hidden by the user). The weak supervision classification label can be recognized by the confidence and hexagonal-ring icon on the badge, a weak supervision extraction label will be displayed as a non-deletable dotted line below the span.
To accept the weakly supervised label for a classification task, just click on the badge. A weakly supervised label for an extraction task must be set manually without assistance.
Deleting assigned labels
Deleting individual manually set labels is as easy as clicking the delete icon. This can be the delete icon right next to the label in the record, or the trashcan icon in the label overview table, both work identically. There will be no confirmation prompt.
If you want to bulk delete a label and all the assigned manual labels with it, you have to delete that label from the task itself (see here).
Customizing the labeling view
Some people want to see all the available information on their screen, some like to stay minimalistic. Because of personal preferences and also possible biasing, we allow for a high level of customization within the labeling suite.
Weak supervision, heuristics, and model callbacks
There are several different types of labels one can have in refinery. And it does not always make sense to display all of them in the labeling suite as this could bias the annotating person towards a label that was given by a heuristic or weak supervision, which would undermine the validation and improvement of them. To put the user in full control, refinery allows for very granular display options.
Directly above the record display are buttons that control the visible labels and predictions. The position of the circle is representative of the displayed type, e.g. top left circle stands for manual label. To display - say - the weak supervision labels, click on "Weak Supervision", which will add these labels to the view. The buttons that are visible by default do not reflect the state, they are only for setting the state (see Fig. 9).
If you want to inspect the state, you have to open the drawer menu (see Fig. 10). Here you can also set the visible types for each labeling task and label individually.

Labeling suite settings
The labeling suite settings can be accessed on the bottom right corner of the screen indicated by a gear icon. Here, you can further customize your labeling suite UI. The most important settings include hiding the label overview table, displaying heuristic confidence, and expanding the classification label display.
All the options are explained in the UI and will not be further discussed here for the time being.
Quality of life
Highlighting
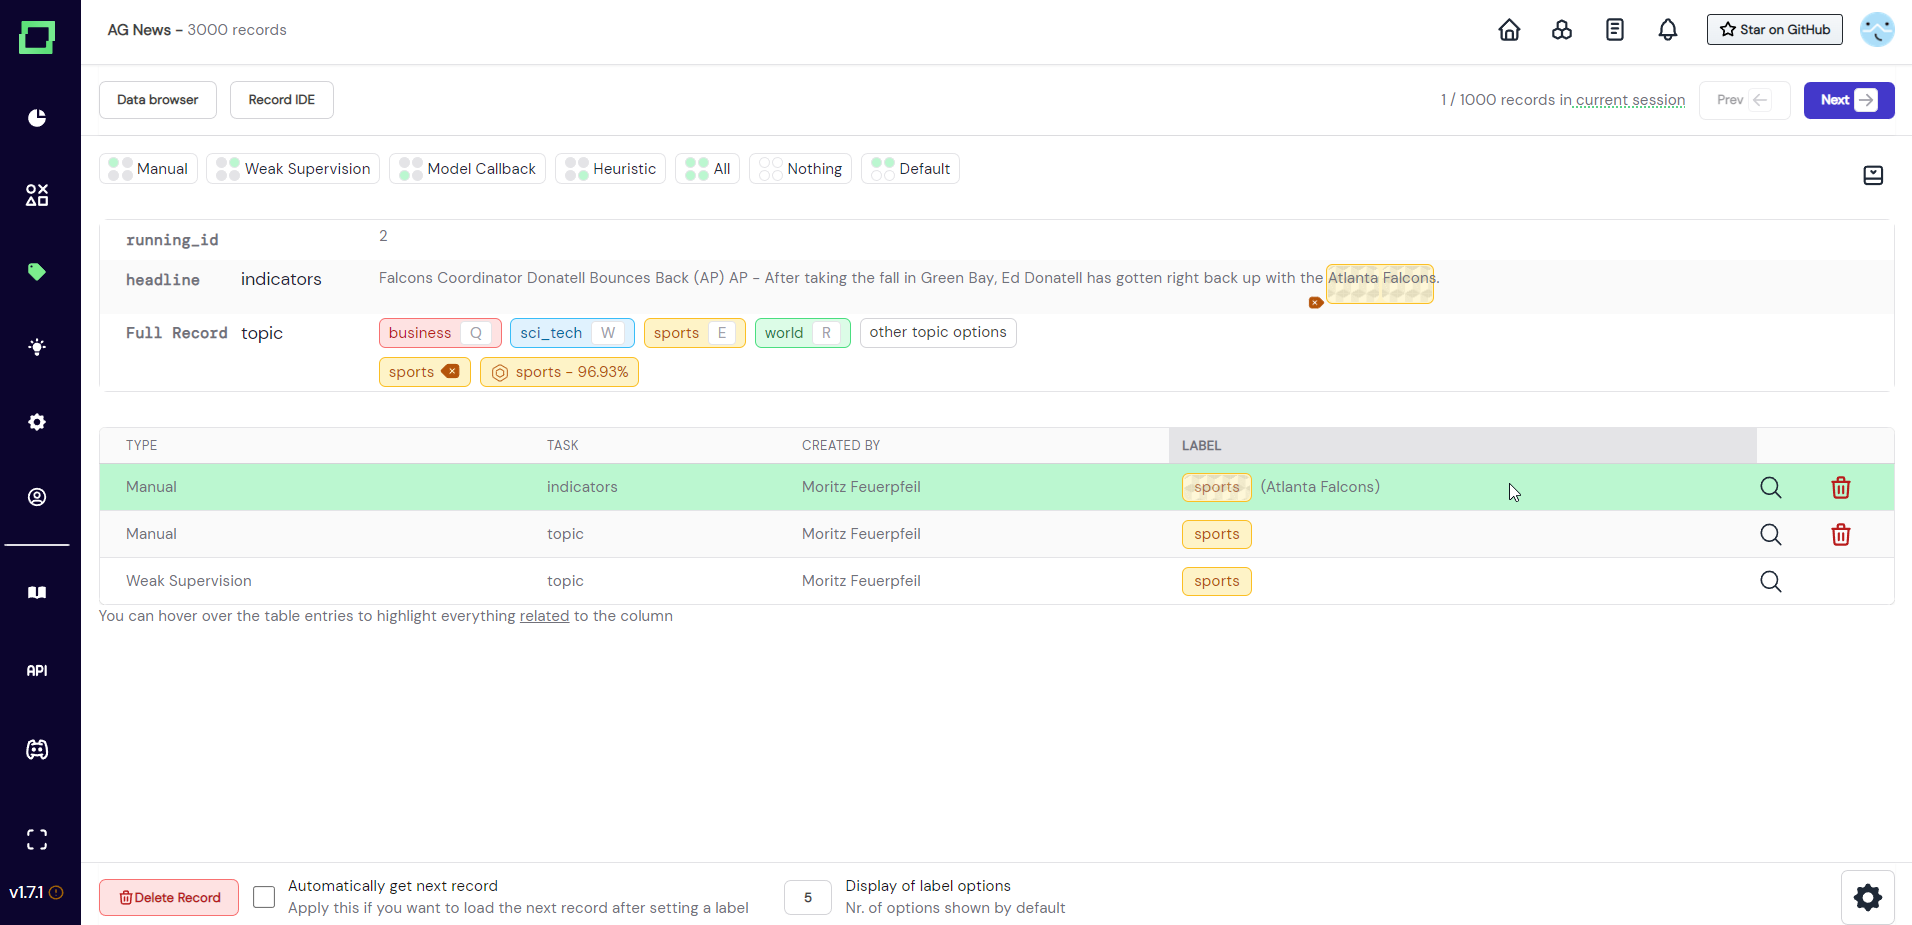
For easier identification of labels and labeling tasks, refinery implements a highlighting feature. Whenever you hover over a label, refinery will highlight the corresponding entry in the label overview table below the record.
You can also hover over individual rows of the table to see them highlighted in the record. If you want to highlight just a single row, make sure to hover over the magnifying glass icon on the very right. You can also highlight whole groups of labels by hovering over their shared information (e.g. the same labeler, task, or type).
Customize your hovering color in the labeling suite settings in the bottom right corner for a personal touch!
Record IDE
The labeling workflow comes integrated with a lightweight record IDE. Here you can take a look at a specific record from a programmatic point of view, which helps in prototyping labeling functions or testing outside APIs with requests. For the full documentation, please visit the dedicated record IDE page.