
Deploy
Deploying a model in gates is easy - we don't even need a quickstart. You will see how it works here.
Requirements
Before we can start deploying a model in gates, please make sure that you have a refinery project up and running which contains a setup for weak supervision.
Also, please make sure that you've created an access token.
Setting up the model
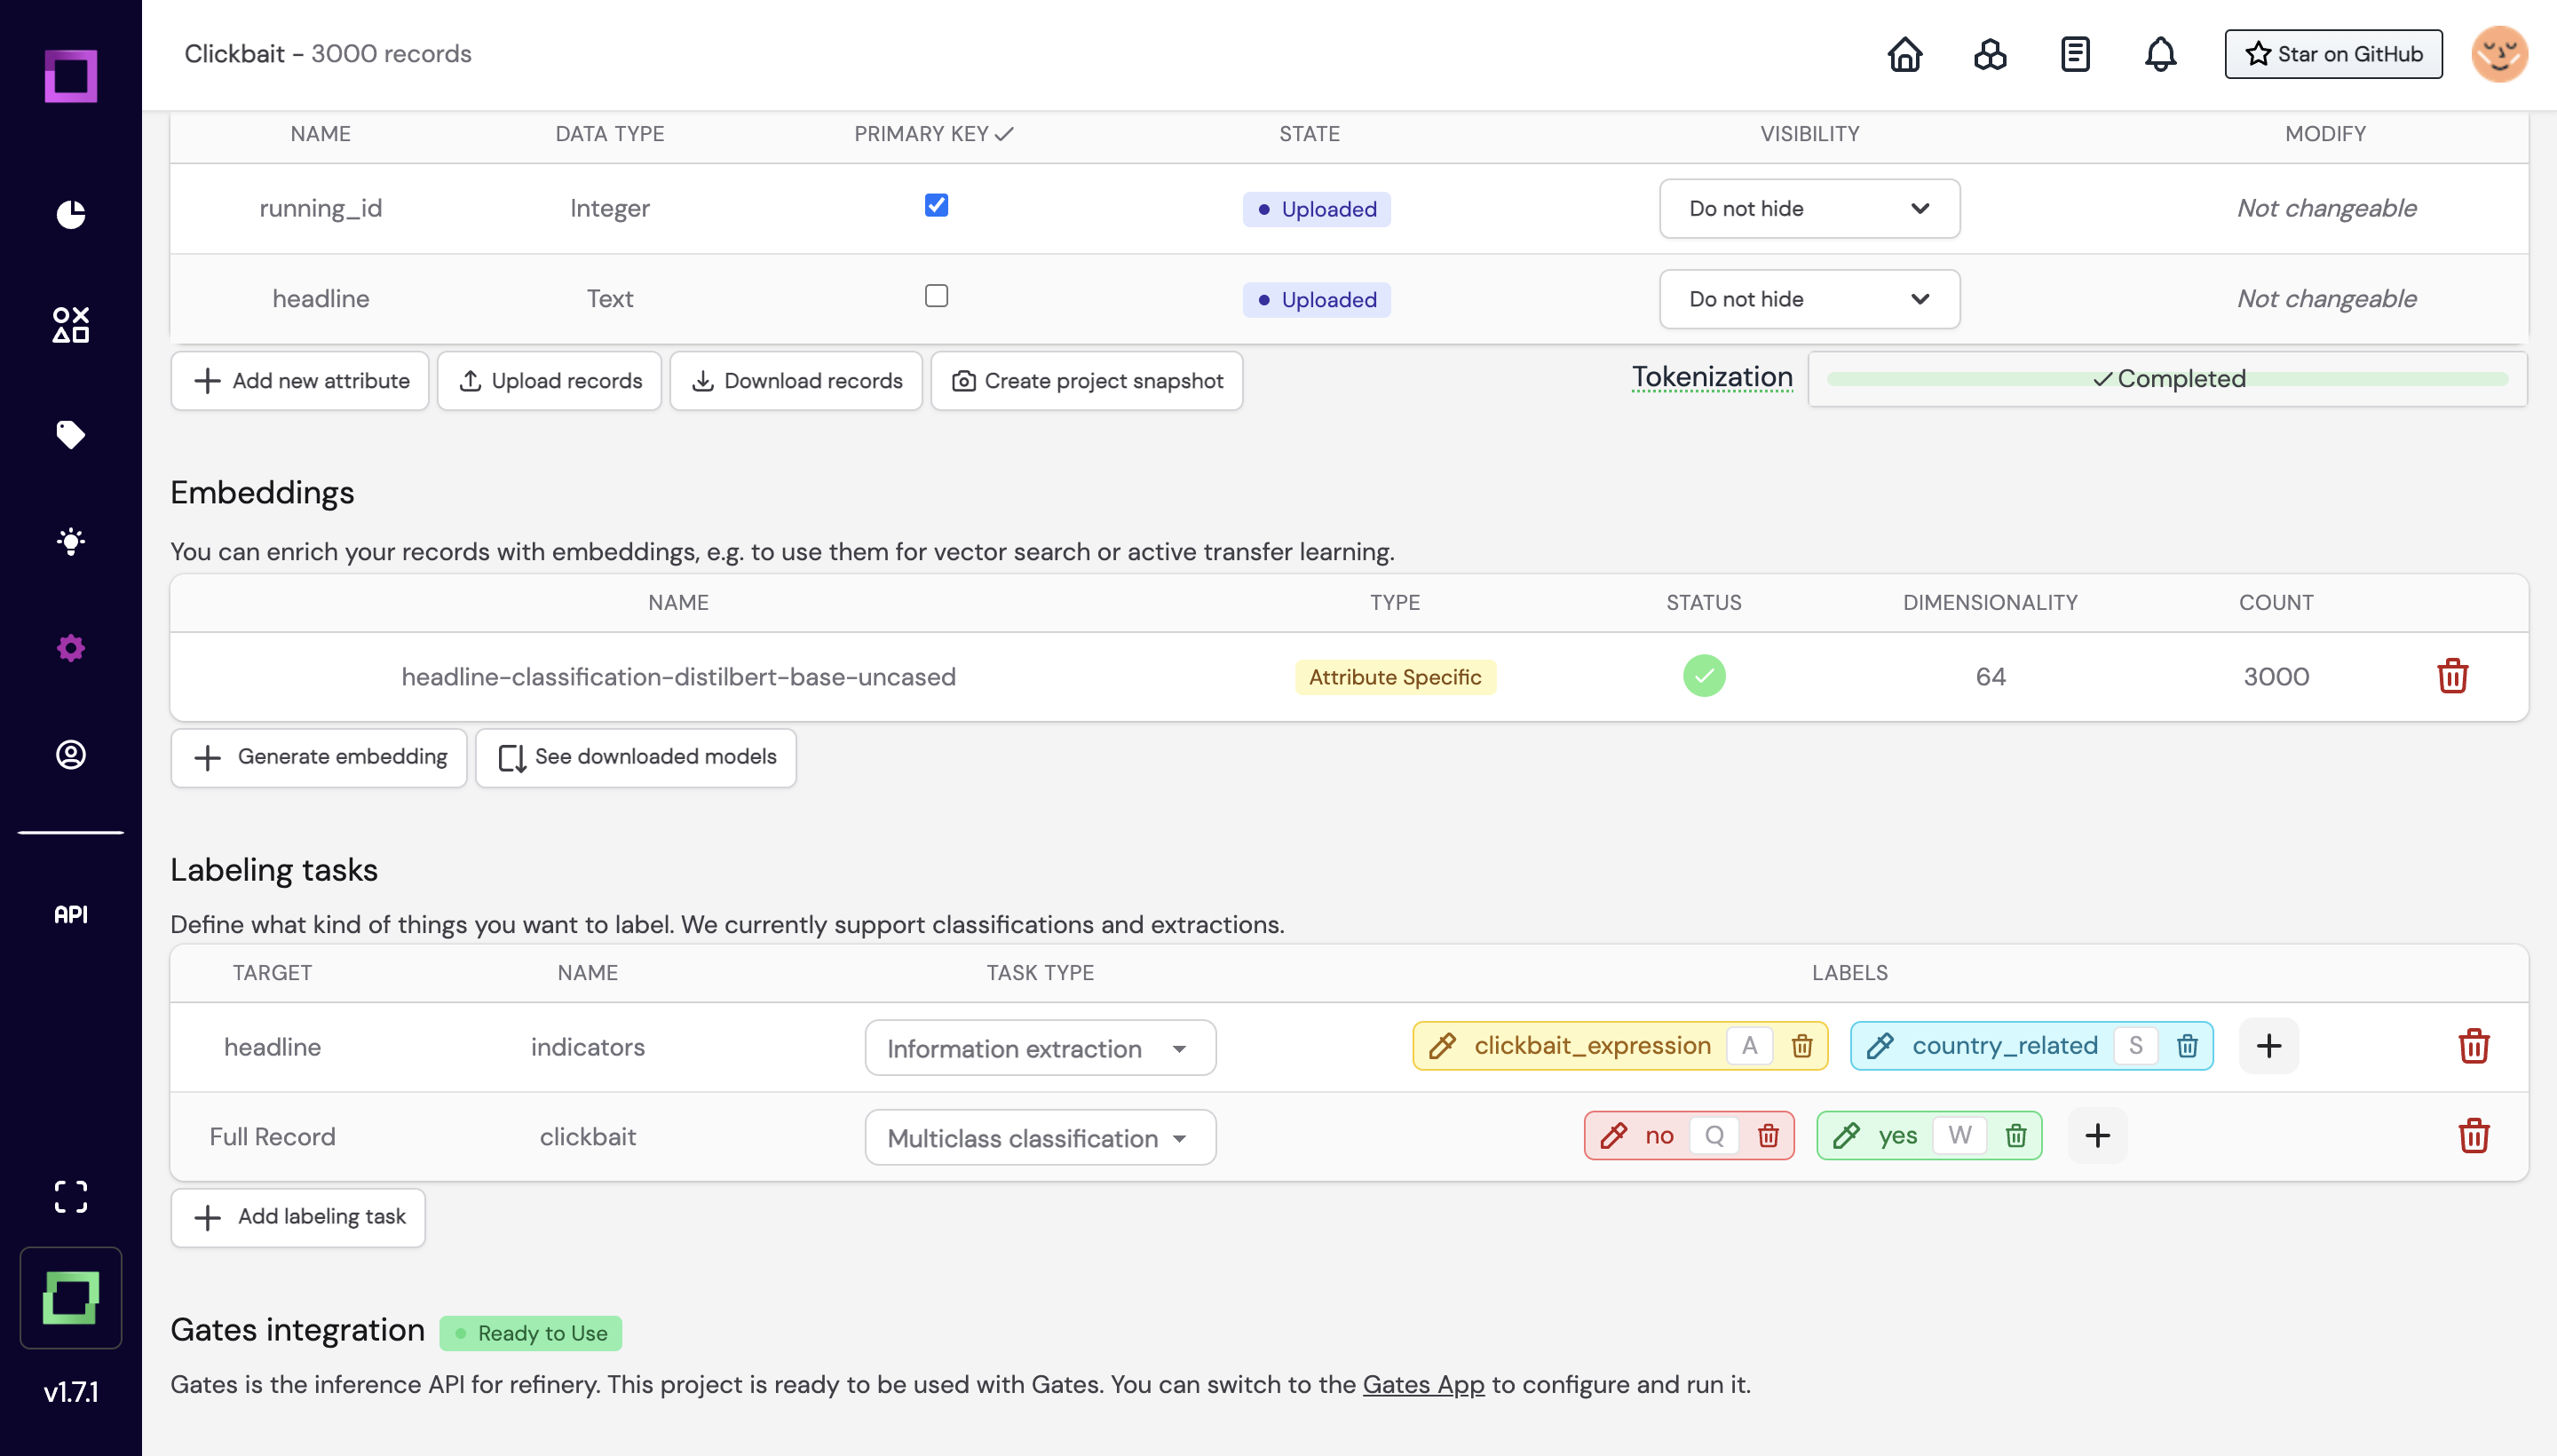
As you head over to gates, you will see that your refinery project is automatically synched with gates.
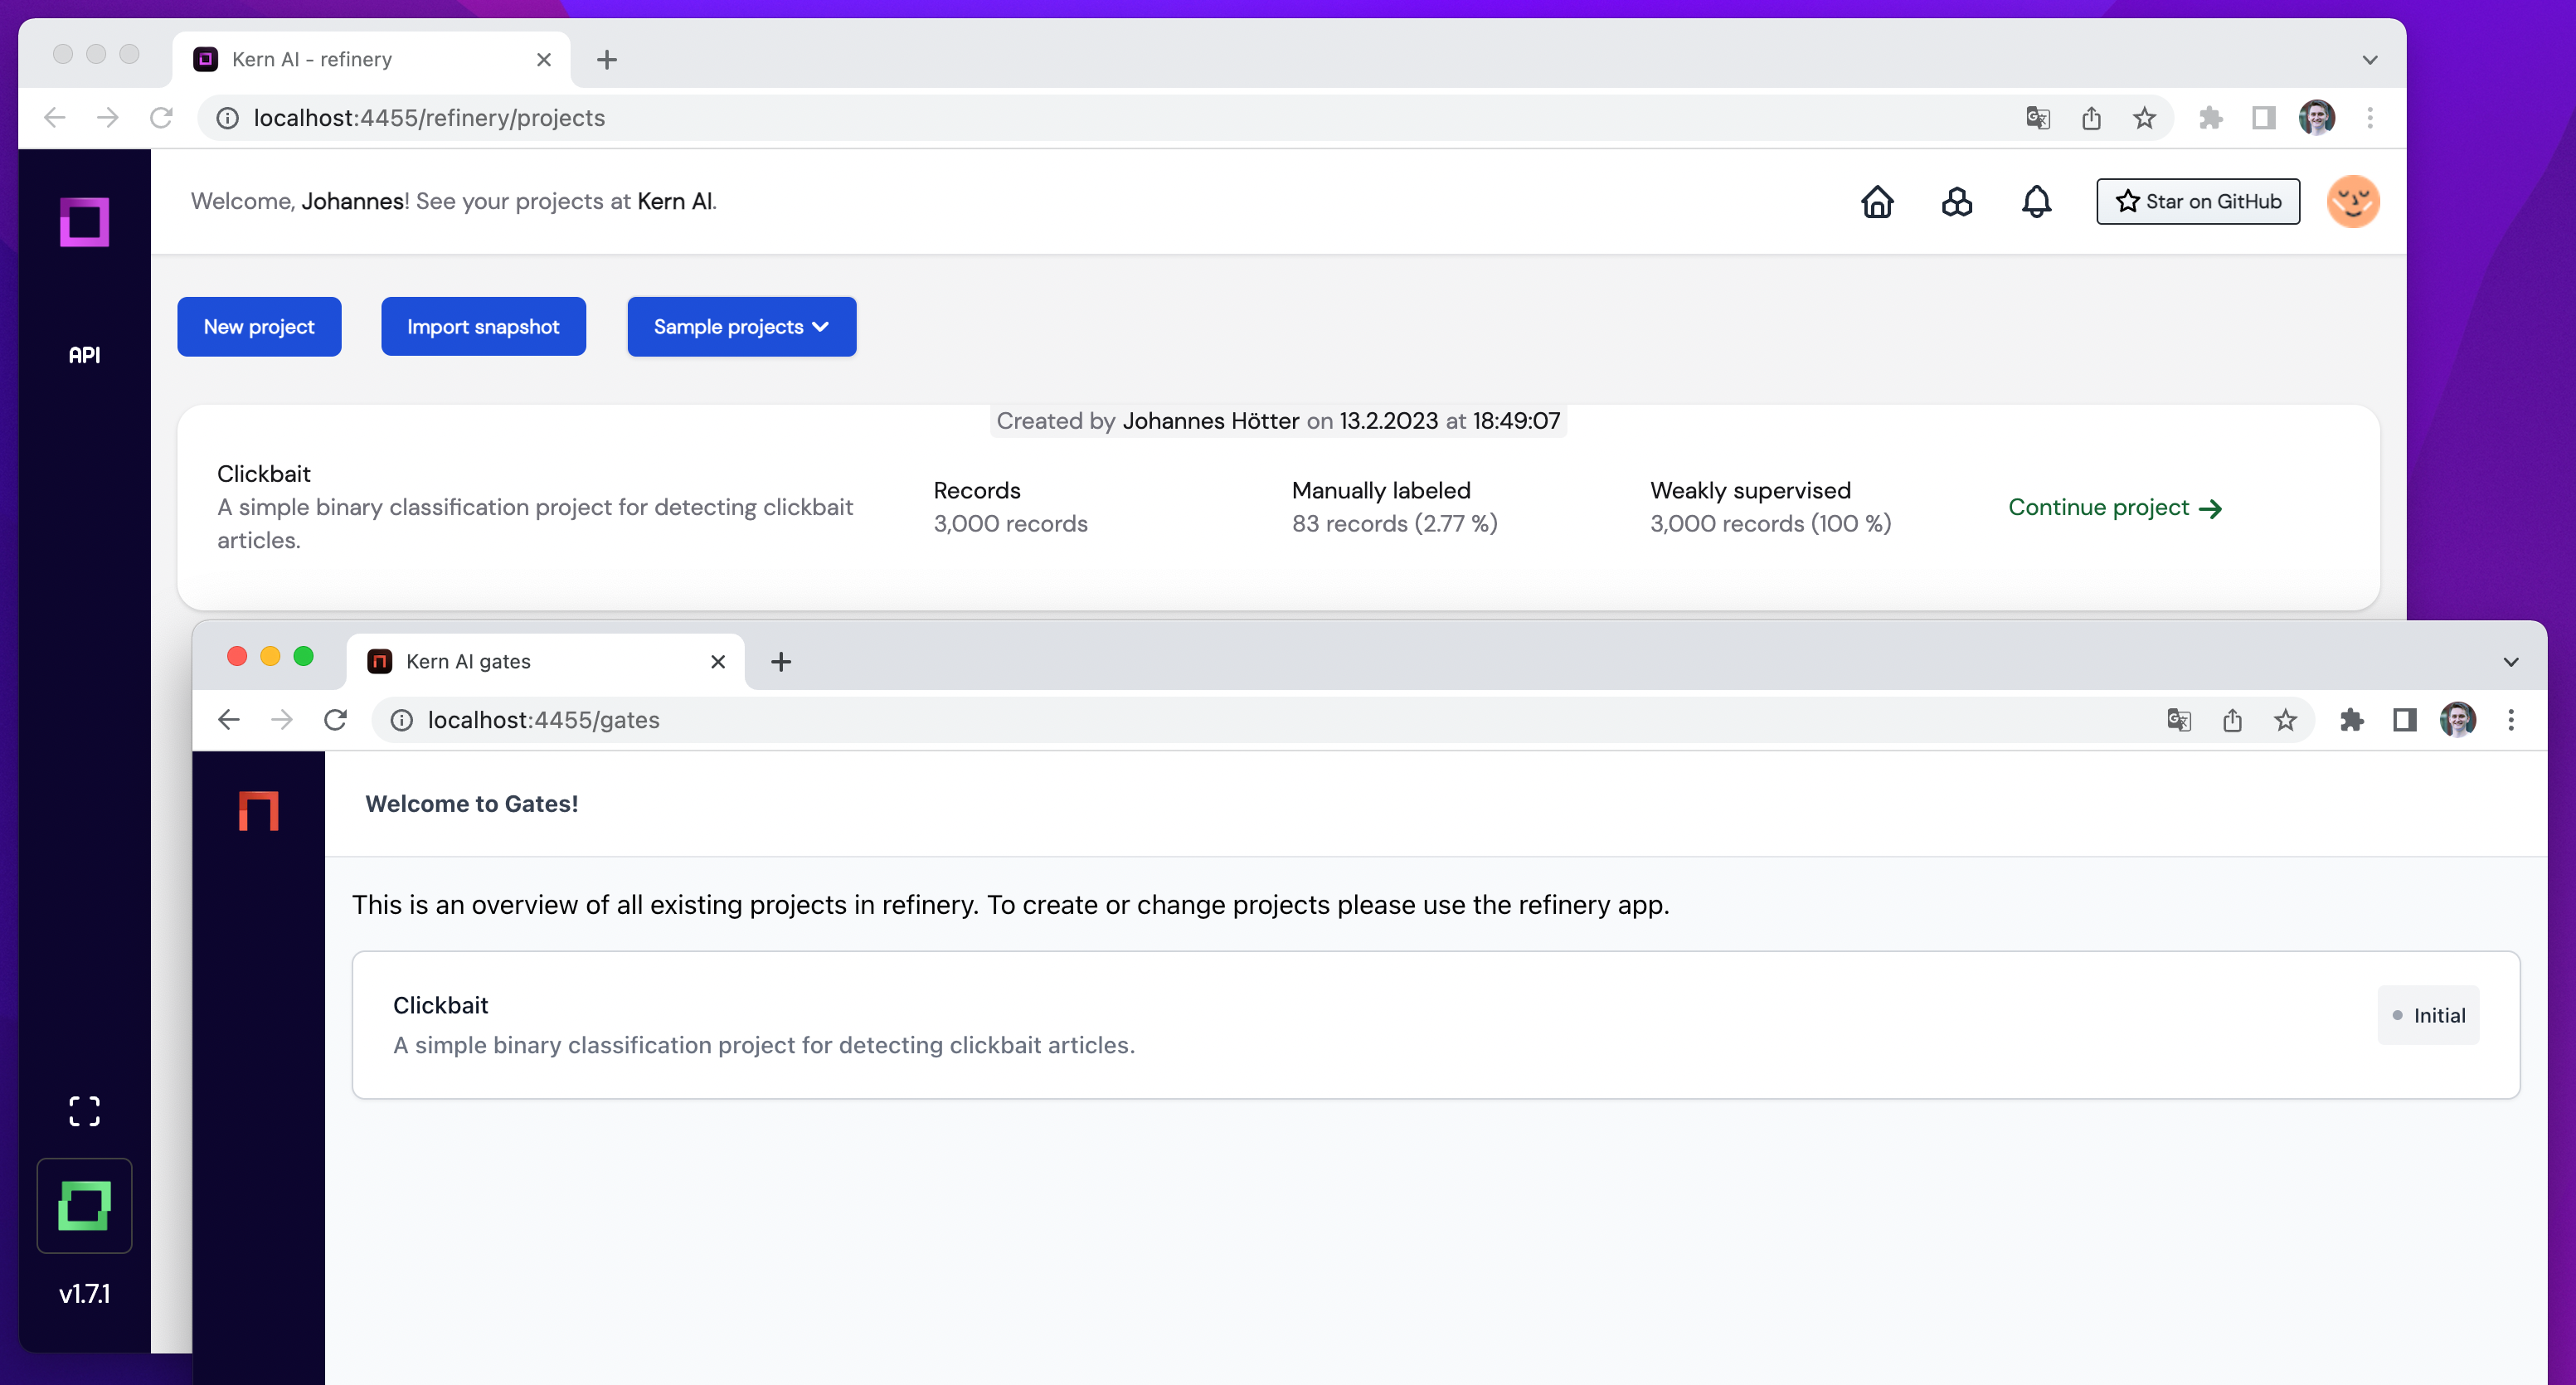
Simply click on the Clickbait title, and you will be redirected to your project.
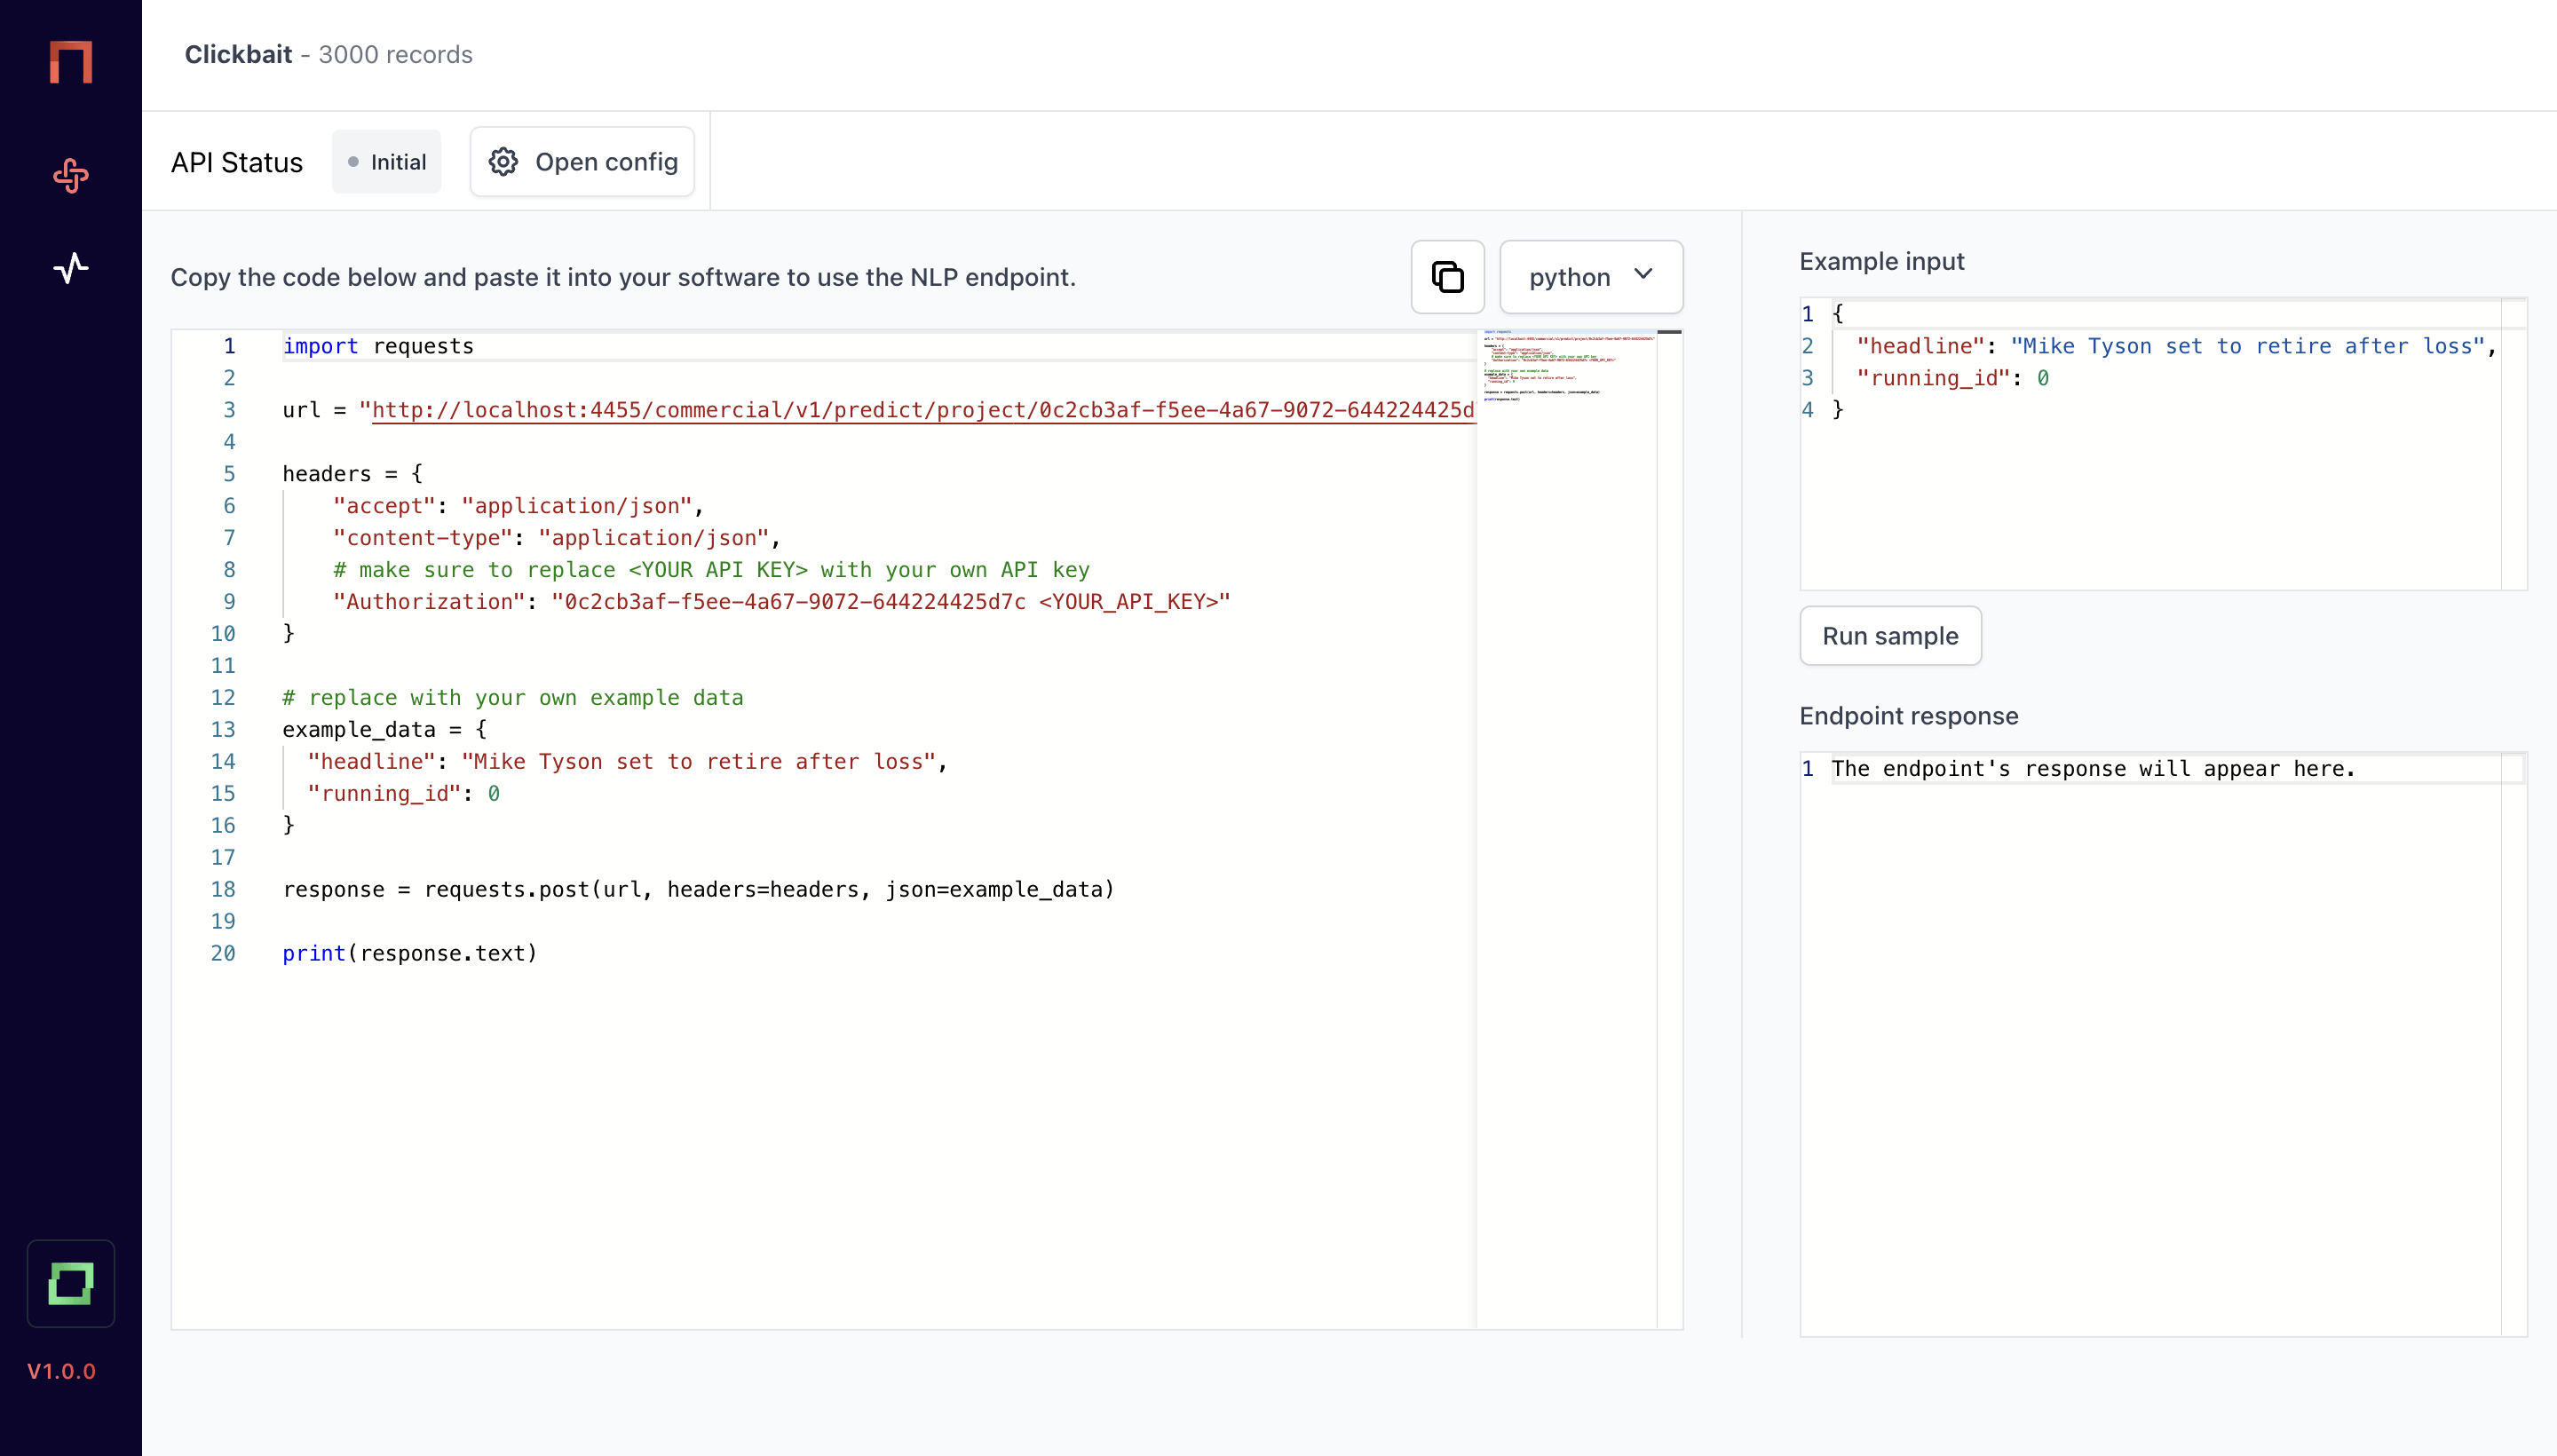
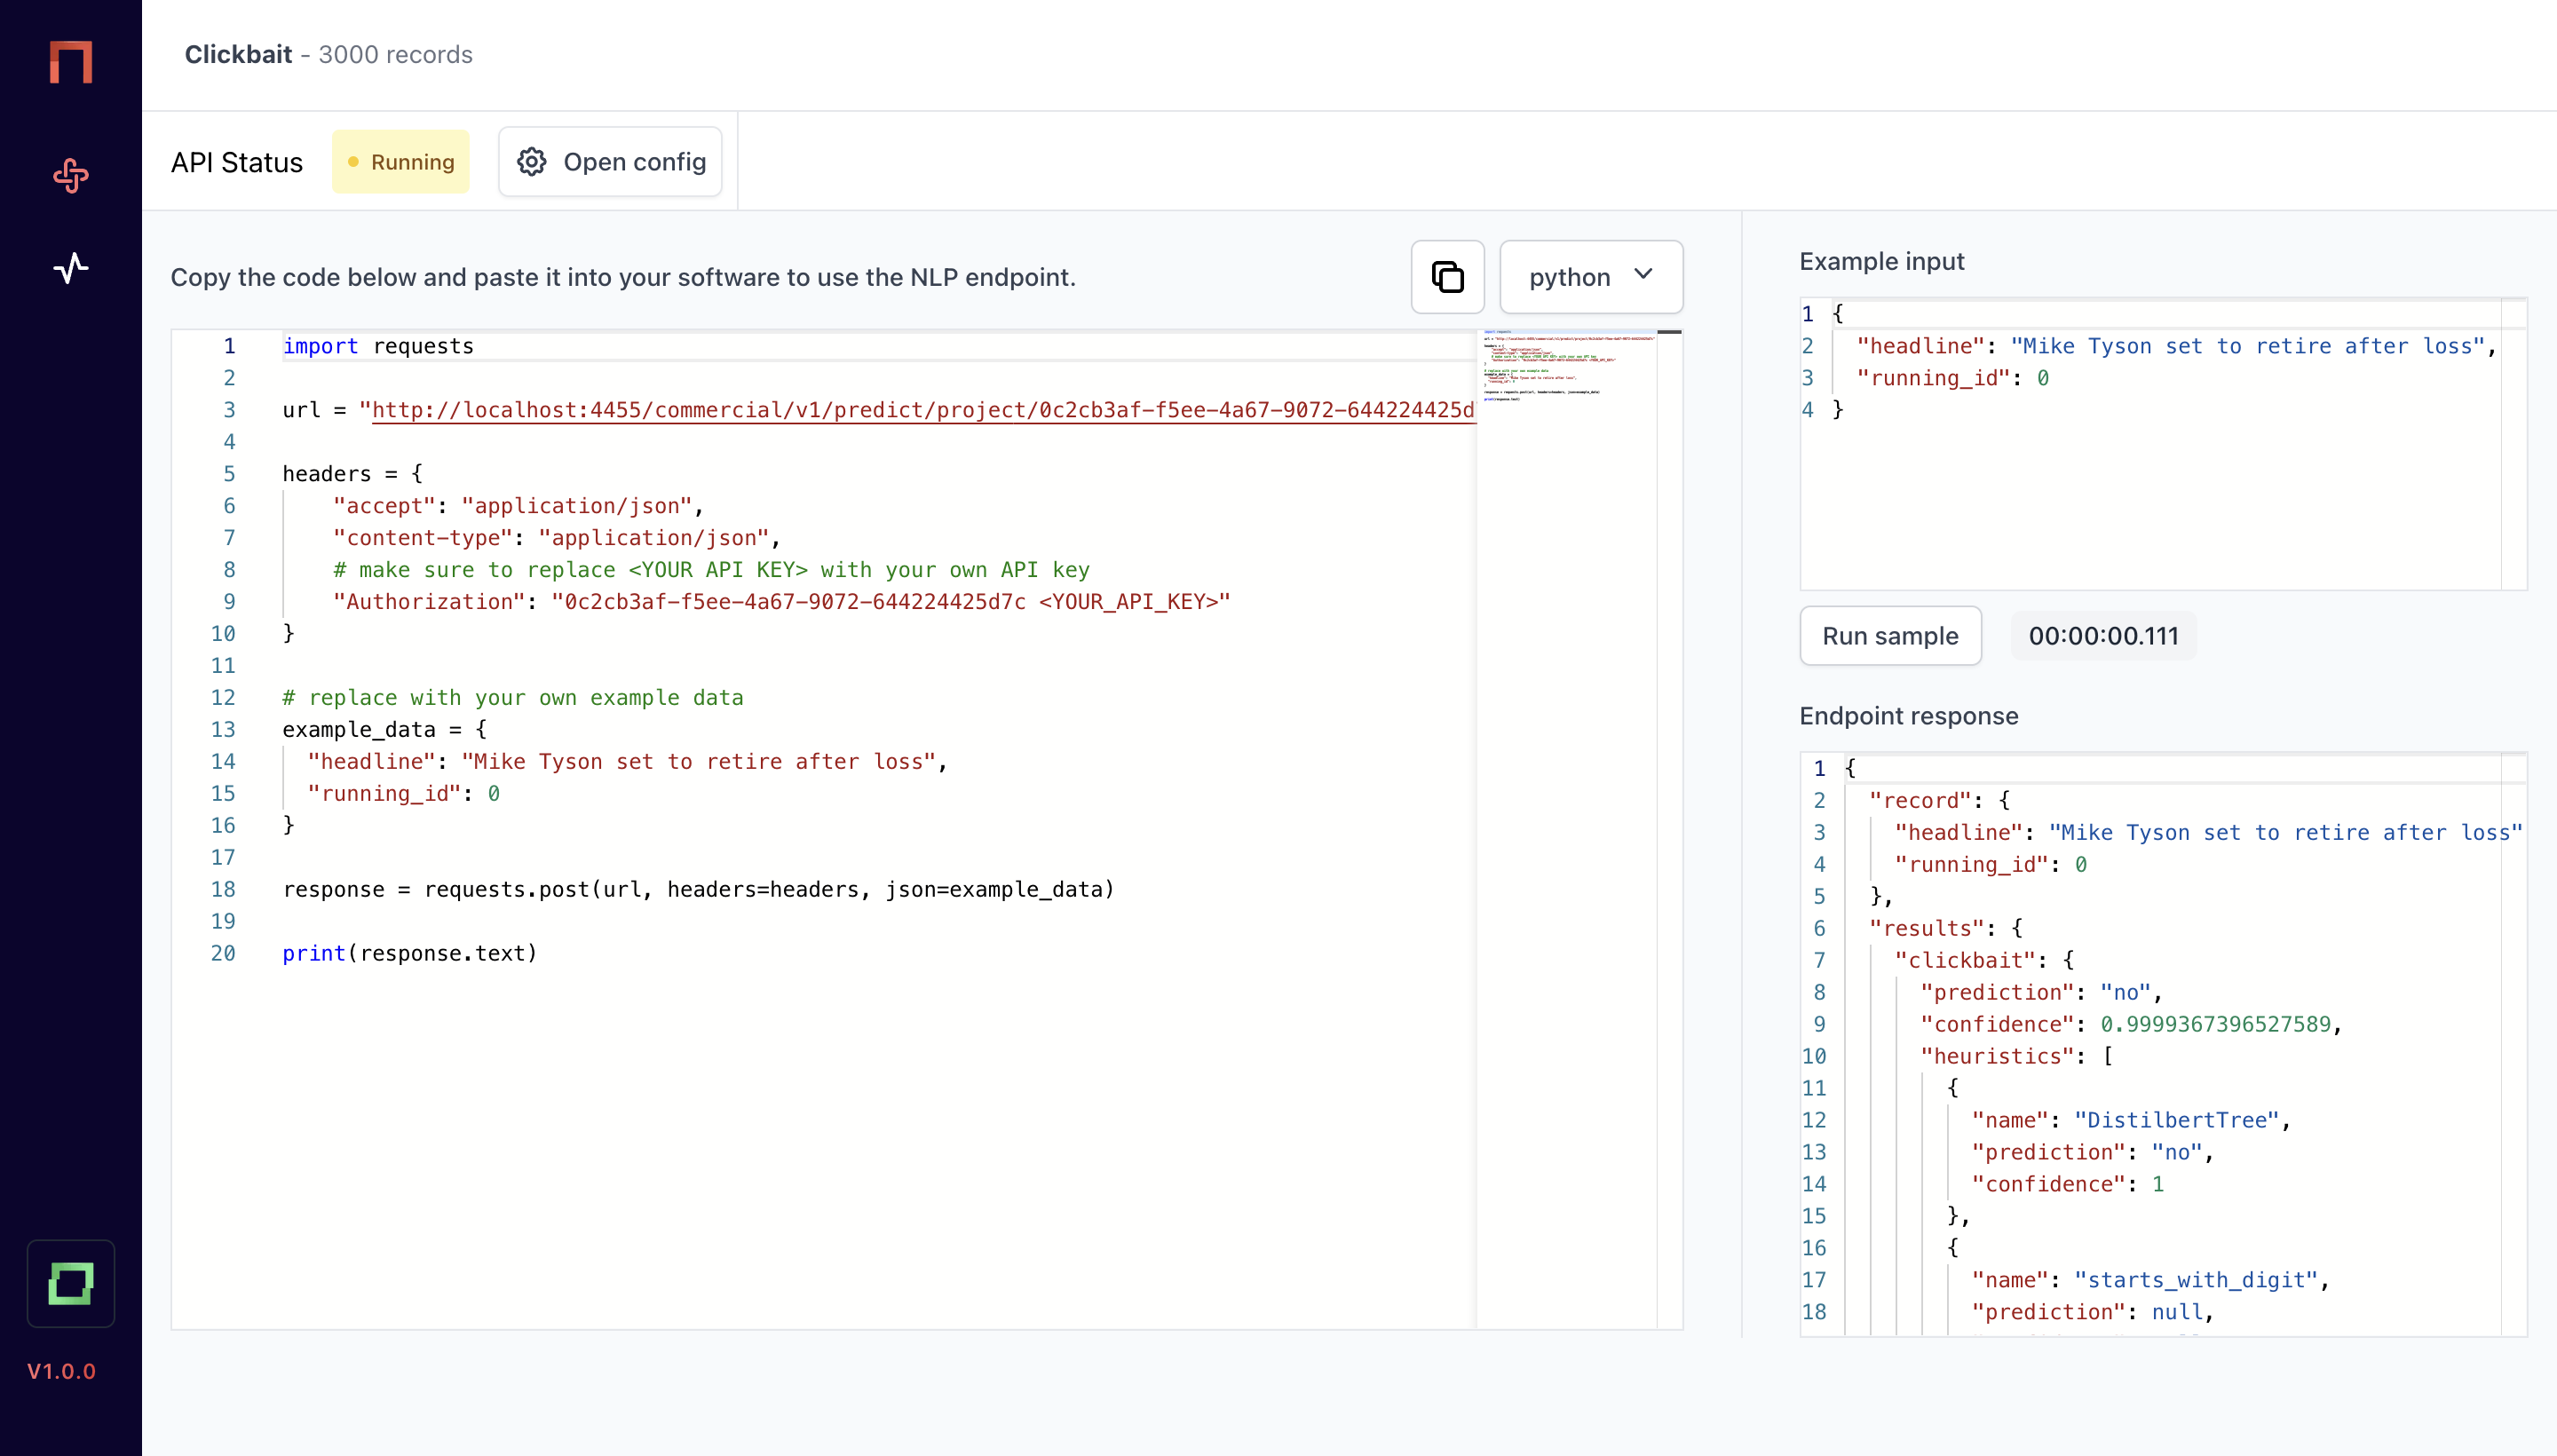
In here, you have a little overview. The left editor shows you a sample Python script to integrate the model once it is deployed - of course, you will have to exchange the token with your personal access token, and you need to enter other data than always the example record :)
On the rightern side, you see a playground, where you can validate example inputs. Let's first deploy the model, and then see the output of the playground. To deploy a model, simply hit Open config.
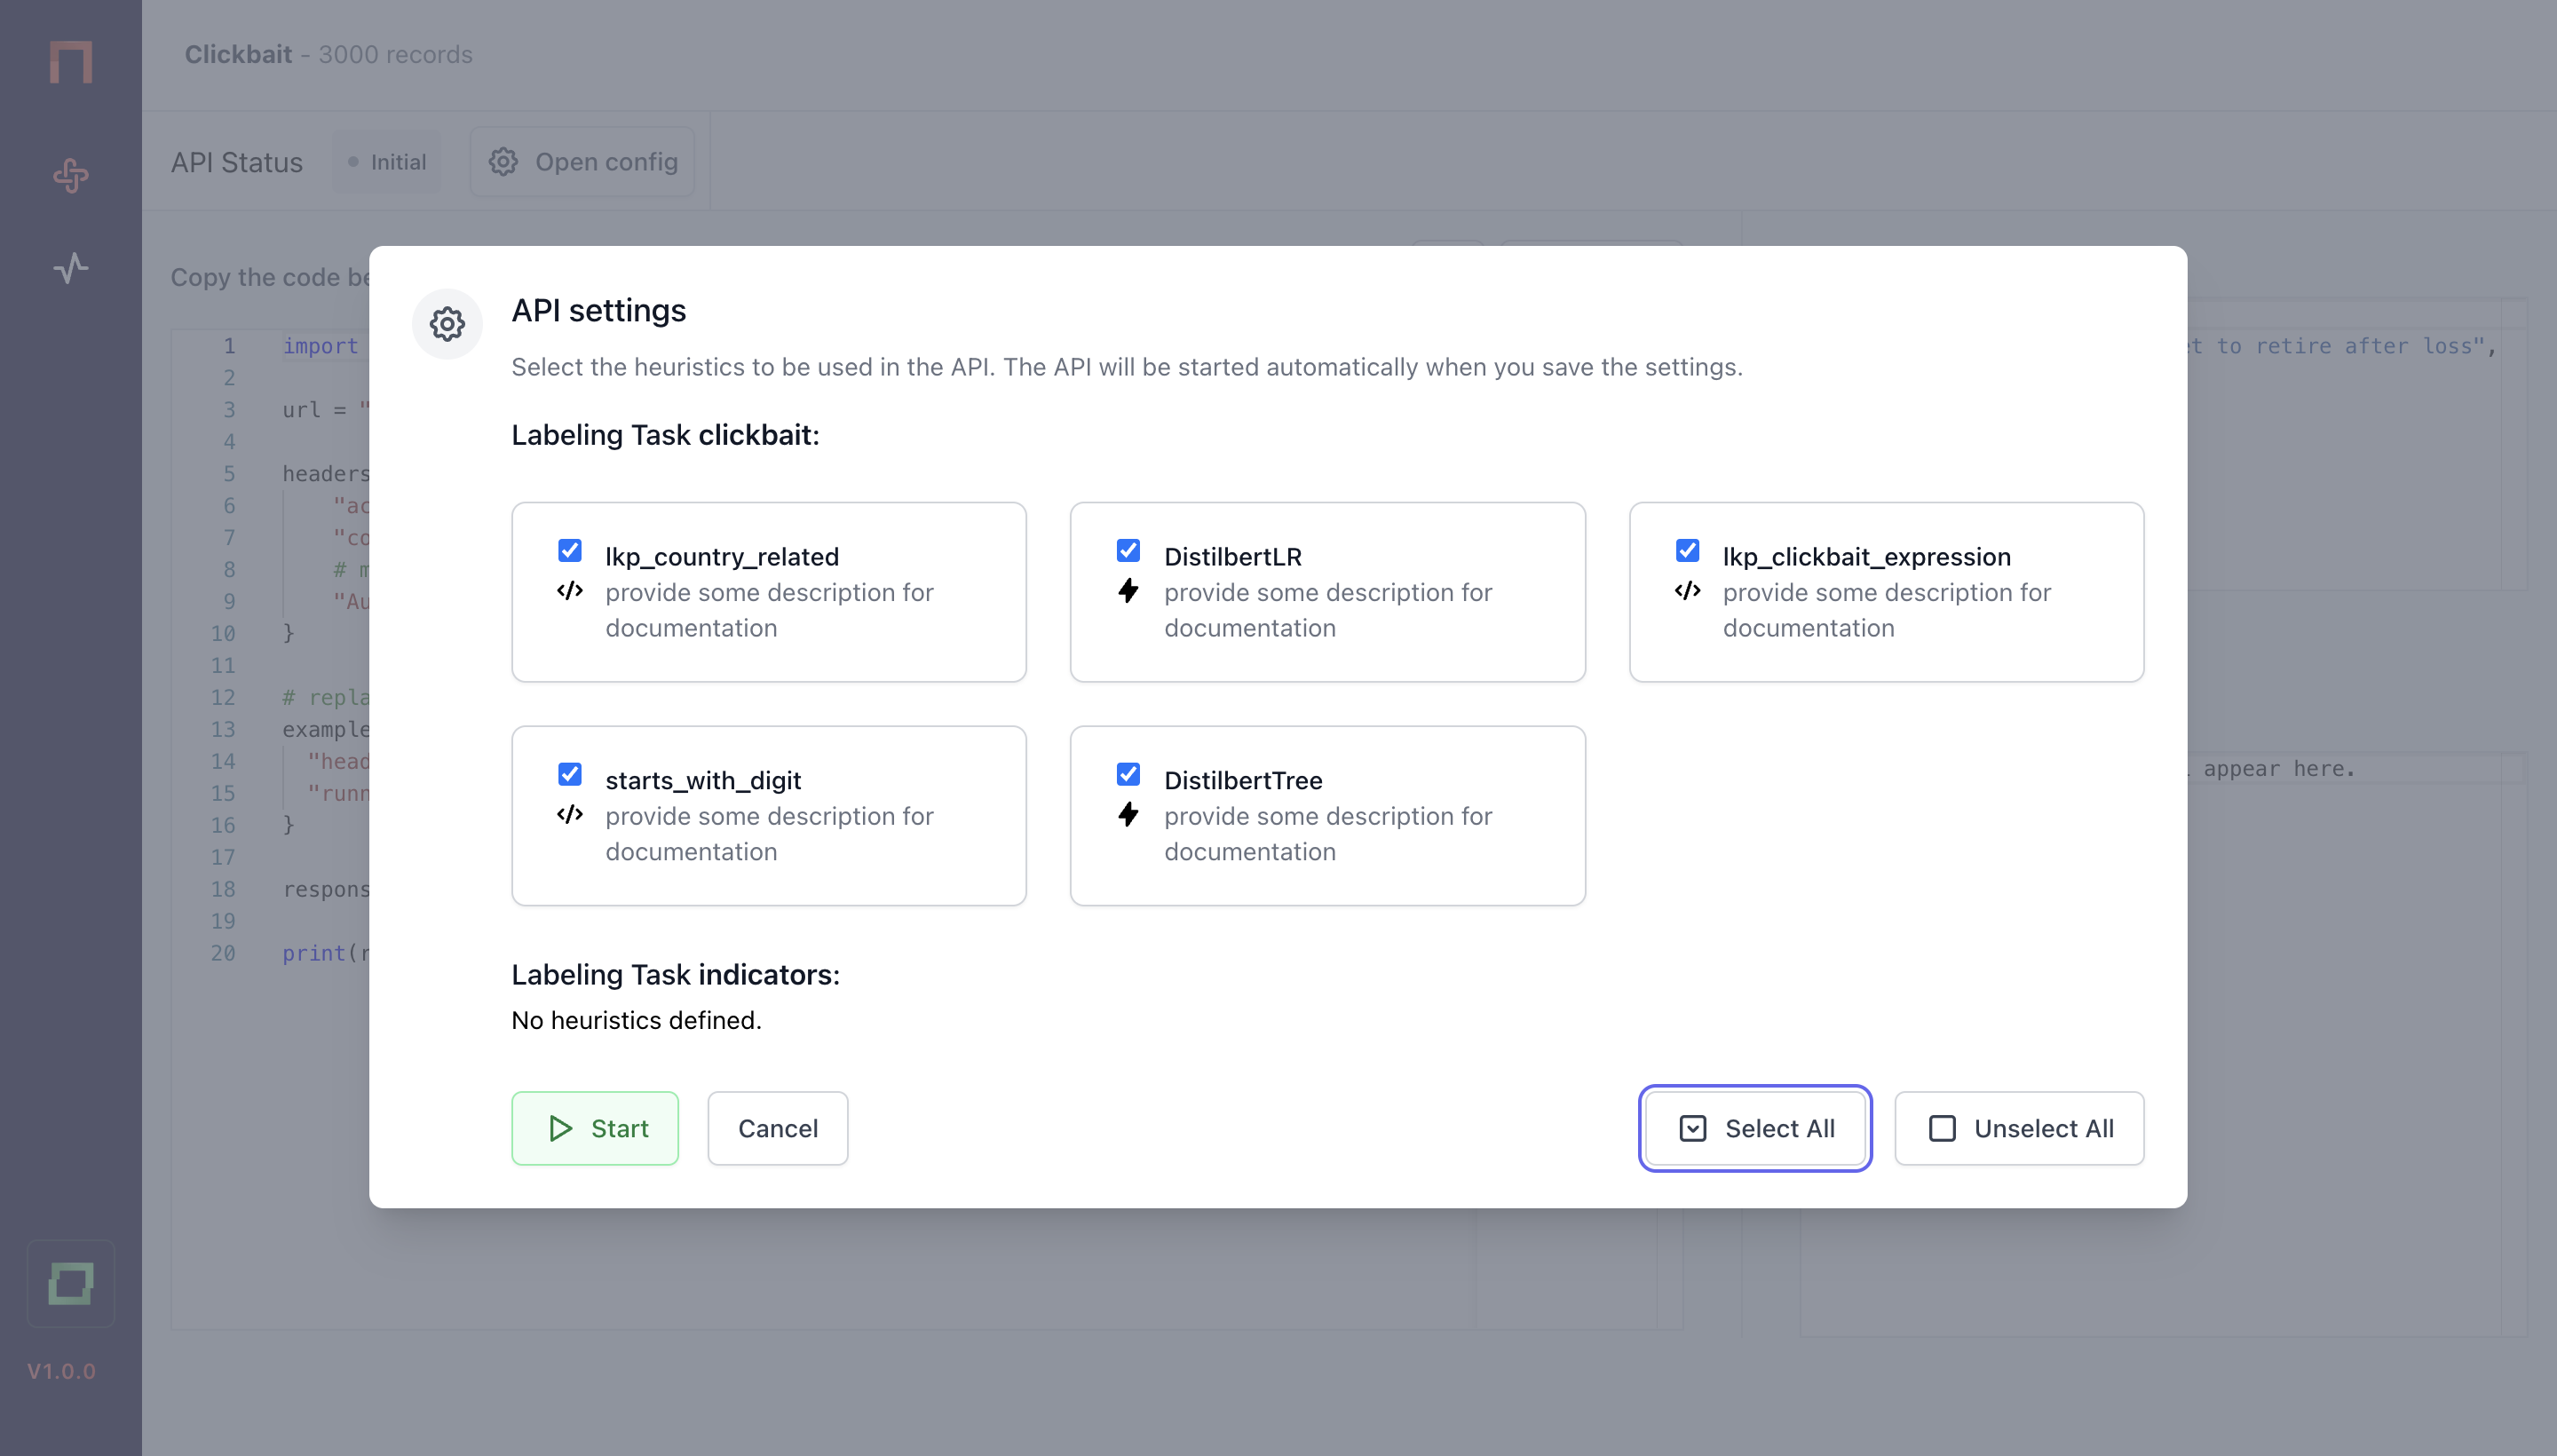
As you hit Start, the model will be deployed. For this, a dedicated container will be created, loading your embedders, active learners and other resources for the prediction - so there is a little overhead time. Usually, this takes between 10 seconds and 1 minute.
Once the state changes from Pending to Running, you can use the playground on the rightern side:
To stop or restart the model, simply use the Open config bar anytime.
The gates API
Once you have deployed your model, you can use the gates API anywhere. Currently, you can use the API to:
- classify records
- make span predictions on texts
- create new attributes
In general, you can do in gates on one record what you can do in refinery on many records. We're also aiming to integrate neural search to gates as soon as possible. To integrate gates in Python, copy the following script and exchange the project id, example records and token with your data. Generally, gates will expect exactly the same record schema as refinery.
import requests

url = "http://localhost:4455/commercial/v1/predict/project/0c2cb3af"

headers = {
    "accept": "application/json",
    "content-type": "application/json",
    # make sure to replace <YOUR API KEY> with your own API key
    "Authorization": "0c2cb3af <YOUR_API_KEY>"
}

# replace with your own example data
example_data = {
  "headline": "Mike Tyson set to retire after loss",
  "running_id": 0
}

response = requests.post(url, headers=headers, json=example_data)

print(response.text)
The output for the above example could look as follows, and we'll break down the structure below.
Response
{
  "record": {
    "headline": "Mike Tyson set to retire after loss",
    "running_id": 0,
    "language": "en"
  },
  "results": {
    "clickbait": {
      "prediction": "no",
      "confidence": 0.9999367396527589,
      "heuristics": [
        {
          "name": "lkp_clickbait_expression",
          "prediction": null,
          "confidence": null
        },
        {
          "name": "starts_with_digit",
          "prediction": null,
          "confidence": null
        },
        {
          "name": "DistilbertLR",
          "prediction": "no",
          "confidence": 0.9347412269488006
        },
        {
          "name": "DistilbertTree",
          "prediction": "no",
          "confidence": 1
        },
        {
          "name": "lkp_country_related",
          "prediction": null,
          "confidence": null
        }
      ]
    },
    "named entities": {
      "predictions": [
        {
          "confidence": 0.9820137900379085,
          "prediction": "person",
          "token_begin": 0,
          "token_end": 2,
          "char_begin": 0,
          "char_end": 10
        }
      ],
      "heuristics": [
        {
          "name": "person_extraction",
          "predictions": [
            {
              "confidence": 1,
              "prediction": "person",
              "token_begin": 0,
              "token_end": 2,
              "char_begin": 0,
              "char_end": 10
            }
          ]
        }
      ]
    }
  }
}
record is the data you input into the API call, enriched with the attribute modifications you configured in refinery. You can use gates to do just that, i.e. it is not necessary to have a classification or extraction prediction. If you want to do so, however, you will find them in the results part of the response.
For a classification, you can look into results, and then into your respective task (e.g. clickbait). On the task-level, it will contain a prediction - which is the final prediction for this task - and the confidence. If you want to break down the results, you can see which heuristics voted. To learn more about this process, check out our weak supervision page.
For an extraction, this looks similar. However, the tasks contain predictions items; you can have multiple extracted spans per text, which is why this is a list. Each item consists of the prediction and confidence, such as the token_begin and token_end (spaCy token indications), and the char_begin and char_end result (i.e. indices of characters per text). Again, you can also find the heuristic-level predictions.
What's next?
Now is a really good time to look into how you can put your gates API into action via workflow.